Things You'll Need
2 pieces of cardboard
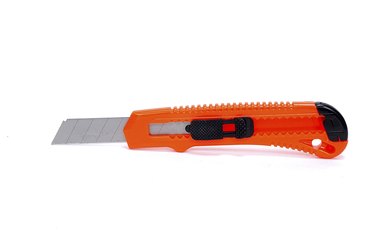
Box cutter
Paper
Scissors
Pencil
Metal ruler
Making a tree out of cardboard is a fun, easy and versatile project. Once built, it can be decorated with paint, stickers or family pictures. And these trees are three-dimensional, so they stand on their own without support. Make them a few inches tall to use as centerpieces for a dinner party, or make them 6 feet tall and turn your living room into a jungle for your kid's next sleepover. The possibilities are endless. And, whatever you use them for, you'll find that making them quickly becomes addictive.
Step 1
Decide on your design. If you are not artistically inclined, consider downloading and printing a picture of a tree. Or draw your tree freehand on a sheet of paper. To help your tree "grow" straight, fold the paper in half vertically before you start and then use the fold as a guide.
Video of the Day
Step 2
Cut out your tree with scissors to make a stencil.
Step 3
Use the stencil and trace the tree onto the cardboard. Make sure the tree's base is flush with the bottom of the cardboard.
Step 4
Find the line of symmetry. The best way to do this is to measure the width of the base of the tree and divide that number in half. Use this measure to find the exact center in each of your drawings. Use a metal ruler or straight-edge to draw the line of symmetry from the top to the base of each tree.
Step 5
Measure the thickness of the cardboard in millimeters. Write that measurement down and add 1 mm. Now, divide your total by 2. For example, if your cardboard is 3 mm thick, add 1 mm to make 4 mm and divide by 2 to get 2 mm. Then measure this distance from the line of symmetry to the right and to the left and mark both. Use those marks and the straight-edge to create the two parallel lines that run from the top to the base of the tree.
Step 6
Cut two identical trees out of the cardboard with the box cutter.
Step 7
Find the midpoint of the line of symmetry on both drawings. Measure the length of the line of symmetry and divide that in half. Then measure again, from the bottom, using the half-measure. This is the line of symmetry's midpoint. Mark it with your pencil by making a perpendicular line across all three lines of symmetry.
Step 8
Take the first cardboard tree and cut along the parallel lines from the bottom up to the midpoint. Remove the small strip by cutting along the perpendicular line you made.
Step 9
Take the second tree and cut along the parallel lines from the top to the midpoint and, again, remove the small strip by cutting across the perpendicular line you made.
Step 10
Slide the tree with the bottom cut on top of the tree with the top cut so they sit at 90-degree angles to one another.
Tip
Create a pine tree shape and paint it dark green. Dab white paint along the edges for a snowy look or paint red balls and streamers on it for a Christmas feel.
For trees with a big trunk, paint a black hole in the center. Then print out some color pictures of birds and squirrels to paste onto it.
Use your cardboard trees to make an interesting croquet or mini golf obstacle course.
Warning
Use caution when working with box cutters. Keep away from children.
Always protect your work surface from scrapes and scratches when cutting the cardboard.
Video of the Day