Things You'll Need
Bricks
Ratchet and socket set
Pliers
Screwdriver
New belt

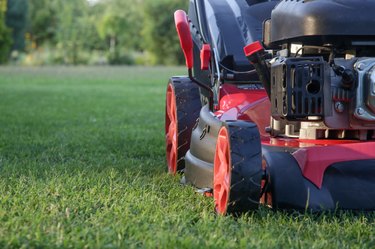
Mowers become bound and the blades stop spinning for a number of reasons. Two main causes are buildup of debris and worn or damaged belts. Damaged and bent blades may also cause mowers to stop functioning properly. Checking your John Deere riding mower's belts on a regular basis will prevent the blades from stopping working and other damage to your mower. Replace worn and damaged belts immediately.
Prepare the Mower
Park the John Deere riding mower on a smooth level surface such as in a garage. Disengage the blades and engage the parking brake. Turn the mower off and remove the key. Remove the spark plug wire and place the wire so that it will not touch the spark plug. Block the wheels with bricks to prevent the mower from rolling.
Video of the Day
Remove the Mower Deck
Video of the Day
Lower the mower deck to its lowest position to remove the mower deck. Disconnect the lift rod assembly from the front of the mower frame. Release the tension rod from its bracket located on the left side of the mower deck (left and right are determined by operator position when sitting in the seat facing forward).
Remove the belt from the engine drive sheave. Remove the spring loaded J-pins from the draft arms using pliers. Draft arms are located just below and behind the foot rests on the body of the mower. Pull the mower deck out from under the mower.

Remove the Cap Screws and Belt Shield
Remove the three cap screws and belt shield from the top of the mower deck. Lift the belt shield from the top of the mower deck, exposing the pulleys and belt.
Disconnect the Idler Spring
Lift the mower belt tension rod and disconnect the idler spring. This releases the tension from the belt, making it easy to remove. Remove the mower belt.
Install the New Mower Belt
Clean the sheaves and upper mower. Install the new mower belt according to the diagram found under the left foot pedal of your John Deere riding mower (this is a typical place to find the belt diagram for many manufacturers).
Reconnect and Adjust the Idler Spring
Reconnect the idler spring. Adjust the tension on the belt by loosening the nut on the flat idler. Slowly slide the idler, either forward or backward, until the tension is tight on the belt. Tighten the nut on the flat idler. Lower the tension drive belt tension rod.
Replace the Belt Shield and Cap Screws
Replace the belt shield of the mower deck. Replace the three cap screws and secure tightly.
Reinstall the Mower Deck
Slide mower deck under the mower to reinstall. Line the mower lift brackets with the draft arms and insert the J-pins. Push front lift rod assembly into brackets on the front of the mower, lift up and insert lift rod assembly into front of the mower frame. Attach the belt to the engine drive sheave. Push drive belt tension rod back into place. Raise the mower deck.
Warning
Hold tightly to loaded springs on the mower, letting go too fast will result in injury when the springs jump.