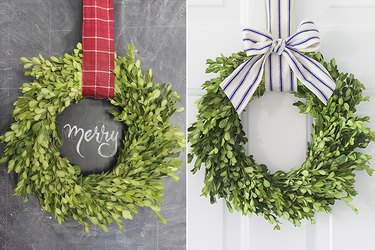
Whether fresh, preserved or faux, boxwood is popularly used in home decor, since it coordinates well with many different interior styles. A fresh boxwood wreath is versatile year-round, looking classic or holiday festive, just by switching out the ribbon.
Things You'll Need
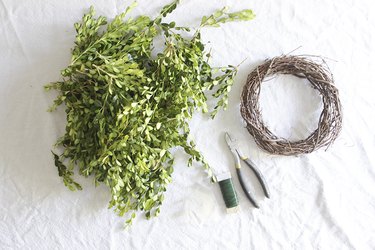
Boxwood clippings, approximately 75 to 100, 4 to 5-inch lengths
Grapevine wreath, 10-inch diameter
Floral wire, 22-gauge
Wire cutter
Tip
- When clipping living boxwood from a bush, wait until mid-day so that the leaves are at their peak color.
- Clipping from new and old growth will give a nice color variation to the wreath.
- Preserved boxwood clippings may be substituted.
Step 1: Wrap Bundles with Floral Wire
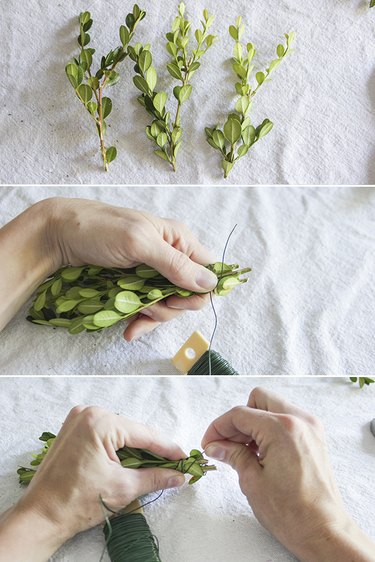
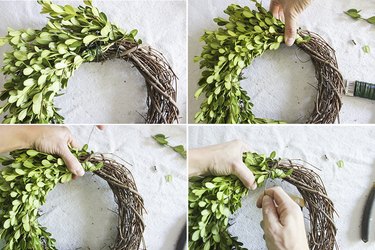
Gather three or four boxwood stem clippings and bundle them together so they are about the same height, with little variation. Use the floral wire to wrap the stems of the bundle together, about four or five times.
Video of the Day
Step 2: Attach Bundle to Perimeter of Grapevine Wreath
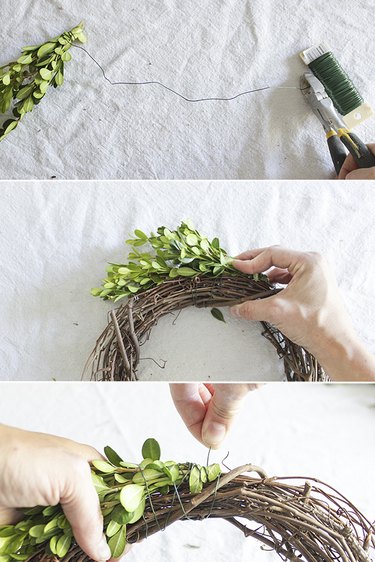
Leave about 12 inches of excess floral wire from each wrapped bundle and clip the wire. Position the first bundle on the top or outer perimeter of the grapevine wreath. Hold it in place with one hand. With the other hand, wrap the excess wire around the wreath and around the end of the bundle, about four or five times. Secure the end of the wire by bending it around one of the small grapevines.
Step 3: Attach Bundle to Middle of Grapevine Wreath
With another bundle, position it in the middle of the grapevine wreath (between the outside perimeter and inside perimeter), slightly staggering the stem ends with the previous one attached. Wrap the excess floral wire around the wreath and stem ends, the same way you did in Step 2.
Repeat Steps 2 and 3 all the way around the wreath.
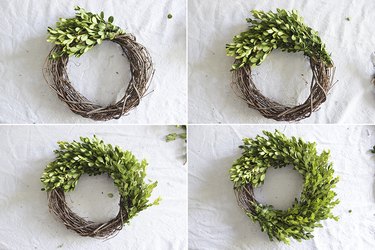
Step 4: Attach Final Bundles
When only 1 to 2 inches of grapevine are visible, lift up the leafy ends of the initial bundles attached, and place the stems of the new bundles underneath. Carefully wrap floral wire around the stem ends and grapevine wreath, being sure to not wrap around the overlapping leafy ends that will cover up the bound stem ends. Attach the bundles on the outer perimeter and the middle with the stem ends so that the wreath's fullness looks even all the way around.
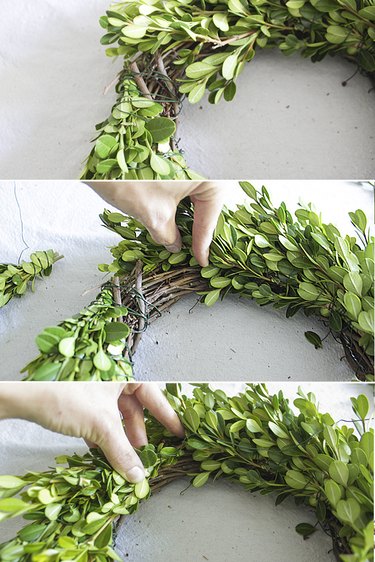
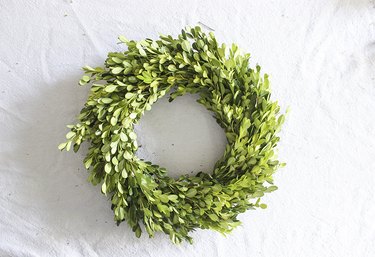
Examine the final product. There should be about 4 inches from the inner perimeter to the outer perimeter of the wreath. Add a small clipping here and there as needed by tucking under wires and grapevines.
Tip
Fresh boxwood that has been clipped will retain its green color for several days and even weeks. As the leaves start to dry, they will slowly lose their vibrant color, but will still remain green and keep most of their shape. Once the wreath is completely dried and the leaves have faded to a dark green, this wreath can be very lightly spray painted with a couple hues of bright, grassy green, and will look beautiful for many more months, if handled carefully.
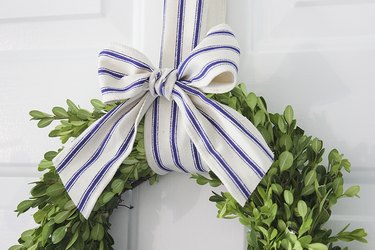
Step 5: Attach Ribbon and Hang
To hang on a door or a chalkboard, simply wrap a ribbon around the wreath and secure it to the top of the door or the back of a chalkboard.
Optional: To easily attach a bow to the hanging ribbon, cut off a 2 1/2-foot section of ribbon, tie a bow, and then use a quilting pin to attach the back of the bow to the desired location on the hanging ribbon.
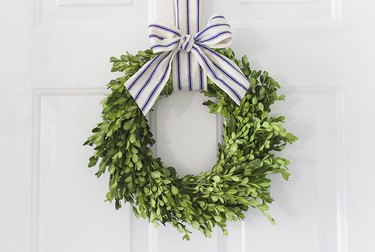
A boxwood wreath made from fresh clippings will only cost about $5 in materials and only takes about one hour to assemble. This makes it an inexpensive and lovely addition to one's home that will transition well into the holiday season.
Because the cost of materials is so inexpensive, several of these can be made and hung on a chalkboard, along a staircase banister, on cabinet doors, in gallery walls, and smaller versions can be made and hung on dining chair-backs for an elegant holiday dinner party.

Tip
If using preserved boxwood (which uses glycerin and green plant dye), the boxwood clippings will retain their fresh feel and bright green color indefinitely when lightly spritzed with water once a month.
Video of the Day