Things You'll Need
Tape measure
Pencil
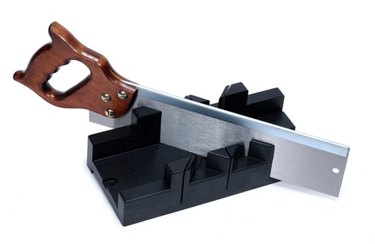
When installing decorative trim in your home, part of the job is cutting the trim to turn corners. To turn a 90-degree corner you must cut the two adjoining pieces of trim each at a 45-degree angle. To ensure an accurate cut, use a miter box and a back saw. A miter box is a open-top U-shaped box with saw guides on the sides for both left and right 45-degree cuts, as well as a straight 90-degree cut. Using the miter box as a guide when making your cuts ensures that trim is always cut to a precise and uniform angle.
Step 1
Measure the length of the trim needed, then mark the trim using a pencil.
Video of the Day
Step 2
Determine whether you will be making a 45-degree left, 45-degree right or 90-degree, or straight, cut.
Step 3
Align the trim with the two guide slots for the appropriate degree and direction cut.
Step 4
Insert the back saw into the guide slots, then lower the blade to the trim to align the blade with the trim.
Step 5
Use deliberate and steady passes with the saw to cut the trim.
Tip
If you are unsure if a left or right cut is needed for the particular piece of trim that you are using, make test cuts using scrap pieces of trim.
Video of the Day