Refashion an antique cabinet door into a useful medicine cabinet with big character by building out a basic wood frame to hinge behind the door's facade.
Things You'll Need
Video of the Day
- Reclaimed cabinet door
- Wood, one-by-four, 10 feet long
- Circular saw
- Medium-grit sandpaper, #60
- 32 wire nails, 1 1/2-inch
- 5 mm underlayment board
- Jigsaw
- Wood stain and/or jnterior paint, as desired
- Cabinet door hinges
- 4 wood screws, No. 8 3/4 inch flat-head
- Screwdriver
- Stud finder
- Level
- 2 wood screws, No. 6 1 3/4-inch flat-head
- Power drill and Phillips head bit attachment
Video of the Day
Step 1: Find a Cabinet Door
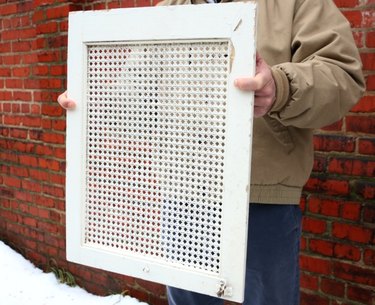
Start by finding a cabinet door; this will act as the face of the medicine cabinet from which you'll build the frame behind. Look for older doors at architectural salvage yards or thrift stores. Doors with a mirror, layered and chipped paint or added interest will all help set the basis for a custom medicine cabinet.
Step 2: Remove Existing Hinges
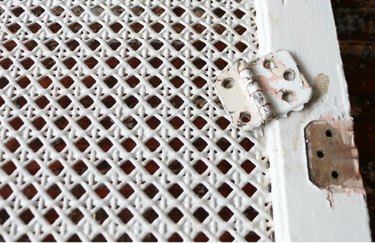
Remove any existing hinges, saving them to use as the hinges on the completed cabinet. When working with older hardware that contains layered paint, there's a good chance it contains lead-based paint if the piece dates prior to 1980. It is important to use caution and wear protective gear, such as gloves and a face mask, when working with these materials. If you'd like to remove the paint completely from the hinges, find instructions for how to do so safely in this related article.
Step 3: Prepare Wood for the Frame
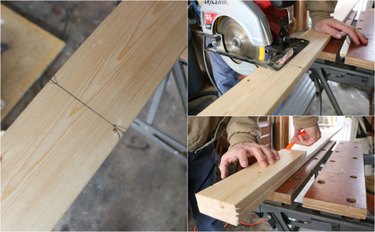
Using the cabinet door as a template, cut the one-by-four into pieces to assemble the frame. The frame should sit about 1 inch shorter than the door perimeter. Using the example pictured, cut two 15-inch pieces and two 20-inch pieces to make a frame for a 16-inch by 21-inch cabinet door. Cut an additional two pieces, measuring 2 inches smaller than the frame width, to use as shelves. Sand the wood pieces to smooth any rough edges.
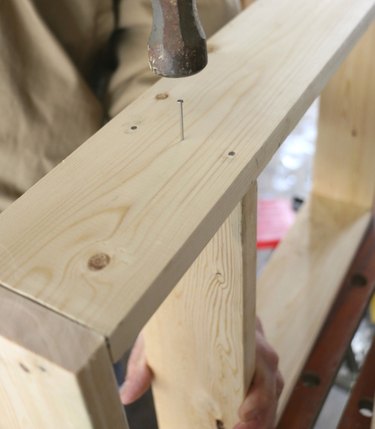
Step 4: Assemble the Frame
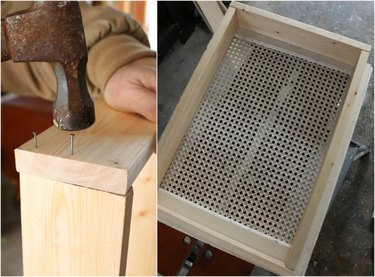
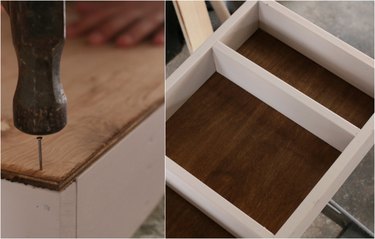
Nail the outside border of the frame together, using three nails per corner, hammering the width pieces over the top of the length pieces.
Step 5: Add the Shelves
Nail each shelf piece onto the inside of the frame at desired heights, using three nails per shelf side, nailing from the outside of the frame in.
Tip: Use containers you want to store inside the cabinet as a guide for measuring shelf height.
Step 6: Cut the Backing Board
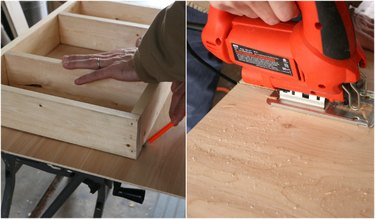
The 5 mm underlayment board will act as the medicine cabinet backing. Using a jigsaw, cut this board to the equal measurement of the wood frame perimeter. Sand any rough edges.
Tip: Trace the outside of the wood frame onto the backing board, cutting just inside the traced lines for a perfect match.
Step 7: Paint or Staing the Wood Backing and Frame
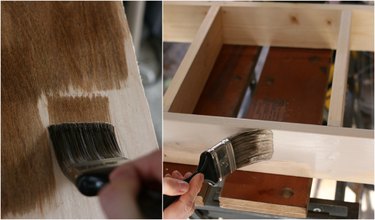
Stain and/or paint the wood backing and wood frame using your choice in color and finish.
Step 8: Add the Underlayment Board
After the stain and/or paint have dried, nail the underlayment board with the finished positioned to be the inside of the cabinet. Place nails in each corner and along the center of each frame side.
Tip: Align the board backing by nailing in opposite corners first.
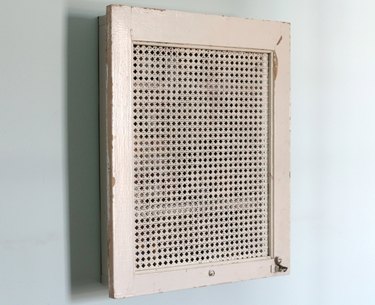
Step 9: Install the Cabinet Door

Install the cabinet door onto the frame using the hinges and No. 8 3/4 flat-head screws.
Step 10: Mount the Cabinet to the Wall

Install the finished medicine cabinet onto the wall by first locating the wall studs, then screwing straight through the backing into the studs with the No. 6 1 3/4-inch flat-head screws.
Tip: If your cabinet door has a mirror, base the installation height on your own height, but find an average eye-line for everyone using the mirror.
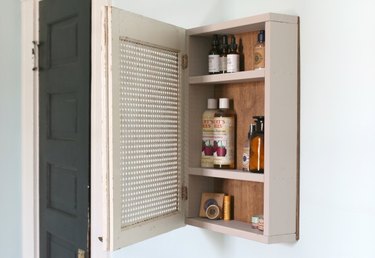
Step 11: Enjoy Your Finished Product
Fill the cabinet shelves with everyday essentials and small goods to keep concealed.