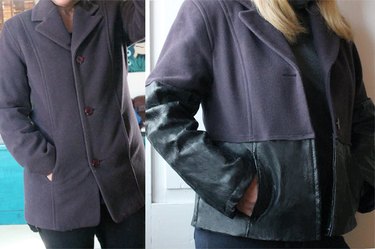
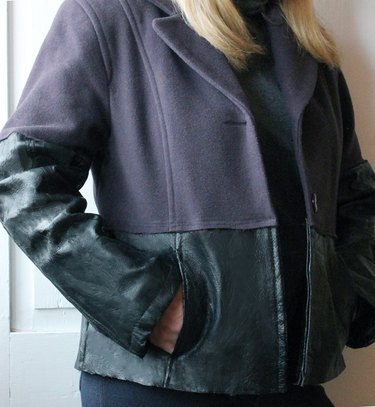
We all have one -- an old faithful winter coat that has kept us warm for years, but has gotten slightly blah. Instead of getting rid of it, give it a modern, edgy twist by adding leather.
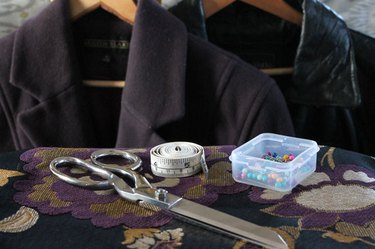
Things You'll Need
Wool coat that fits well in the shoulders
Leather jacket that fits well in the hips
Pins
Measuring tape
Washable marking pen
Sharp scissors
Seam ripper
Clips
Sewing machine with 110/18 (leather) needle
Chalk
Hand-sewing needle and coordinating thread (optional)
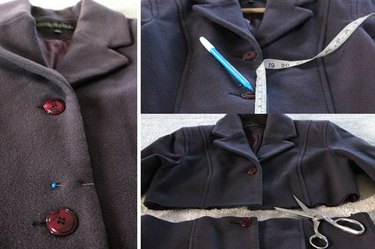
Step 1
Put on the wool coat and mark the desired length with a pin. Use a measuring tape to measure from the bottom of the coat to your pin. Measure this distance all around the coat and mark it with a washable marking pen. Use a sharp pair of scissors and cut along your marks to remove the bottom of the coat.
Video of the Day
Step 2
Fold the raw edge of the lining under 1/4 inch and pin it to the wrong side of the coat. Sew the lining to the coat along the pin line to keep it in place and to keep it from fraying.
Step 3
Measure, mark and cut the new sleeve length. Finish the raw edge of the sleeve lining by folding it under 1/4 inch and pinning it to the wrong side of the sleeve. Sew along the pin line to keep the sleeve lining in place.

Step 4
If the leather coat you're using has a zipper, remove it with a seam ripper.
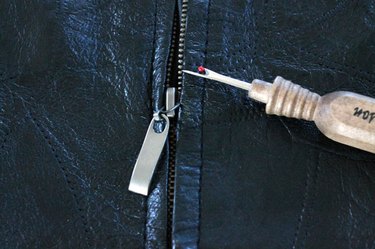
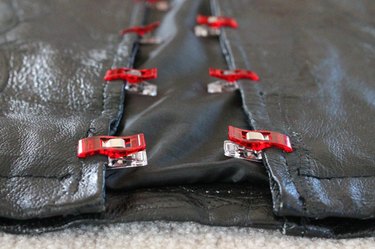
Step 5
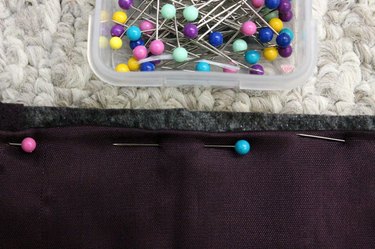
Since pins will create holes in the leather, use clips to close the opening created by removing the zipper. They will hold it in place while you're sewing it closed.
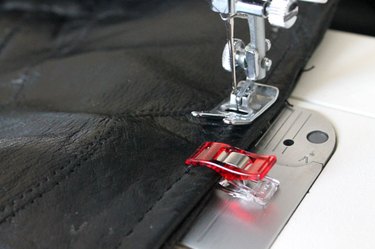
Step 6
Sew the openings closed with a 110/18 leather needle. Sew along the previous stitch lines.
Step 7
Use the bottom of the wool coat sleeve that you removed earlier to determine how much to cut off the leather jacket sleeve. Finish the raw edge of the leather sleeve lining the same way you finished the wool sleeve lining in Step 3.
Step 8
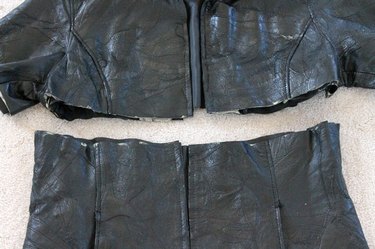
To determine how much to cut off of the bottom of the leather jacket, first measure your new wool coat length from the shoulder seam to the raw bottom edge. The leather piece will be half of the wool coat measurement plus 1/2 inch. For example, if your new wool coat length measurement is 14, then 14/2=7+1/2=7 1/2. You will cut 7 1/2 inches off the bottom of the leather jacket.
Measure and mark this distance all around the bottom of the leather jacket.

Step 9
Use a sharp pair of scissors to cut along the chalk lines. Fold the raw edge of the leather lining under 1/4 inch and pin it to the wrong side of the coat. Sew the lining to the coat along the pin line to keep it in place and to keep it from fraying.
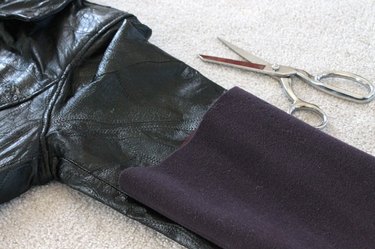
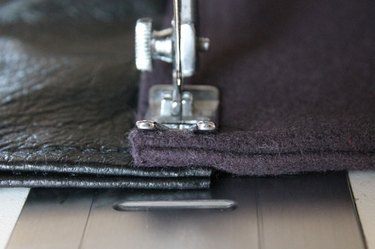
Step 10
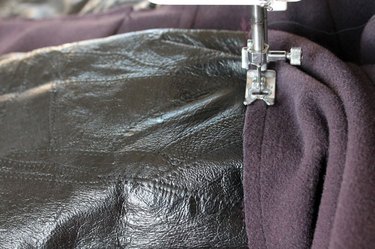
Place the raw edges of the leather and wool coat pieces together, with the wool coat on the top, and overlap them 1/2 inch. Sew them together using a 110/18 leather needle. You could sew two sets of straight lines, or if your machine has decorative stitches, you could use a fun stitch to attach the bottom to the top of the coat.
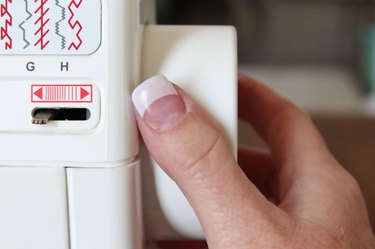
Step 11
If the layers get thick, you may need to twist the balance wheel by hand to help it get through the thick areas.
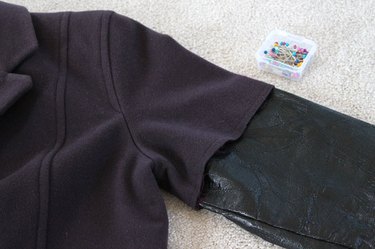
Step 12
Place the top edge of the leather sleeve into the bottom of the wool coat sleeve. Overlap them 1/2 inch and pin in place.
Step 13
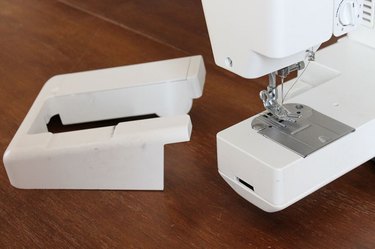
Remove the part of the machine bed to reveal the sleeve arm on your machine.
Step 14
Place the sleeve over the sleeve arm to sew the bottom of the leather sleeve to the wool coat sleeve. Here again, you could use a straight or a decorative stitch to attach them together. Do the same with the other sleeve.
Step 15
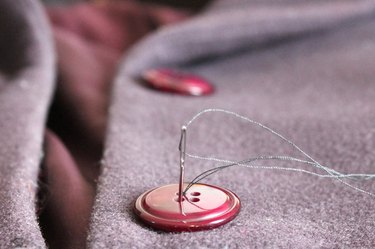
If the top of the wool coat doesn't have enough buttons to look right, you can remove a button from the bottom portion of the coat that you cut off and hand sew it to the upper part of the coat. You could also add a few buttons and buttonholes to the leather portion if you'd like to be able to button the coat all the way down.
Enjoy wearing your new (old) coat all season long!
Video of the Day