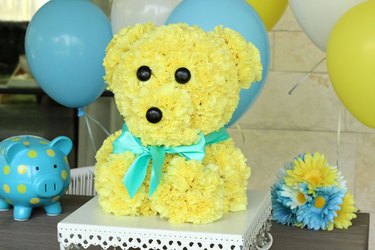
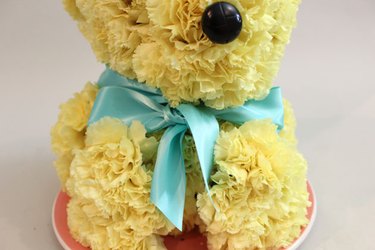
Who wants a bear hug? If you're looking for an adorable and unique centerpiece for a baby shower or child's birthday, this floral arrangement is ready to warm everyone's heart. The bear is made of fluffy carnations, which are inexpensive, last a long time and, most importantly, look like fur. And the button eyes and nose give the bear such a sweet expression.
Video of the Day
Things You'll Need
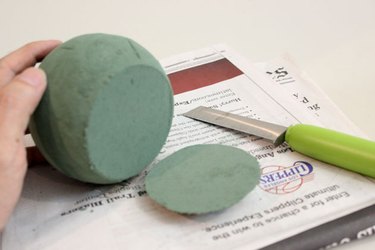
2 floral foam spheres, 4 1/2 inches
Carnations (about 150)
Black shank buttons
Wood skewers
Floral wire
Knife
Scissors
Ribbon
Step 1
On one of the floral foam spheres, cut off about half an inch from one end so that the sphere has a flat side. This sphere will be used for the bear's body, and the flat side will allow the bear to sit steady on a platter. Leave the second floral foam sphere, which will be the head, intact.
Video of the Day
Step 2
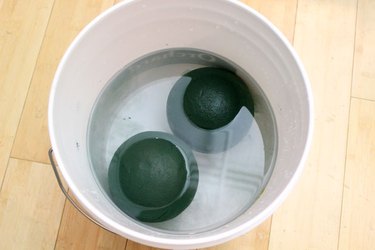
Soak the two floral foam spheres in a bucket of water until they are completely absorbed with water. Their color will turn dark green when they are saturated.
Step 3
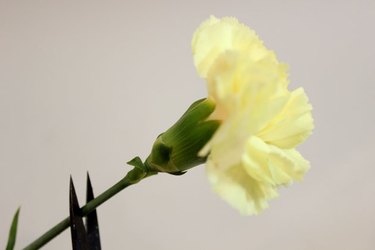
Cut the stems of the carnations, leaving about 1 to 2 inches of stem under the bloom. For this bear, you will need about 150 carnations, so plan ahead and purchase them in bulk. You can speak with the floral department manager of your local supermarket, a florist or visit a flower district if you have one locally.
Step 4
Start with the body. Place the floral foam with the flat end on a platter. Insert the carnations starting at the top so that they go in perpendicular to the surface of the foam. Notice that even though the floral foam is small, the carnations extend past the foam by about 2 inches—the resulting shape will therefore be much larger.
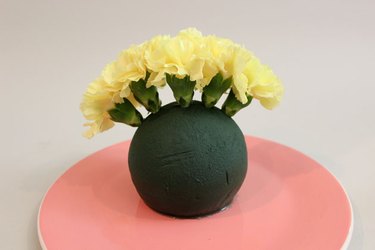
Step 5
As you continue inserting carnations, you will need to lift up the foam to get to the lower section. Do not place carnations on the flat side of the foam or the bear will be wobbly.
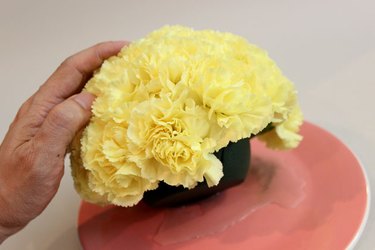
Step 6
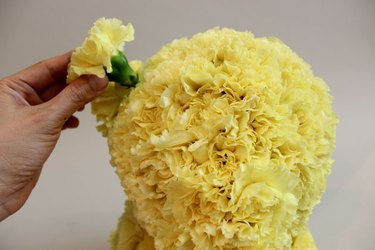
To give the bear two arms, locate on the dome where you would like the arms. Poke a finger through the existing carnations to find an unused section of floral foam and insert the new carnations to create an arm. You will need about five to six carnations for each arm.
Step 7
Locate where you would like the feet to go, and layer carnations on top of the body to form the feet. You will need about five carnations per foot.
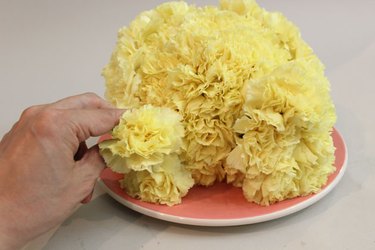
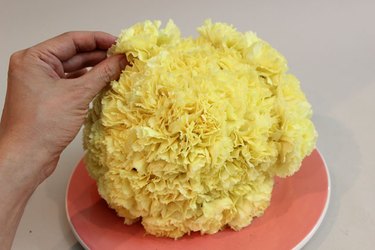
Step 8
Now that the body is finished, let's move on to the head. Working with the second floral foam sphere, insert carnations all over just as you did with the body. The only difference is, because there is no flat end, you will be covering the entire sphere with carnations.

Step 9
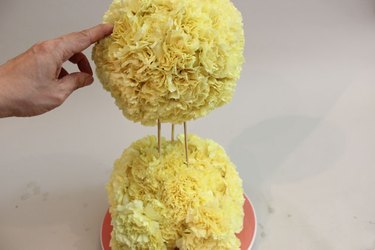
Insert three skewers into the head, position the skewers above the body and press down until the head sits on top of the body. Be sure that the skewers are not taller than the height of the head and body combined. Do not be concerned that at this point the arrangement does not look quite like a bear yet.
Step 10
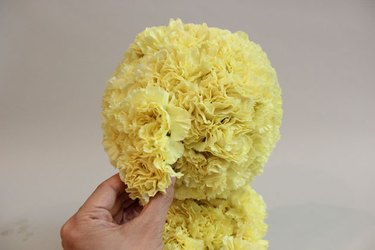
Just as you did with the arms and feet, layer additional carnations on top of the head to create the bear's muzzle. The muzzle should be located at the bottom hemisphere of the head. To create a muzzle that sticks out, first layer four carnations on top of the existing carnations. Then layer a fifth carnation in the middle of the four you just added.
Step 11
For the ears, locate where you would like them on the upper left and right sides of the head. Then layer three carnations in a row on top of the existing carnations in those locations. If you would like bigger ears, layer one or two more carnations on top of the first three. Now it's looking like a bear!
Step 12
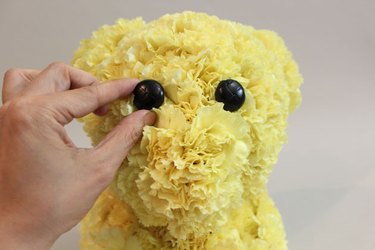
For the eyes and nose, choose buttons with shanks rather than button holes so that the bear's eyes are solid. Thread the shank with floral wire, twisting the wire around the shank to hold it steady. When you're finished, you should have two ends of the wire coming from the shank. Cut the wires so they are about 3 inches long.

Step 13
Use the wires to insert the eyes into position. The eyes should be just above the muzzle. Then insert the nose on top of the muzzle.
Step 14
Tie a bow around the bear's neck. The ribbon and bow help to differentiate the head from the body, especially if your bear does not have much of a neck. Besides, it makes your floral arrangement "unbearably" cute.
Tip
As you insert carnations, water is displaced in the foam and will spill on your work surface. Have a towel handy to wipe it up.
Keep the arrangement in your refrigerator to keep it fresh until it's time for the party.