Things You'll Need
Tape measure
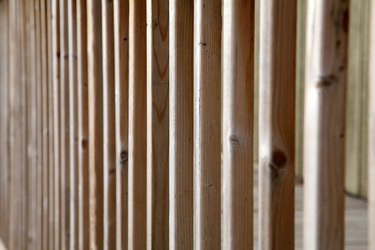
2-by-4-inch boards
Carpenter's square
16d nails
Construction adhesive
Carpenter's level
Powder-actuated nail gun
Concrete nails
L-brackets (optional)
Wood shims
Saw
Framing additional dividing walls in a basement can increase your living space, and is cheaper than building an addition to your house. When a builder plans to finish the basement they generally insert anchors in the concrete to allow easier attachment of the interior walls. Even if there aren't any anchors, however, you can still frame the basement out with sturdy, solid walls. The most common method is to anchor the bottom wall plate to the concrete with adhesive and reinforce with concrete nails driven with a power-actuated concrete nailer or similar. In some areas, however, building code requires the bottom plate to float free from the concrete. Called a floating wall, it attaches to the floor joists above and the walls to the side but leaves a 1 to 1 1/2-inch clearance between the wall's bottom plate and the floor beneath.
Step 1
Plot the wall location, using a point of reference to establish the position. For example, when building a room 10 feet wide, run a tape measure from the outside wall over 10 feet in two or three spots. Mark both the floor and ceiling with a line the length of the wall desired.
Video of the Day
Step 2
Locate the floor joists above the wall location. In an unfinished basement these are always exposed in the ceiling above. If the wall runs parallel with and directly under a floor joist, the entire wall anchors to the floor joist. A wall that intersects a floor joist every 16 inches anchors to the joist where the wall and joist meet. If the wall runs parallel to a joist, but not directly under it, cut lengths of 2-by-4-inch boards to fit between the joists. Nail the boards between the joists every 12 inches with two 16d nails. This provides an anchor for the wall instead.
Step 3
Cut two 2-by-4-inch boards to the wall length desired. Use treated wood for one if you plan to attach it directly to the concrete. These boards form your bottom and top wall plates -- the horizontal boards between which the vertical studs span. Concrete transfers moisture readily and untreated wood will eventually rot wherever it touches concrete. For long walls, break the wall into sections and build in shorter lengths -- for instance, a 10-foot-long wall coupled with a 14-foot wall section.
Step 4
Measure from the the underneath of the floor joist in the ceiling above down to the floor at your feet. Record the measurement and perform a little math: Subtract 3 inches to allow for the thickness of the plates, both top and bottom. Take away an additional 1/2 inch to allow clearance for the wall when you erect it; a full-height wall is taller than the opening when angling into place. Subtract an additional 1 inch if you want the walls to float. The 1 1/2-inch clearance allows movement of the concrete beneath, in areas where the soil is not stable, without stressing the wall structure.
Step 5
Lay the top and bottom plates for a single wall section side by side with the edges flush. Mark the stud locations using a tape measure and a square running across the face of both plates at once. Draw a line at 1 1/2 inches, 3 inches, 4 1/2 inches, 16 3/4 and again every 16 inches thereafter until the end of the plates. Mark 4 1/2 inches, 3 inches and 1 1/2 inches from the end. Make an "X" on the right side of each measurement. This indicates that the right side of the stud goes against the line, thus ensuring each stud is 16 inches apart at center -- indicated as "16 oc" by carpenters.
Step 6
Skip over the appropriate number of studs to create a door opening. Add 5 inches to the interior door width and mark the plates on either side, again making an "X" to indicate the right edge of the stud involved. Adding this extra space provides room for the necessary door framing as well as the clearance necessary for the door jambs once installed.
Step 7

Count the number of studs needed from one plate's markings. Omit two total from the marks since the 3 inch mark will hold blocks made from 2-by-4s instead of full-length studs. Cut the studs from 2-by-4inch boards to the size determined previously.
Step 8
Attach each full-length stud to first one plate, then the opposite. Align each stud appropriately -- with the right edge against the mark -- with the stud's widest face running depth-wise across the plate, which can rest on its widest face as well. Drive two 16d nails through the plate into the stud ends to secure.
Step 9
Tap short blocks, cut from additional 2-by-4s, in between the last and adjoining stud on either side of the wall section. About 10 to 12 inches long, spaced every 6 to 8 inches apart, these ensure you have framing to attach your wall sheathing to once complete.
Step 10
Frame the door's rough opening by cutting a 2-by-4-inch board the width of the space left between the two outermost studs surrounding the door, called the king studs. Nail between the king studs at the appropriate height, which is the door height plus 2 inches. Cut additional lengths of 2-by-4s to run from the bottom plate to the horizontal board -- called a header -- and from the header to the top plate. These are trimmer or jack studs. Finish with short boards, called cripples, running from the header to the top plate above the header, one every 16 inches or less. Cut the bottom plate between the innermost studs out to complete the doorway.
Step 11
Spread a generous bead of construction adhesive on the bottom of the sole plate, which rests against the floor, if you choose to glue the wall in place. For floating floors, skip this step.
Step 12
Erect the wall, positioning it exactly as required. Drive powder-actuated nails through the sole plate into the concrete if you choose a solid floor attachment. Nail through the outside studs into the adjacent wall and through the top plate into the floor joists above the wall where present. For greatest stability, the wall must attach to the sides and top if the bottom is unattached, and to the bottom if the top support is lacking.
Step 13
Reinforce the wall by installing L-brackets on either the top or bottom plates. Hold one end of the bracket against the plate involved and insert nails as directed by the manufacturer. Secure the other leg against the blocking or joists above the wall or the floor beneath the wall. This works especially well for walls secured to wood floors without joists underneath.
Tip
Check for plumb -- perfectly straight up and down -- and square before attaching the wall. Use thin shims to compensate for any gap that prevents the wall from fitting snugly.
Video of the Day