Things You'll Need
Gas fireplace insert kit
Gas log
Pipes for incoming gas fuel
Pipes for vent system
Pipe sealant
Drill
Drill bits
Hammer drill
Mortar drill bits
Insulation strips
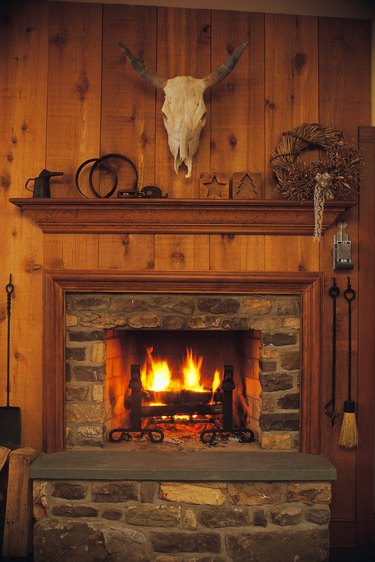
Fireplaces are not only a source of heat inside a home, but they often provide the focal point of a room's decor. After moving into a home with a wood-burning fireplace, the homeowner may want to upgrade to a different type of fuel source. A gas insert is considered a clean and efficient alternative to a wood-burning fireplace. Available in fireplace specialty shops and home improvement stores, these inserts can use either natural gas or propane. Different models provide different ways to vent the gas-fueled insert, and you can choose an insert that includes a gas log or select one from a kit.
Step 1
Remove the grate and any additional items inside the fireplace. Measure your fireplace opening and inside dimensions. Purchase a gas insert to suit your needs, allowing plenty of room for it to fit well inside the existing fireplace.
Video of the Day
Step 2
Shut off the natural gas or propane to your home before installing a gas insert.
Step 3
Follow the manufacturer instructions for placement of the incoming gas line and the vent pipeline. Mark and drill a hole through the back wall of the fireplace, or where the insert instructions suggest the pipe carrying gas should come into the fireplace. Use a hammer drill and mortar drill bits to create holes in the concrete insert.
Step 4
Obtain help to lift the heavy fireplace insert. Place the insert inside the fireplace, lining up the holes for the pipes that will be installed for gas fuel and ventilation. Place the gas log unit inside the insert.
Step 5
Connect the new gas line to the pipe in the home that is nearest the fireplace. Use sufficient pipe sealant to keep gas from leaking at all connection points. Connect the gas pipe inside the fireplace to the ignition point in or near the specially made gas fireplace logs. Seal this area to prevent gas leaks.
Step 6
Connect pipeline to the vent. Push the end of the vent to the outside of the home through the back of the fireplace. Seal all connection places. Place sealant around the hole where the vent pipe goes outside the home.
Step 7
Connect electrical connections per manufacturer instructions, keeping extra electrical wire as far away from the heat source as possible to prevent burning the cords.
Step 8
Turn the gas on in the home slowly. Turn it off immediately if you detect a gas smell in the fireplace. Consider having your do-it-yourself project inspected by a professional before turning on the gas for maximum safety.
Step 9
Pull the insert out of the fireplace slightly. Place small strips of insulation around the opening of the fireplace insert. Push the insert into place snugly against the fireplace front. Use manufacturer-recommended sealant to seal off any potential gas leaks.
Warning
Consider the recommendations of gas fireplace insert manufacturers and the National Fireplace Institute. They urge consumers to hire a professional to install the gas and vent lines if you are not trained to work with gas pipe installation.
Steer away from gas fireplace units that do not vent to the outside because these do not provide a way for dangerous carbon monoxide fumes to exit the home.
Keep papers and other materials out of a gas fireplace, not only to keep it clean but to eliminate harmful gases and ashes from causing a burning or air contamination problem.
Video of the Day