Things You'll Need
Measuring tape
1-inch PVC pipe
PVC cutters
1-inch PVC elbows
1-inch PVC tees
Outdoor upholstery fabric or canvas
PVC snap clamps
1-inch conduit clamps (2)
2-inch wood screws
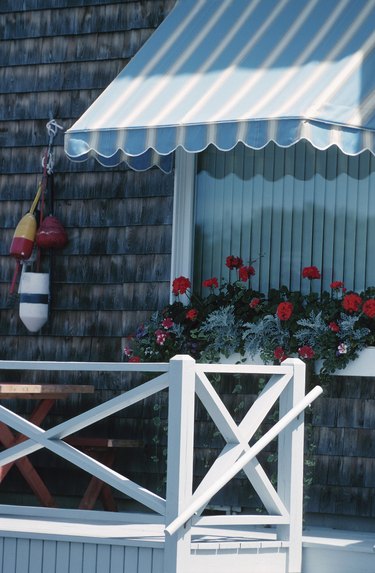
Building and installing awnings above the windows and doors of your home is a simple way to keep your home cool while adding to its curb appeal. If you do not use the correct materials to build your awnings, though, they may not last long. Lightweight, durable materials, such as PVC pipe, are recommended for the awning frame because they can stand up to extreme weather. For the awning cover you need to use something water-resistant and tough, like outdoor upholstery fabric or canvas.
Step 1
Measure the length of the window or door where you want to install an awning. Plan to use a standard awning width of between 24 and 36 inches.
Video of the Day
Step 2
Cut two pieces of 1-inch PVC pipe to the length determined in Step 1 with a pair of PVC cutters. Cut two more pieces of 1-inch PVC pipe to the chosen width for the awning.
Step 3
Arrange the four pieces of PVC pipe in a rectangular shape. Position the pipes of equal length opposite each other and sandwich those cut to the width of the awning between the ends of those cut to its length.
Step 4
Connect the pieces of PVC pipe in the bottom corners of the rectangular frame with 1-inch PVC elbows. In the top corners of the frame, use 1-inch PVC tees. Position the tees so the unused connection faces away from the frame.
Step 5
Cut a piece of outdoor upholstery fabric or canvas that is approximately 4 inches wider and longer than the original measurements you took in Step 1. Hem the fabric on all four sides with a 1/2-inch seam.
Step 6
Lay the hemmed fabric over the top the awning frame. Center the fabric so it hangs over the awning frame evenly on all four sides. Wrap the excess fabric tightly around the PVC frame and secure it on all four sides with PVC snap clamps.
Step 7
Hold the completed awning up over the door or window where you want to install it. Adjust the angle of the awning until you are satisfied with it. A steeper angle will block out more sunlight, but it may also obstruct your view out the window or door.
Step 8
Slip a 1-inch conduit clamp over the open connection on each tee connector along the top of the awning frame. Have an assistant hold the awning firmly in place while you do so.
Step 9
Screw the conduit clamps into the window or door frame with 2-inch wood screws. If you need to adjust the angle of the awning after the clamps are installed, simply loosen the screws enough so that you can move the awning. Tighten the screws again after you have made the necessary adjustments.
Tip
Use your creativity when selecting a fabric for your awning cover. Choose a bold color or bright pattern to add to the curb appeal of your home. You may also opt to add panels of fabric that hang down from the sides of the awning frame to further block out sunlight.
Video of the Day