Things You'll Need
Pencil
Masking tape
1-inch plywood
2-by-4 lumber
Circular saw
Miter saw
Wood glue
2-inch wood screws
Wall anchors
Drill
1.5-inch finishing nails
Hammer
Wood putty
150 grit sandpaper
Caulk
Paint
Paintbrush
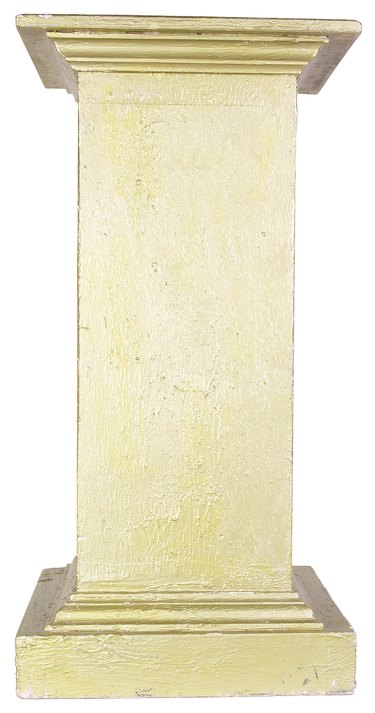
A faux column is a column that has no structural function. Usually the purpose of a faux column is decorative, or to hide an imperfection in a wall. This project may be be constructed from plywood. You don't need any special carpentry skills to create a faux column, although you may wish to have the pieces of plywood cut at a home improvement center if you don't have the power tools at home.
Step 1
Use a pencil to mark the area on the wall where you plan to install the column. Draw an outline indicating the outer perimeter of the column. Use chalk or masking tape to mark the floor at the base of the column to show the column's depth.
Video of the Day
Step 2
Measure the height of the column you drew on the wall, and measure the depth of the column as indicated on the floor. These measurements are the dimensions of the two sides of the column. Measure the width of the column. This width and the height of the column are the dimensions of the column's face. Purchase two pieces of plywood in the appropriate dimensions for the sides, and one piece of plywood in the appropriate dimensions for the face. You will also need one piece to fit over the top of the column, the dimensions of which should conform to the width of the side pieces and the width of the face piece. Miter cut the outer edges of all pieces so that when they are assembled, they will form a 90 degree angle where the pieces meet.
Step 3
Use a pencil to write "side A" on the piece of plywood that will form the left side of the column. Write "side B" on the face of the column, and write "side C" on the piece of plywood that will form the right side of the column.
Step 4
Subtract the depth of the two side pieces of plywood from the width of the column. This is the width of the space on the wall beneath the column once it has been assembled. Cut three pieces of 2-by-4 lumber to this width.
Step 5
Screw the pieces of 2-by-4 into the wall where the column will be located. Position one near the bottom, one near the middle, and one near the top of the column. The pieces should be centered in the middle of the space for the column. Use 2-inch wood screws and drill pilot holes into the 2-by-4s and the wall before inserting the screws. Tap wall anchors into the pilot holes in the wall unless you hit a wall stud.
Step 6
Position side A on the left side of the column where it will be installed. Press the back of side A against the 2-by-4 pieces that you screwed into the wall in Step 5. Apply a bead of wood glue on the edge of side A that touches the wall, then screw side A to the the 2-by-4 lumber you screwed into the wall in Step 5. Use 2-inch wood screws and drill a pilot hole into the side of the column and into the plywood before inserting the screws.
Step 7
Repeat Step 6 to install side C of the column.
Step 8
Apply a bead of wood glue to the mitered edges of side A and side C. Fit the face piece, side B, into position so the mitered edges meet.
Step 9
Stand on a ladder and line the top of the column with wood glue. Place the top piece of the column into position. Allow all glue to dry overnight.
Step 10
Nail the edges of side B using 1.5-inch finishing nails. Stand on the ladder again, and nail the top piece into place with the finishing nails.
Step 11
Fill in any gaps in the seams between pieces with wood putty. Wait for it to dry according to the manufacturer's instructions, and then sand the edges.
Step 12
Seal the bottom of the column with caulk. Wipe off excess caulk with the tip of your finger and allow it to dry according to the manufacturer's instructions.
Step 13
Paint the faux column according to your own preferences. Paint a layer of primer on first, then when the primer has dried, paint subsequent layers in whatever color you wish to use for the column.
Tip
Before painting, you may decorate the exterior of your column with moldings and trim purchased from a home improvement center. Nail the trim to the column, or glue it into place.
This column is very basic. For a more complex design, consider adding a base piece, a decorative cap piece on top, or both. You may also simulate the appearance of a base or cap on the column with trim around the top and bottom edges.
If cutting the plywood yourself, use a circular saw. Use a miter saw to make mitered cuts.
Warning
Wear safety glasses when using a circular saw.
Video of the Day