Things You'll Need
Straight edge
Chalk
Carpenter’s square
Tape measure
3/4-inch MDF sheets
Table saw
Wood screws
Electric drill with screw bit
3/4-inch plywood sheets
Hammer
10d nails
Black caulk
1/2-inch rebar
Wire ties
Concrete mix
Cement mixer
Concrete sealant spray
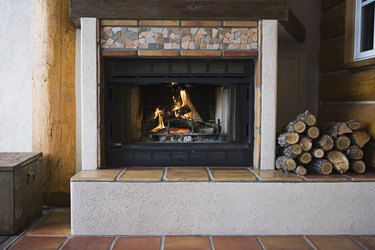
Making a cement hearth is an easy way to create a hearth that's strong, stable and, most importantly, fireproof. Most cement hearths only form the core of a finished hearth, with the cement often covered with more attractive building materials, such as marble or ceramic tiles. The most time-consuming aspect of building your cement hearth will be in constructing the mold, but, if you use the proper materials and construction process, you'll end up with a smooth slab, ready for covering with whatever material you like or useable as is.
Step 1
Mark the area of your floor where you wish to place the hearth using a straight edge and a piece of chalk. Place a carpenter's square against each line of the hearth square before lining up the straight edge to place the next to ensure your hearth has 90-degree angles if desired.
Video of the Day
Step 2
Measure each side of the drawn hearth with a tape measure. Create a frame for the hearth with sides that fit the measured distances built from 3/4-inch MDF planks cut with a table saw to the proper length and height desired for the hearth pad. Join the planks together into a square using wood screws to connect the boards together, driven through the wood with an electric drill equipped with a screw bit.
Step 3
Measure the length and width of the outside of your MDF frame and create a second frame made of 3/4-inch plywood to fit around the MDF frame. Make certain the second frame is of the same height, and that the planks fit flush with the MDF boards. This second frame will add strength to the MDF for the cement pour. Screw this frame onto the MDF frame, creating a second box frame around the first.
Step 4
Measure the length and width of the outside frame and cut a 3/4-inch MDF sheet to fit over the top of the outside frame, creating an open box built of MDF. Nail the base to the plywood planks forming the outside frame with a hammer and 10d nails.
Step 5
Attach 2-by-4-inch planks along the bottom of the MDF sheet outside the frame to add support to the piece. Screw the boards in place, setting a board every 10 inches across the entire length of the board's surface. Turn the frame upright so that the opening is toward the top.
Step 6
Spread black caulk along the seams of the MDF inside the frame to prevent the cement from seeping out. Smooth the caulk with a finger, making it as thin as possible to avoid creating an imprint on the edges of your hearth.
Step 7
Line the inside of the form with a grid of rebar. Have the store that you purchase the bars from cut them for you to a size that fits within your frame, leaving one inch of space on either end of the bar between the bar and the wall of the frame. Place the rebar into the frame spaced 12 inches apart, with a horizontal layer of rebar covered by a vertical layer. Connect the rebar where the two layers cross one another with wire ties.
Step 8
Place nails into the sides of your plywood frame every 12 inches so that they line up with the ends of the rebar grid, with half of the nail sticking out from the wood. Tie wires to the nails with the other end of the wire tied to the rebar to lift the rebar upward to suspend the grid at a level that's located at half the height of the form.
Step 9
Mix the Portland cement based concrete in a cement mixer, adding water until it has the consistency of a smooth oatmeal.
Step 10
Pour the concrete into the frame, filling it to the top. Tap the sides of the frame with a rubber-headed mallet to force air bubbles from the pour to the top of the hearth slab.
Step 11
Wait about 20 minutes for the slab to begin to set and then drag a plywood board across the surface, supported by the frame edges, using a back and forth motion. This will level the slab, reducing high areas and filling voids. Leave the slab to cure for three days.
Step 12
Remove the wires from the nails along the sides of the frame, and unscrew all of the boards to free the hearth.
Step 13
Lift the hearth with the aid of a few helpers and place it into the drawn square on your floor. Set the hearth so that the side created on the MDF board is the hearth top, being smoother than the other side of the slab. Seal the surface by spraying it with a concrete sealant, choosing a color sealant if desired to tint the concrete in the process.
Tip
Make the hearth at least 4 inches thick to take full advantage of the rebar reinforcement. Check with local building codes to determine if there any minimal requirements your hearth must meet before you begin construction.
Video of the Day