Things You'll Need
Miter saw
Pin nailer
Pin nails 1 1/4-inch
Angle finders, also known as angle finder protractors, are small hand-held tools that can be used to replicate almost any angle. They have two small arms on a swivel. One arm is positioned on the flat surface of any piece of wood. The other arm is swiveled out to match a corresponding angle and locked in place. You can use angle finders to set the angle on a miter saw when cutting baseboards to fit each other.
Step 1
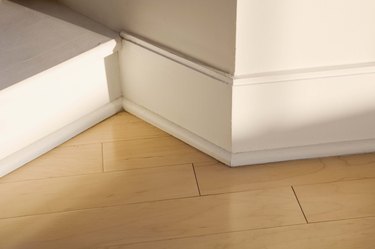
Install one length of baseboard on one side of a wall where another piece of baseboard will join it at a 90 degree angle.
Video of the Day
Step 2
Place the larger rectangular shaped arm of the angle finder flat on the floor. The swivel arm of the angle finder should be facing the baseboard that you just installed. The swivel arm looks like a dull knife blade.
Step 3
Loosen the wing nut on the swivel arm. While holding the rectangular arm flat against the floor, tilt the swivel arm until it fits flush against the baseboard. Tighten the wing nut.
Step 4
Place the angle finder on a miter saw. The rectangular arm should be against the fence. The swivel arm should be angling out from the slot in the fence that the saw blade uses.
Step 5
Pull the miter saw blade down to within 1/4 inch of touching the swivel arm. Push the miter saw blade to the left or right until it matches the angle on the swivel arm. Lock the blade at that angle. Let the blade spring back up.
Step 6
Place another piece of baseboard on the miter saw. Turn on the saw. Hold the baseboard with one hand. Using the other hand, bring the blade down to cut the angle on the end of the baseboard.
Step 7
Place the angled end of the baseboard against the existing piece of baseboard already in place. The angle that you just cut will fit over the baseboard already installed on the wall. Nail the baseboard in place with a pin nailer.
Tip
If your baseboard has a profiled angle, use the same procedure. Before installing the new angled piece, use a sander to sand off the back of the mitered edge. Sand off everything that has a fresh cut on it. The profiles will match perfectly. This is known as "back cutting" or "coping" baseboard.
Warning
Always wear safety glasses and breathing protection when working with wood or saws. You should always do a test cut. Dry fit any angled edges before nailing baseboard.
Video of the Day