Things You'll Need
Screwdriver
Straightedge
Utility knife
Work lights with extension cord
Power or hand saw
Staple gun with insulated staples (Optional)
Fine-grit foam sanding block
Wood 2x4
Wood screws
90-degree elbow joists
Flat plate-style joists
Carpenter' s level
Drywall
Drywall screws
Drywall putty
Drywall tape
Wide putty knife
Primer
Paint
1/2-inch-thick piece of wood (Optional)
Spackle
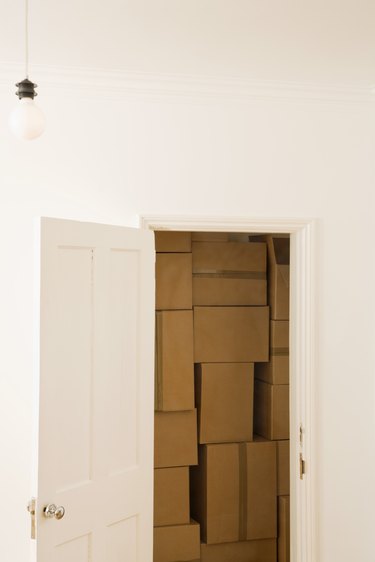
Oddly, most closets are built with wasted space. The inside of the closet is usually the height of the room, but the height of the doorway is generally the standard doorway height. This means that the top shelf must be low enough to allow you to move items in and out below the top of the doorway, which leaves you with a big empty space at the top of the closet. In most cases, there's enough room for another shelf, but you must first turn the doorway into a full-height setup to allow you to actually use the top shelf.
Step 1
Remove everything from the closet. Anticipate not using the closet for at least three days.
Video of the Day
Step 2
Remove the existing doors and all hardware, including tracks for sliding and bi-fold doors.
Step 3
Draw a vertical line even with the existing width of the doorway, ending at the ceiling on either side of the closet -- both inside and out. These lines delineate the area to be removed. Score these lines with a utility knife as deeply as possible.
Step 4
Cut power to the room at the breaker box. Use work lights plugged into another room with an extension cord to see what you're doing.
Step 5
Break up the existing drywall between the lines marked in Step 3 with a hammer. Use the blunt side of the hammer to dent it then pull it loose with the claw end. Look for any electrical wiring as you go and avoid snagging it with the hammer claw. Remove the drywall from both the inside and outside of the closet.
Step 6
Remove all visible insulation and discard it. Don't pull the insulation down from above or you'll pull it out of the ceiling. Simply cut if off straight across at ceiling level with the utility knife.
Step 7
Cut off the exposed vertical wood support beams that are flush with the ceiling. A power saw makes the work go more quickly, but a hand saw is easier to control in tight spaces. Have a helper hold any electrical wiring out of the way. Do not attempt to cut any support beam with stapled wiring -- remove the staples first and tuck the wires well out of the way.
Step 8
Tuck any electrical wires up into the ceiling. Wires can be attached to existing beams with insulated staples if necessary. Sand the edges of the remaining drywall smooth to ensure a clean fit with the new drywall.
Step 9
Cut pieces of 2x4 to fit between the ends of the vertical support beams and attach them with 90-degree elbow joists. Attach the new wood flush with the ceiling and level all the way across. Use a carpenter's level to be sure. For extra security, add flat plate-style joists on the underside of the wood at each joint.
Step 10
Cut new drywall to fit the exposed areas. Score the drywall with a straightedge and the utility knife then bend it to break off. The deeper the score, the cleaner the break. Attach drywall to wood supports with drywall screws, driving each screw far enough in so that the head makes a slight dimple in the drywall. Place drywall pieces as close together as possible for cleaner seams.
Step 11
Fill all seams and screw dimples with drywall putty, smoothing down the areas as much as possible. Apply paper drywall tape to the seams -- not the dimples. Apply wet putty with a wide putty knife to the drywall tape and allow it to dry.
Step 12
Apply another coat of drywall putty on top of the drywall tape as smooth as possible. Be stingy -- using too much putty results in a bumpy finish. Allow the area to dry then sand it smooth with a fine-grit foam sanding block.
Step 13
Assess the seams, going by feel rather than sight. If you feel little "hills" at the seams, apply another coat of putty on either side of the existing coat, feathering both edges and using as little putty as possible. The goal here is to turn a hill into a very gradual incline to make the bump less noticeable. Allow the seams to dry then sand them smooth. Repeat, as necessary, until the newly-installed area is smooth and level.
Step 14
Apply one coat of primer and allow it to dry. Apply two coats of paint, allowing each coat to dry before continuing. Install trim around the doorway if desired.
Step 15
Install closet doors, according to the manufacturer's instructions. Track-type doors can be installed directly into the drywall, but regular hinged doors may require a door frame. Some doors are available pre-hung, with the door frame already attached -- otherwise, simply screw a 1/2-inch piece of wood in the height and width of the frame into the existing drywall, cover the screw holes with spackle and paint then install the hinges.
Tip
Measure the floor-to-ceiling height and find replacement doors before beginning the project. Doors this size are non-standard and may be hard to find -- you may even have to have them custom made.
Light-colored paint in a matte or eggshell finish hides the most flaws in a wall -- if your putty job didn't come out perfect, consider changing your paint color. Dark or glossy colors call attention to flaws.
Warning
Never attempt to rip out drywall with live power in the room. You never know if you'll encounter electrical wires.
Video of the Day