Things You'll Need
Circuit breaker tester
Screwdriver
Outlet box with swing-out mounting tabs
Pencil
Keyhole saw
14-2 romex cable
Wire cutters/strippers
Wire nuts
Blank outlet cover
Outlet cover
Wall electrical outlets are typically located 18 inches above the floor. It's possible you may have a need to learn how to move an outlet up on a wall. For instance, you may have a workbench or craft table where easy access to a power outlet would be desirable. Moving the outlet up the wall will take a bit of work, but there's no complicated wiring necessary.
Step 1: Be sure the power is turned off
Turn off the power to the circuit you'll be working on at the home's circuit breaker panel.
Video of the Day
Step 2: Use a circuit tester
You should use a circuit breaker tester before doing any work on the outlet to be sure it is turned off. This device sends a small electrical current through the breaker to test its response. If the breaker is working properly and is turned on, the current will flow freely and the tester will indicate that the circuit is open. If the breaker is not working properly or is turned off, the current won't flow, and the tester will alert you to that fact.
Step 3: Remove the screws
Remove the screw holding the cover plate onto the outlet. Remove the cover. Loosen the screws at the top and bottom of the outlet and pull it out of the outlet box. Loosen the screws on the sides of the outlet and pull the black and white wires off of the outlet. Loosen the screw holding the mounting tabs of the outlet box and pull the box out of the wall.
Step 4: Place the new outlet box
Hold the new outlet box against the wall in the position where you want the new outlet to be located; it needs to be almost directly above its existing spot so that you don't have to deal with a wall stud.
Step 5: Trace and cut around the box
Trace around the box. Cut out the area inside the traced line with a keyhole saw.
Step 6: Add cables and wiring
Push romex cable through the new opening until the end of the wire appears in the bottom opening. Pull several inches of wire out the opening and feed it into the top hole of the outlet box.
Step 7: Prepare the wires
Remove 1 inch of insulation from the black and white wires in the cable. Match the black and white wires of the cable to the black and white wires that were connected to the old outlet. Slide a wire nut over each pair and twist until the nut is holding the wires tightly together.
Step 8: Replace the box
Place the box back into the wall opening and turn the screws for the mounting tabs until the box is securely fastened. Place a blank outlet cover onto the box and attach with screws at the top and bottom.
Step 9: Prepare the cable
Cut the cable off with about 6 inches extending out of the new hole in the wall. Slide the cable through the hole in the bottom of your new outlet box. Place the outlet box in the opening and turn the mounting tabs with a screwdriver to lock the box in place.
Step 10: Remove insulation and prepare wires
Remove about 1/2 inch of insulation from the black and white wires of the cable. Loosen the silver and brass screws on either side of the new outlet. Place the black wire under the brass screw and tighten, and the white wire under the silver screw and tighten.
Step 11: Attach the outlet box and cover
Place the outlet into the outlet box and attach it with its screws at the top and bottom. Place the outlet cover onto the box.
Step 12: Restore the power
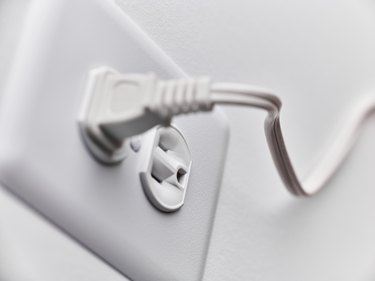
Turn the power back on and plug something into the outlet to be sure it works.
Video of the Day