How to Create a Stunning Flower Bouquet: Hand-Tied Method
Learning how to create a stunning flower bouquet comes down to sequence more than skill: pick a restrained palette, condition your stems, then tie everything into a spiral by hand. Doing the steps in that order makes the process easier and gives the flowers a better chance of lasting once they're in water. This guide borrows its color discipline from celebrity florist Jeff Leatham, whom a Dailymotion interview identifies as "The Flower God" (Dailymotion, last year), and its flower-selection method from Jane, a floristry expert at CAE (CAE, last year). This works well as flower arranging tips for beginners: by the end, you'll have built one small hand-tied bouquet and know how to repeat it with whatever's in season.
The three core stages here are palette, conditioning, and the spiral tie; setup and final display round it out. This isn't a deep dive into table styling or long-term flower care, though both get a brief mention near the end.
What you need before you start
Video of the Day
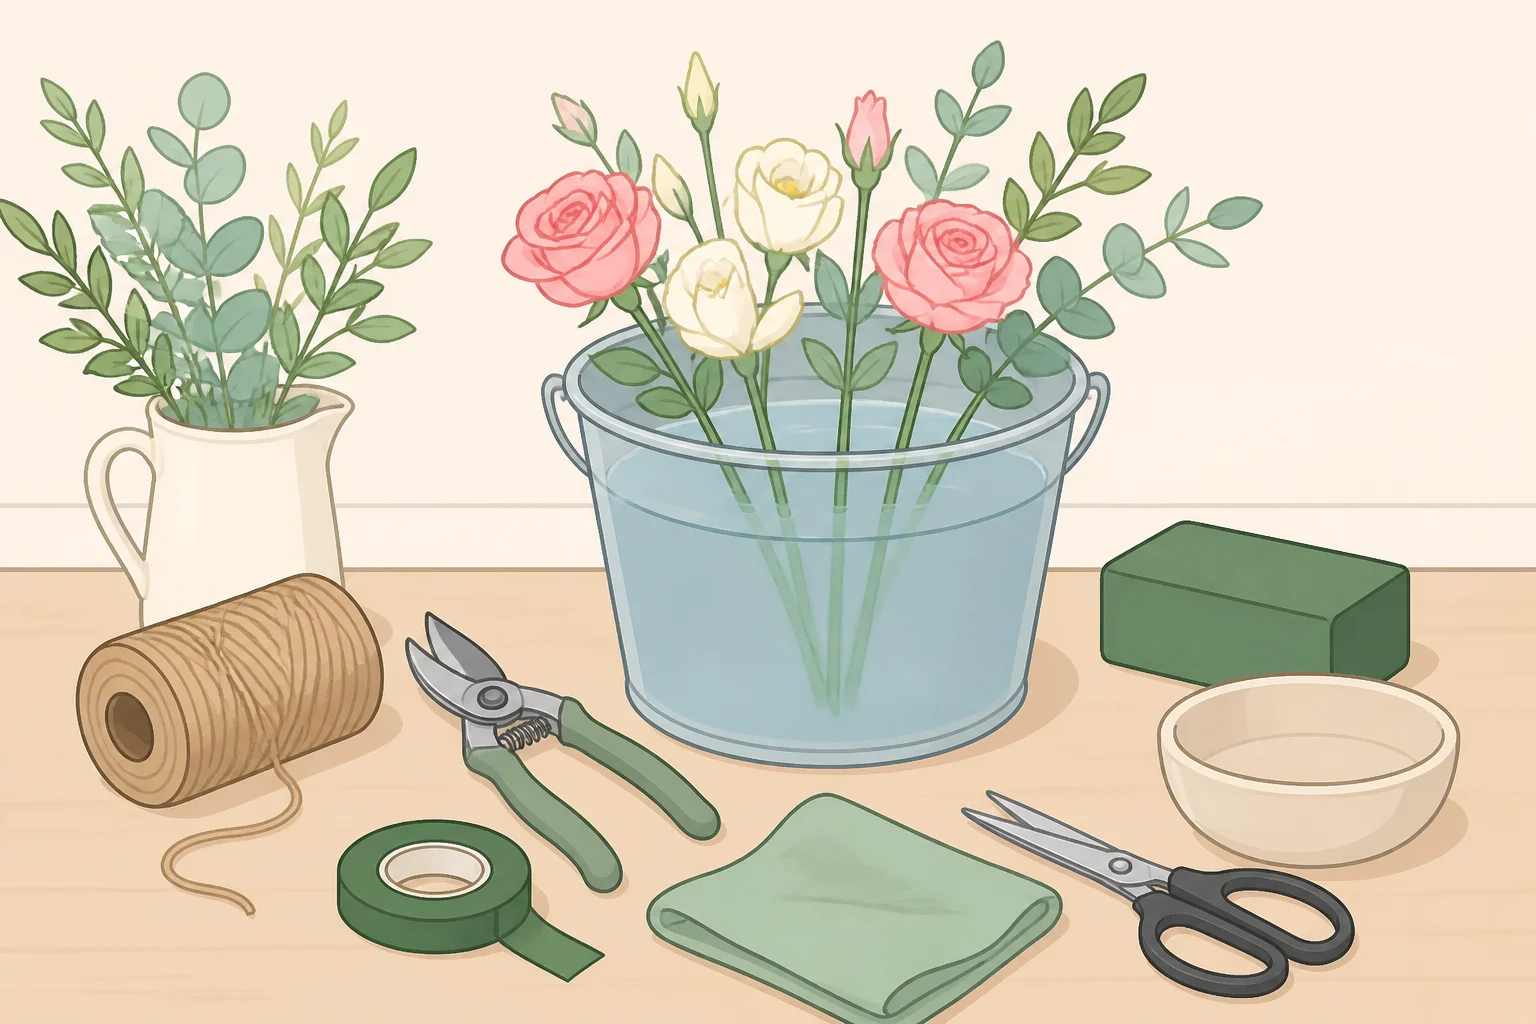
Gather sharp floristry scissors or secateurs and a length of natural jute twine (Homes & Gardens, last year). Add a bucket of clean water for conditioning your stems, which happens before any arranging (RHS, last year).
Leatham's own kit list adds chicken wire and floral tape to that (Good Housekeeping). You don't need either one for the hand-tied method described here.
If you'd rather watch the technique than read it, a Homes & Gardens florist demonstrates a hand-tied method in a video for the outlet's Petals & Roots series (Homes & Gardens). Watch it before you start cutting stems. When you do cut, use a sharp knife, secateurs, or floristry shears rather than whatever scissors are in the kitchen drawer; RHS guidance warns that crushing a stem reduces its ability to take up water and nutrients (RHS).
Video of the Day
How to create a stunning flower bouquet with a monochromatic palette
Leatham's color advice actually splits into two distinct ideas worth keeping separate. He favors a monochromatic flower arrangement, built within a single hue, for what he calls an elevated look (Good Housekeeping). Separately, for a holiday table spanning flowers, candles, linens, and décor, he recommends choosing two or three shades and repeating them throughout so the whole setting reads as intentional (Good Housekeeping).
That second piece of advice wasn't written about bouquets specifically. Applied to a single arrangement, though, the same restraint holds up: fewer colors, repeated on purpose, reads as deliberate at any size. Use strict monochrome for the most polished result, or a tighter coordinated range, like the fall colors Leatham says he's especially drawn to (cream, orange, and deep red), if you want more contrast.
- Pick one focal flower you love, ideally one that carries multiple shades within a single hue. CAE points to tulips, orchids, and lilies as flowers that do this naturally; its color becomes the guide for everything added after it (CAE).
- Lock in your palette before you buy anything else. Decide whether you're going strictly monochromatic or adapting Leatham's two-to-three-shade table advice down to bouquet size. Either route satisfies the same underlying rule: restraint.
- Fill out the bouquet by category, not by a fixed shopping list. CAE's working formula is one type of mass (focal) flower, three to four types of secondary flowers, one to two types of filler, and foliage to add fullness and protect the bouquet's edge (CAE). For a first attempt, start with a manageable handful of stems across those categories, pulled from your two or three chosen shades; the method scales up from there.
- Restraint doesn't mean muted. A tight palette works in saturated color as readily as pastel. In one conversation, Leatham described Dubai as leaning heavily on beige and tan and said people generally need to be more daring with color (Dailymotion). Two deep shades can be as controlled as two pastels.
Condition your stems before you arrange anything
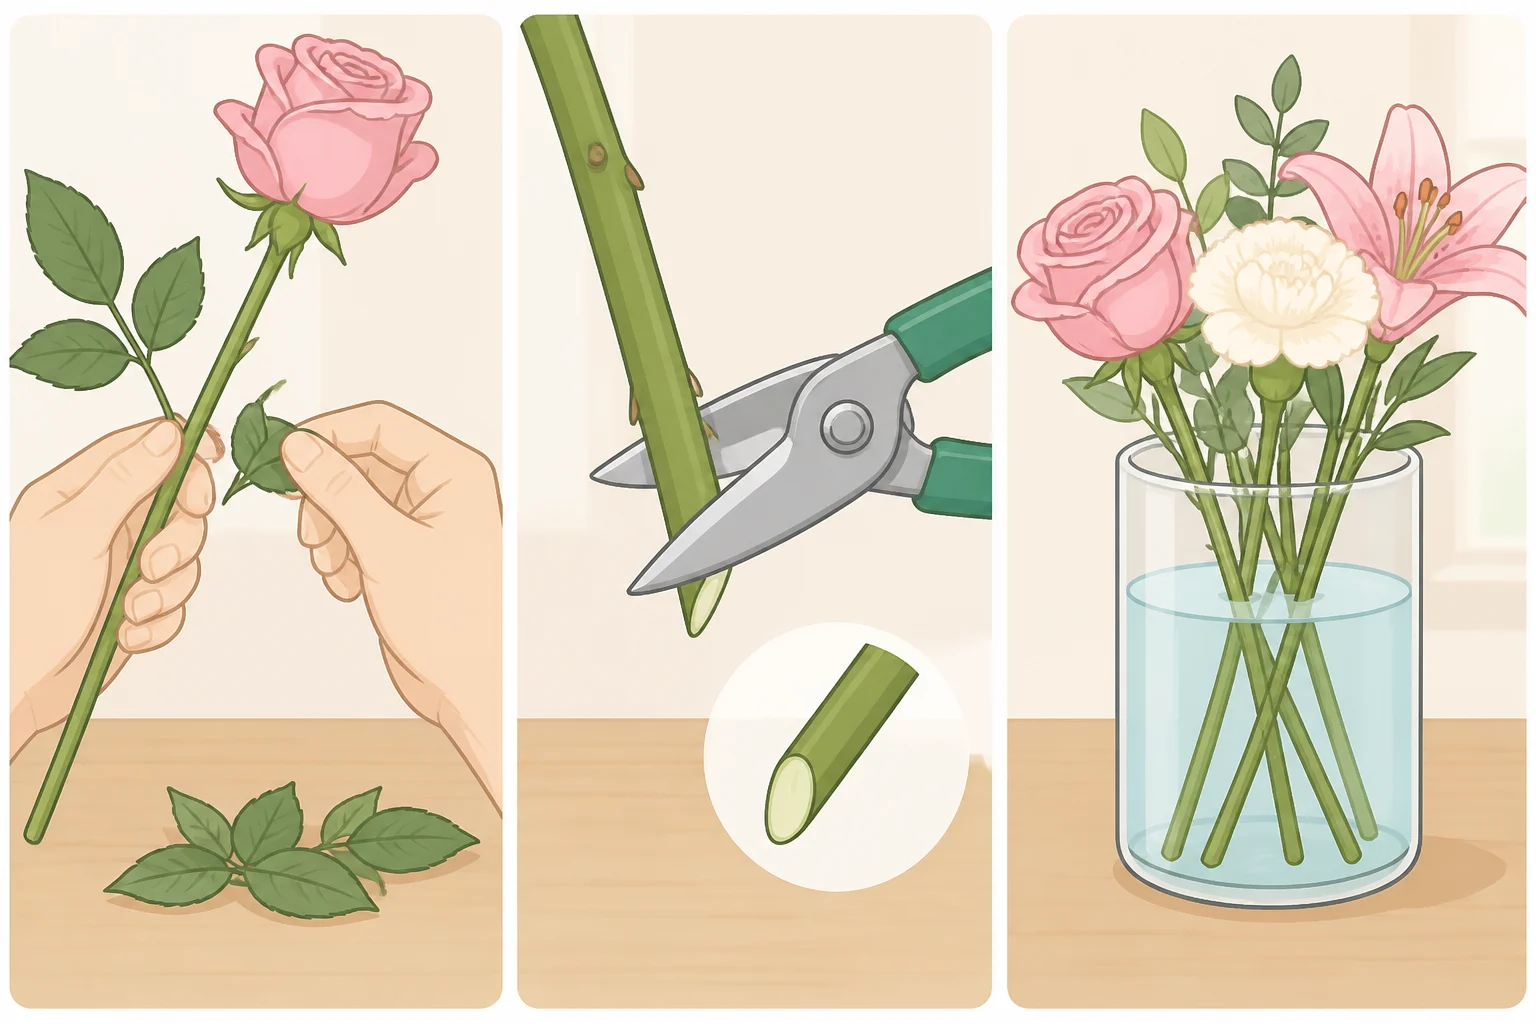
Conditioning prepares cut flowers to last longer once arranged and helps them look their best, according to the RHS (RHS). It happens before any tying, not after.
- Strip the foliage from the bottom half to two-thirds of each stem, and certainly anything that would sit below the waterline. Left on, it rots in the water (RHS).
- Re-cut every stem with a sharp knife or secateurs, at a clean, angled cut. A crushed stem can't take up water as well (RHS).
- Stand the stems in clean water in a cool spot for at least two to three hours, ideally overnight (RHS). Tulips and gerberas are prone to bending; wrapping them in newspaper and standing them deeply in water first can help straighten them before they go into the bouquet (RHS).
The next section works best once the stems have had time to drink.
Build the bouquet: the hand-tied spiral method
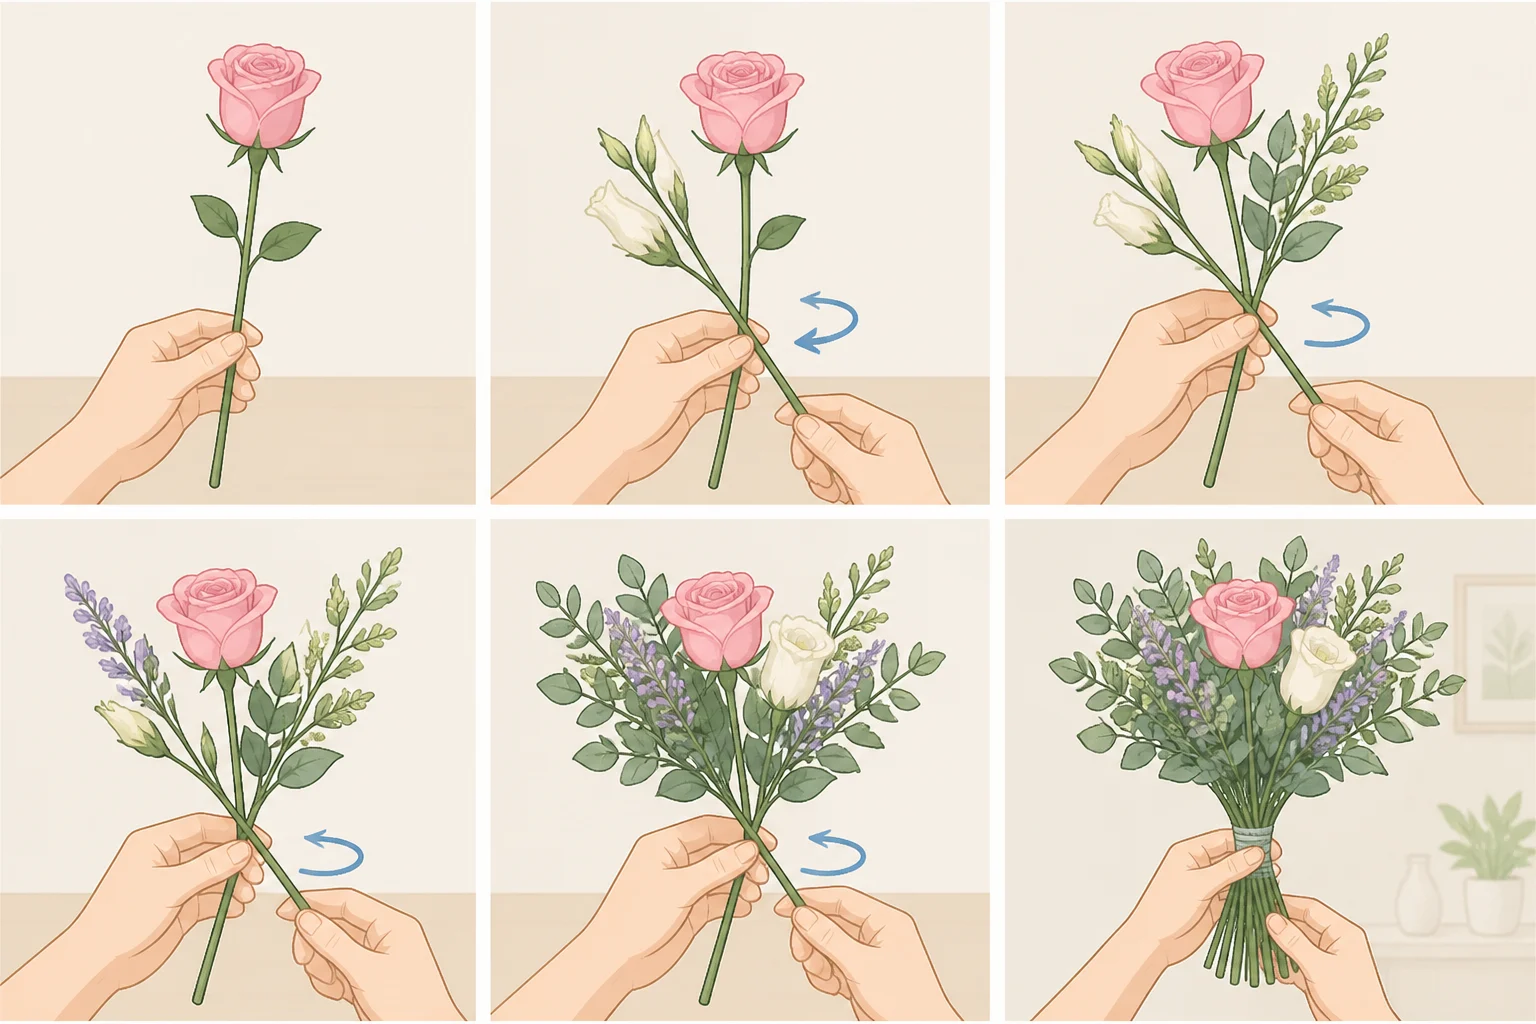
Lay your conditioned stems out by variety on a table so everything's within reach, and loop your twine around your neck for easy access when you're ready to tie off (Homes & Gardens).
- Place your focal flower first. Hold the stem between thumb and forefinger; right-handed arrangers hold in the left hand and feed with the right (Homes & Gardens). Everything below your grip becomes the visible stem.
- Add a secondary stem, crossing it at the front at a 45-degree angle, then a filler stem the same way. That crossing motion, repeated, is what builds the spiral (Homes & Gardens).
- After three stems, give the bundle a quarter turn, then keep feeding stems in on the diagonal, crossing each at the front and turning a quarter again every three to four additions. Vary what you add each round so no single flower type clusters in one spot (Homes & Gardens).
Most first attempts go lopsided right here, and the fix is mechanical rather than artistic. Every new stem should cross at the same diagonal angle as the ones before it, and the bundle itself rotates in your free hand rather than individual stems twisting inside your grip. A stem added straight instead of on the diagonal breaks that rhythm and the bundle stops turning smoothly. Pull it back out and re-add it at the same angle as everything else.
- For a classic round shape, distribute each flower type or color in a rough triangle as you build. CAE's guide points to this as the way to catch a lopsided result before you tie it off (CAE). The structure underneath that triangle works in three layers: a dense center of focal and secondary stems, a middle layer of secondary stems with a few filler stems spaced more sparsely, and a looser peripheral layer of filler and foliage at the edges (CAE). Build toward that shape as you go. For a deliberately loose, asymmetrical look, treat the triangle as a check rather than a rule.
- Tie it off just above your gripping hand, tight enough to hold the spiral but loose enough for the flowers to still move slightly (Homes & Gardens). Before trimming, hold the bundle against the vase you plan to use: the blooms should sit just above the rim, with enough stem left below the tie to reach the water.
- Trim all stems to the same length once the tie is in place (Homes & Gardens).
The Homes & Gardens florist behind this method trained for nearly eight years and has built hundreds of hand-tied bouquets. She says practice is the key to building confidence here (Homes & Gardens). A slightly uneven first attempt is normal.
How to arrange flowers in a vase
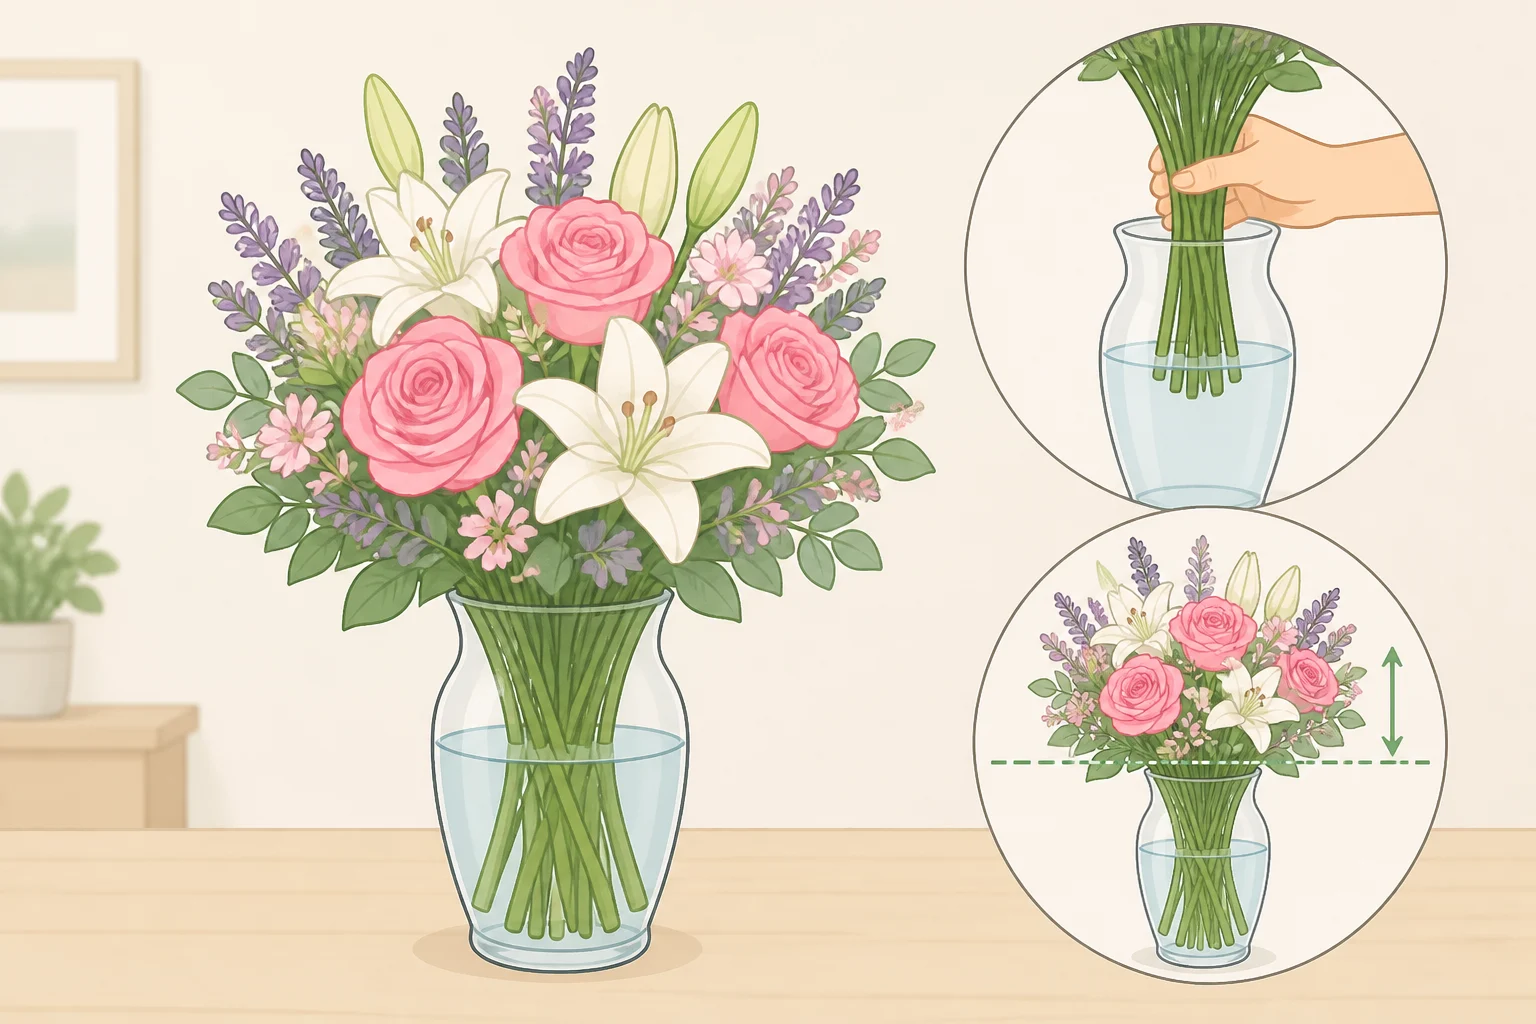
To display the finished bouquet, set it straight into a vase of fresh water. To gift it, wrap it in rustic brown parcel paper and tie it off with a velvet ribbon instead (Homes & Gardens).
Vase choice is partly a maintenance decision, and partly what separates a casual bunch from a chic floral arrangement. Leatham favors square or bubble-shaped vases in black, taupe, or ceramic tones because they hide the water level: "I'm a true believer in putting flowers in a vase and letting them go, so I like vessels that don't show the water as much," he says. Clear glass works too, but it comes with a condition; in his words, you have to commit to changing the water (Good Housekeeping).
For floral centerpiece ideas for a long table, Leatham suggests skipping a single large arrangement in favor of several smaller versions of the same bouquet, or alternating them with candles set at different heights (Good Housekeeping). That's a styling option worth knowing, not a required next step.
Repeating the method with different flowers
The spiral technique and the category formula behind it, one focal flower, a few secondary varieties, a touch of filler, some foliage, stay the same regardless of season. What changes is the flowers themselves, and sometimes the proportions: stem strength, bloom size, and conditioning needs all shift with what's in season. The ranunculus and scabiosa used in the Homes & Gardens demonstration (Homes & Gardens) could just as easily shift into blush and cream, or toward something richer, depending on the season and your own taste. That's a design choice, not a fixed rule tied to the calendar.
Pick up a modest bunch of flowers this week and run through the whole process once, color choice through final trim, before attempting anything meant as a gift. The skill improves through repetition.