How to Brown Ground Beef Properly: Fix Gray, Steamed Meat
Dump ground beef into a hot pan and start breaking it apart right away, and the result rarely looks like the photo in the recipe. Instead of a deep brown crust, the meat turns pale gray and sits in a puddle of its own liquid. Learning how to brown ground beef properly means breaking that habit, at least for the first few minutes of cooking.
Patty Catalano, food editor at The Kitchn, traced the problem to timing in a piece published yesterday. As meat gets broken into smaller pieces too early, moisture escapes and surrounds the beef, cooking it by steam rather than by direct contact with the pan. The beef still finishes safe to eat; it just never develops the color or flavor a proper sear delivers.
Cooking ground beef until it's no longer pink and actually browning it are two different outcomes. Beef can be fully cooked and still gray, which Amanda's Cookin' described two months ago as "beef that got cooked but never got browned." The gap comes down to temperature: the Maillard reaction that produces browning and deeper flavor needs a surface hotter than 300°F, and steam maxes out at 212°F, nowhere near hot enough to trigger it, the same source notes.
Getting a good sear on ground beef comes down to patience: a hot pan, enough room for the meat to breathe, and a few minutes of leaving it alone before reaching for a spatula. This guide covers why gray beef happens, then walks through the exact steps for pan heat, batch size, timing, and a temperature check, so ground beef browns properly every time, whether it's called browning ground beef or browning hamburger meat. Heat needs contact, not crumbles.
Why ground beef turns gray instead of brown
Video of the Day
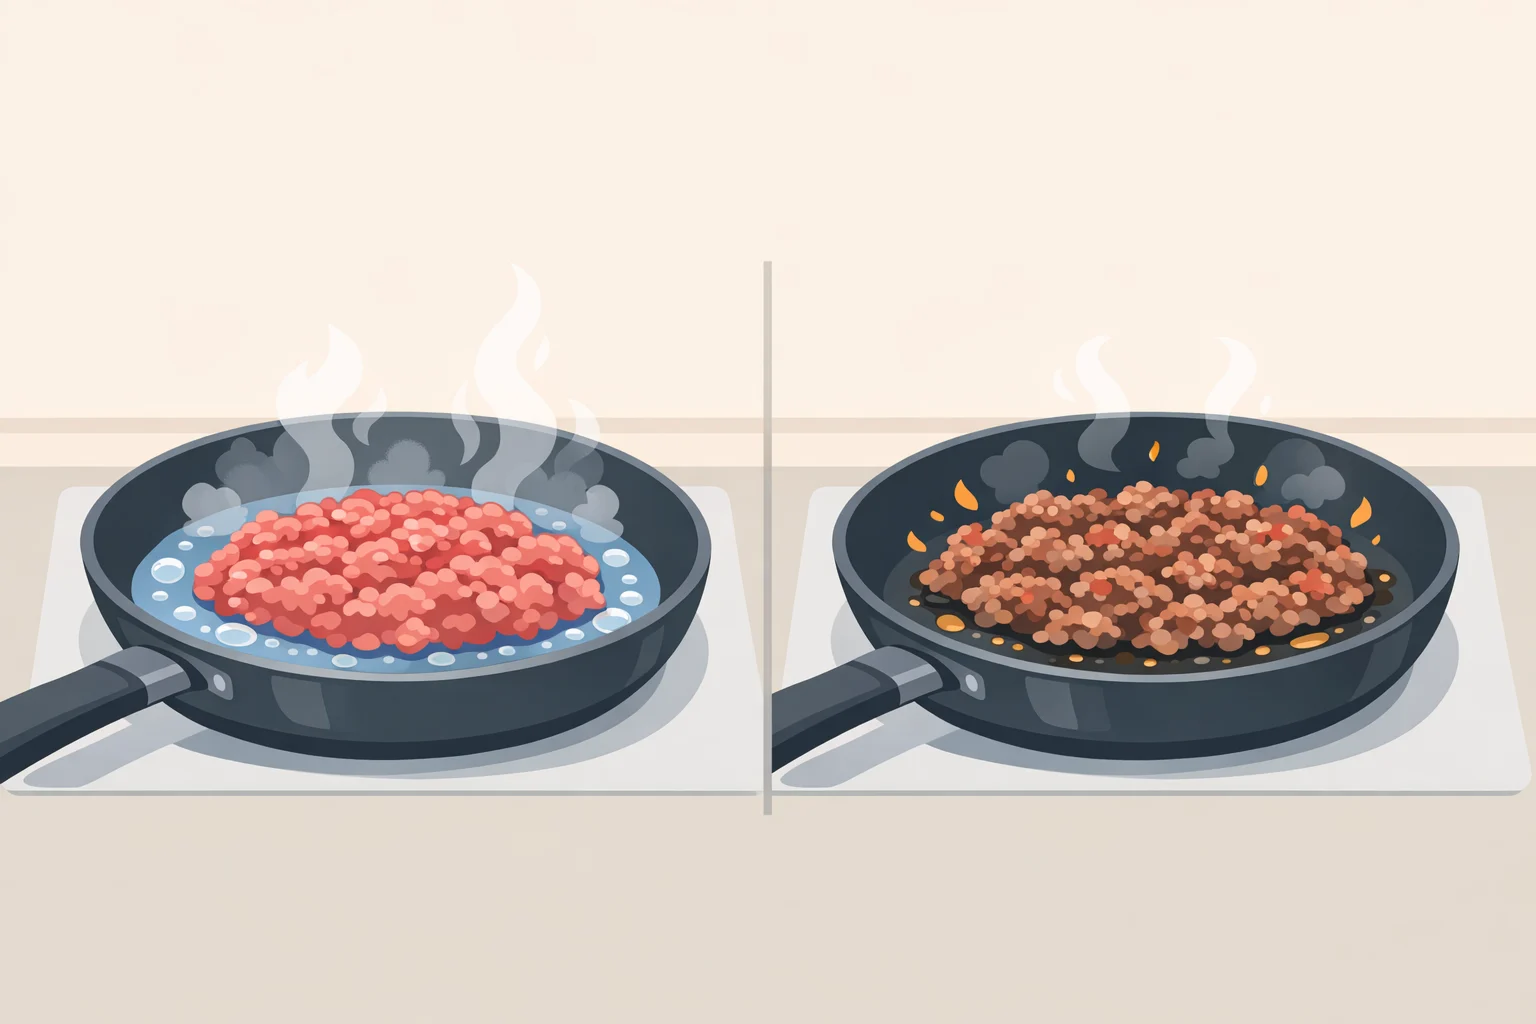
Ground beef holds a fair amount of moisture, and breaking it into small pieces early releases that moisture fast. That moisture surrounds the meat and cooks it by steam instead of direct heat, which is exactly why the dump-and-crumble approach turns beef gray instead of brown, The Kitchn explains. Browning instead depends on the meat staying in sustained, direct contact with a hot, dry surface long enough for the Maillard reaction to build a crust.
A cold pan makes the problem worse no matter how carefully the meat gets handled afterward. If the skillet isn't hot enough when the beef goes in, it starts steaming immediately, The Kitchn notes. The pan needs to be hot before the meat goes in, not brought up to temperature underneath it.
Video of the Day
The best way to brown ground beef starts before it hits the pan
Fat ratio decides a lot before the pan is even involved. Standard 80/20 or 85/15 ground chuck is the versatile choice for browning, with enough fat to sear well without turning soggy, per Amanda's Cookin'. Leaner 90/10 ground sirloin needs a tablespoon of olive oil or another neutral oil to make up for the fat it's missing, while very fatty 73/27 beef tends to release too much liquid for a good crust, the same source notes.
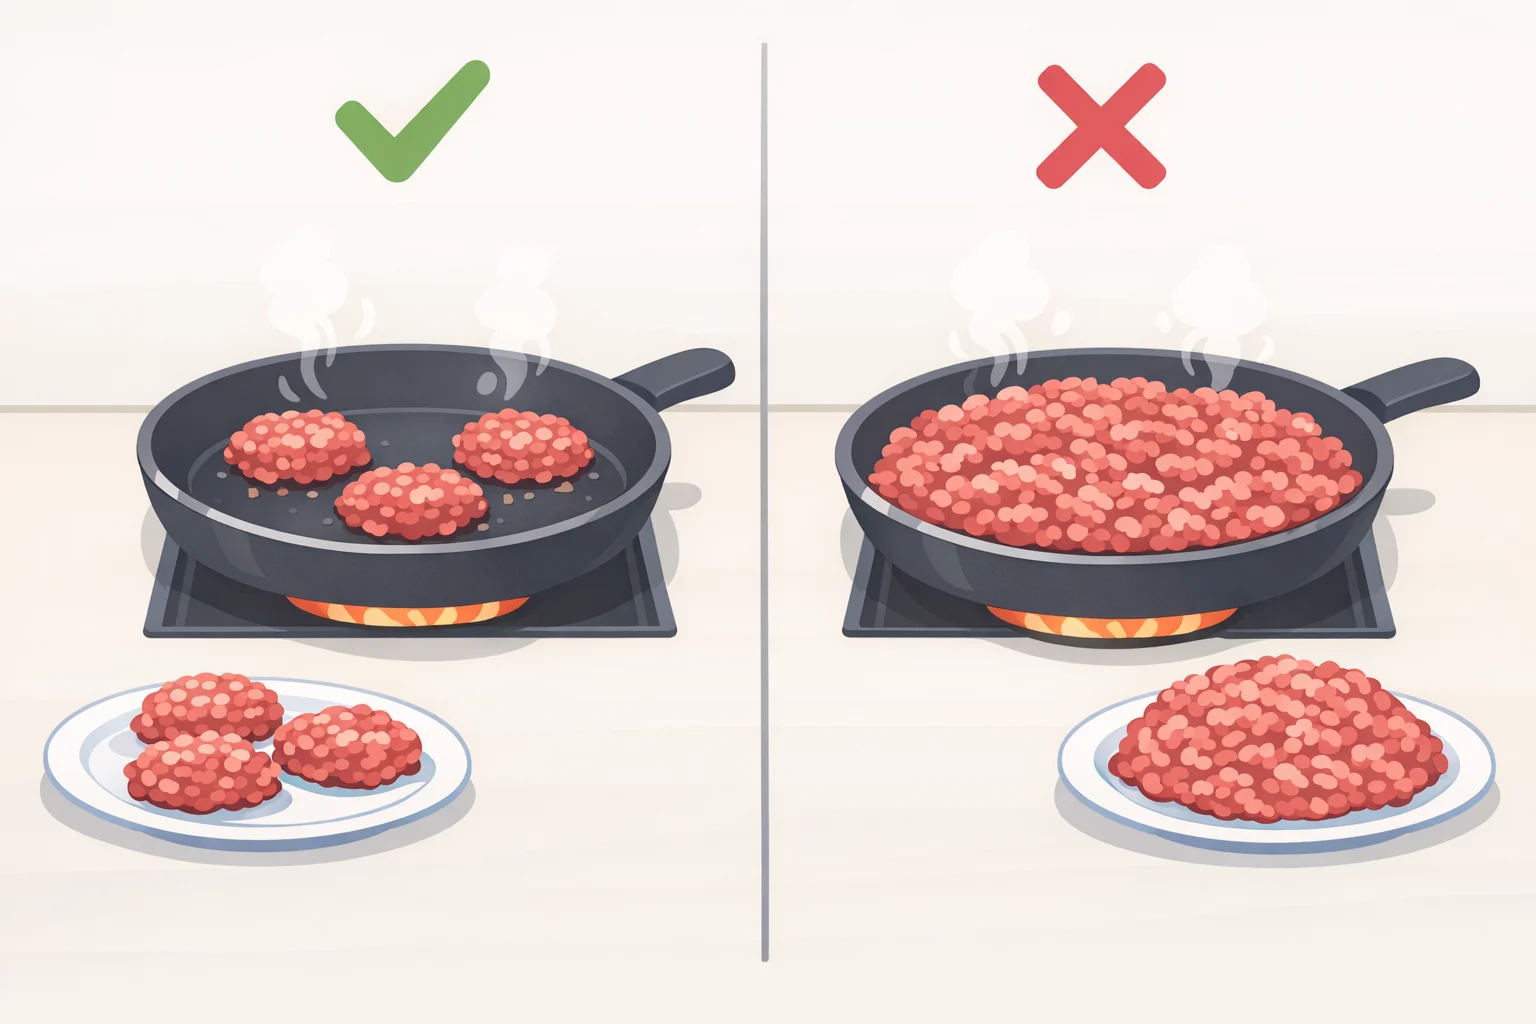
Pan size is the variable most home cooks skip past. A 10-inch skillet handles about a pound of beef well, but trying to brown two pounds at once turns the process into what Amanda's Cookin' calls "a stewing operation" instead of a sear. Anyone cooking more than that should work in batches: sear one portion, move it to a bowl, then repeat with the rest, rather than crowding everything into the pan at once.
Serious Eats used the same logic in 2024 with thin-sliced sirloin for Kenyan beef wet fry, searing the meat in two rounds over high heat specifically to avoid crowding the pan and steaming the beef instead of browning it. The principle carries over directly to ground beef: less meat per batch means more contact with the hot surface, which means a better crust.
Thaw state matters too. Cooking straight from frozen isn't recommended for proper browning, but even a 30-minute soak in cold water makes a noticeable difference in how well the meat sears afterward, according to Amanda's Cookin'. Get the fat ratio, batch size, and thaw right, and the technique below works the way it's supposed to.
How to brown ground beef properly, step by step
-
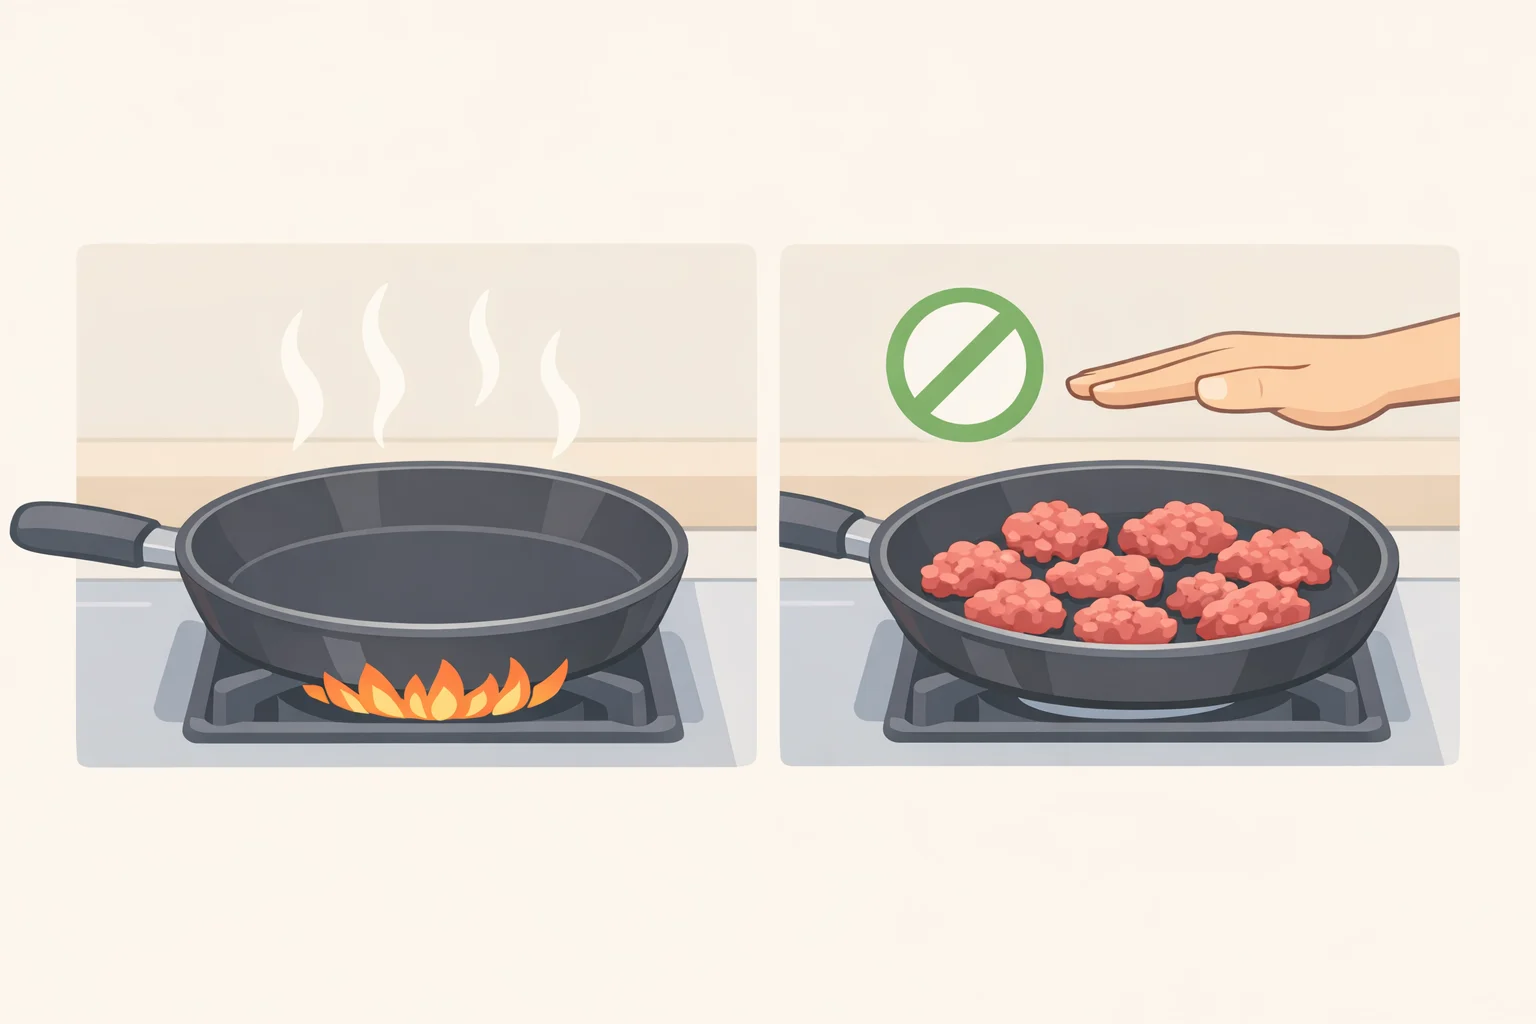
Preheat the pan properly. Heat the skillet over medium-high until a few drops of water flicked onto the surface evaporate within a second or two. That's a rough but reliable sign the pan has reached searing temperature (Amanda's Cookin').
-
Add the beef in large chunks, not crumbles. Use no more than about a pound per 10-inch skillet, and resist the urge to break it apart the second it hits the pan.
-
Leave it undisturbed for 2 to 4 minutes. Don't stir it, don't poke it, don't check on it every thirty seconds. This is the step most people skip, and it's the one that lets a crust form instead of steam (Amanda's Cookin'). A confident sizzle is a good sign; a quiet hiss or visible steam means the heat is too low.
-
Check for browning, then flip. Lift the edge of a chunk with a spatula. Once it's browned underneath, flip each piece to sear the other side for another 2 to 3 minutes (Amanda's Cookin').
-
Break it up and finish cooking. Crumble the beef to whatever texture the recipe calls for and cook another 2 to 3 minutes, until no pink remains.
-
Season after browning, not before. Salt draws water out of meat through osmosis, so holding off until after the beef has browned avoids working against the sear (Amanda's Cookin'). That's a practical kitchen guideline rather than a controlled scientific finding, but it lines up with everything else in the process.
Fixing the most common causes of gray beef
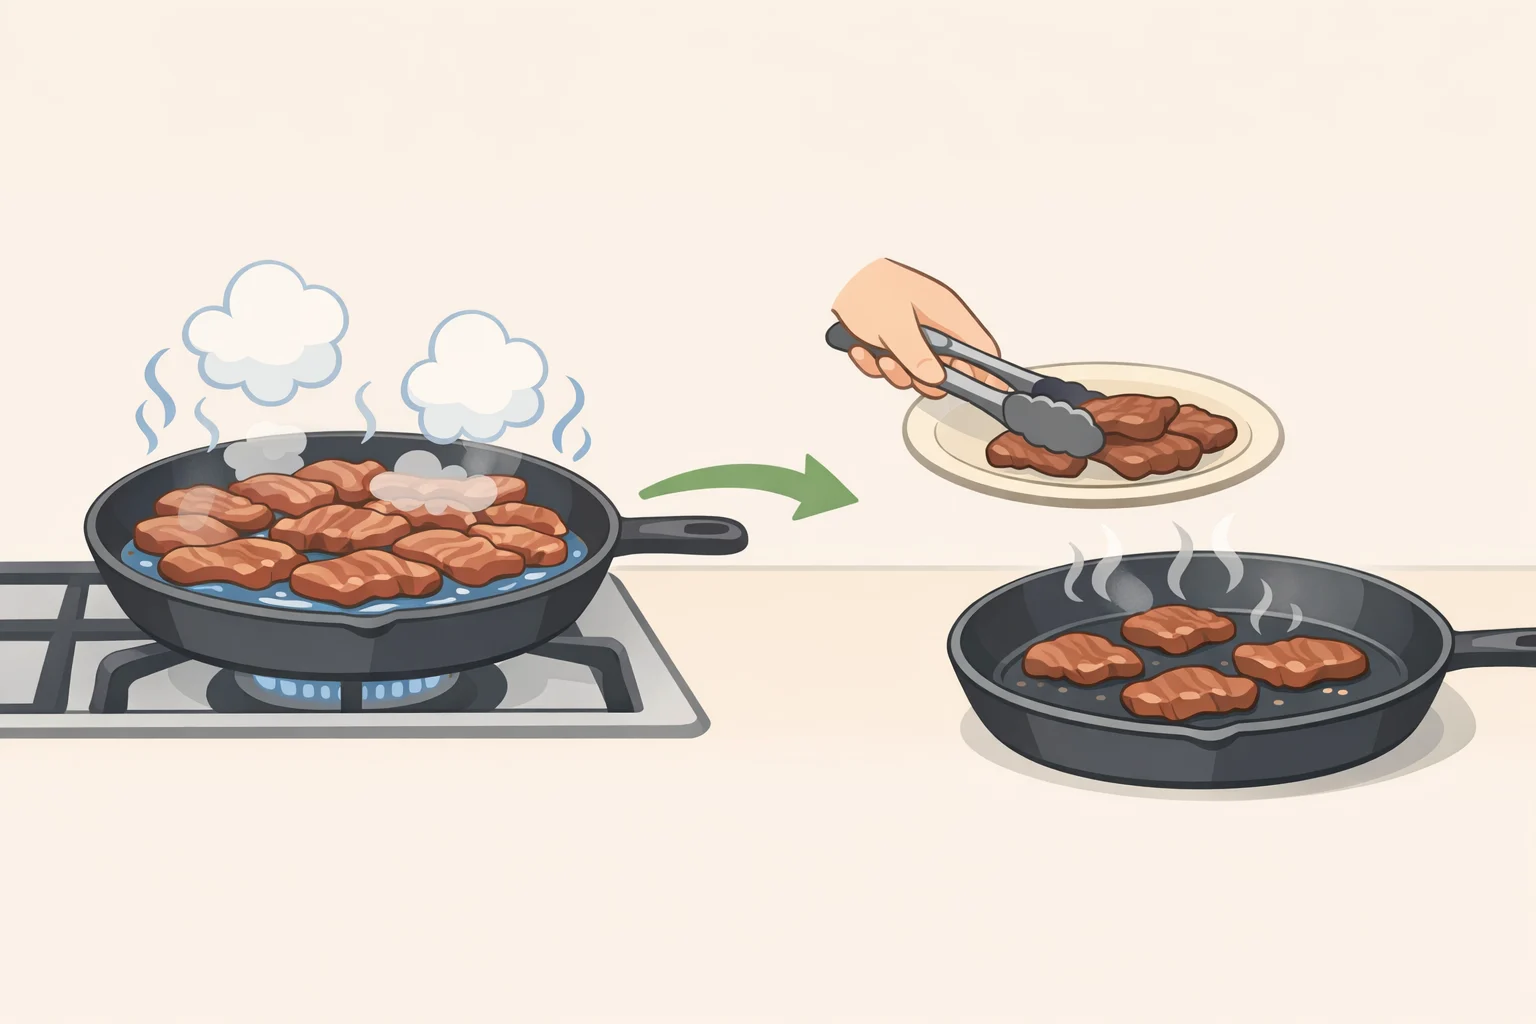
If beef keeps coming out gray no matter what, the cause is almost always one of a handful of habits, according to Amanda's Cookin'. An overcrowded pan is the most common culprit, since too much meat in too little space traps steam regardless of how hot the burner runs. If liquid is pooling despite everything else being right, pull some meat out to a plate, let the rest finish searing, and cook the extra as a second batch instead of pushing through one crowded pan.
A pan that never fully preheated is the second culprit. "Medium-high" needs to mean medium-high the whole time, not medium drifting toward low once the meat goes in, Amanda's Cookin' points out. Keeping ground beef from steaming comes down to holding that heat steady, not cranking it up at the start and hoping it lasts through the whole batch.
Once the beef is browned, skip the instinct to rinse it under water to cut the grease. That step washes away the crust and flavor that just took several minutes to build, per Amanda's Cookin'.
The same technique applies to ground turkey and chicken, with one caveat. Poultry has far less fat and moisture than beef, so it browns faster and can dry out more easily if left too long, Amanda's Cookin' advises. For poultry, lean on the appropriate safe minimum temperature rather than timing or color to judge whether it's done.
Browned ground beef vs. cooked ground beef: what temperature actually means
Browning is a flavor and appearance issue. Doneness is a safety issue. The two are related but not interchangeable, and USDA FSIS is blunt about the distinction: color and texture are not reliable indicators of whether ground beef is safe to eat. Some ground beef turns brown before it's actually safe. Other, leaner beef can stay pink well past the point where it's fully cooked.
That warning isn't new. A 1995 Kansas State University study cited by USDA FSIS found that more than 25% of fresh ground beef patties turned brown before reaching a safe internal temperature of 160°F. That finding is why FSIS moved away from recommending a visual check for doneness decades ago, and it's the same reason FoodSafety.gov still points to a thermometer, not color, as the standard, in guidance last reviewed in late 2024. The safe minimum internal temperature for ground beef sits at 160°F (71°C), verified with a food thermometer inserted into the thickest part of the meat.
Since ground beef breaks into uneven pieces once it's crumbled, get a reliable reading by checking one of the thicker chunks before it's fully broken apart, and take a second reading in a different spot if the first one looks off, USDA FSIS advises.
Ground beef's food safety guidance is stricter than what applies to a solid cut like a steak. USDA points to a string of E. coli O157:H7 outbreaks going back to 1982, traced to undercooked ground beef as the primary source of infection, which led the agency to declare the pathogen an adulterant in raw ground beef in 1994 (USDA FSIS). That history is the reason a thermometer, not a glance at the color, remains the standard for confirming ground beef is safe to eat.
Once the beef is browned and cooked through, dealing with the rendered fat matters too. Tilt the pan and spoon it into a heatproof container, or pour the contents through a colander set over a bowl (Amanda's Cookin'). Never pour it down the drain, since it solidifies as it cools and can clog pipes, the same source warns. If a batch releases more liquid than expected partway through cooking, spoon some off right then rather than waiting until the end, so the rest of the meat keeps browning instead of simmering in its own runoff.
Leftovers keep well after that. Refrigerate browned beef in an airtight container for three to four days, or freeze it for three to four months, labeled with the date (Amanda's Cookin').
Getting a good sear, every time
Browning ground beef isn't complicated once the pan, batch size, and patience line up. The payoff is flavor: a deeper, meatier taste that steamed gray beef never develops, no matter how long it sits in the pan.
Color still won't tell the whole story. A thermometer reading of 160°F is the only way to confirm the crumbles are actually safe, no matter how good the crust looks. If the pan is crowded or the beef is still releasing liquid after several minutes, cook the next batch in two rounds instead of forcing it through in one.