How to Start Dusting Your House: Top to Bottom, Vacuum Last
Follow this sequence and you'll never have to re-clean a surface you've already finished.
The single most effective thing you can do to improve your dusting is change the order you do it in. Start high, move left to right, vacuum last. That's the whole system. Everything in this guide is just the detail work underneath those three principles.
Reaching for the vacuum first is the most common mistake professionals see. Dust displaced from higher surfaces falls directly onto floors that were just cleaned, forcing a second pass (Good Housekeeping, March 2026). Gravity is not optional. Work with it.
This guide walks through the complete dusting sequence: what to grab before you start, a step-by-step room order that works every time, and a condensed version for shorter sessions.
The 30-second dusting order
Video of the Day
Before the detailed steps, here's the sequence at a glance:
- Ceiling fans, light fixtures, tops of door frames
- Mid-level surfaces: shelves, furniture, blinds, electronics, upholstery enter at the doorway, left to right, top to bottom
- Low zone: baseboards, behind and under furniture
- Vacuum last floors, baseboards, vents
Don't vacuum first. Don't start in the middle of the room. The sequence is the method.
Video of the Day
Before you start: tools and two prep moves
What you need:
- Two to three clean microfiber cloths, lightly misted with water. Damp cloths trap dust rather than pushing it around or generating static that attracts more; a dry cloth often does both of those things (NBC Select, August 2025)
- An extendable duster for ceiling fans and high ledges
- A vacuum with a brush attachment not used until the final step
Fresh tools matter. A dirty or loaded cloth redistributes dust onto already-cleaned surfaces. Start each session with clean cloths and fold to a fresh section when the surface you're using turns visibly grey. Even a duster that looks clean likely holds microscopic particles from the last session (NBC Select, August 2025).
One more thing on microfiber: wash reusable cloths without fabric softener. Softener degrades the electrostatic properties that make microfiber effective at trapping particles rather than redistributing them (Bob Vila, April 2022).
Two prep moves:
- Declutter shelves and tabletops before you start. Fewer objects means faster, more thorough coverage, and fewer places for dust to resettle afterward (Bob Vila, April 2022)
- Keep windows closed. Open windows introduce outdoor pollen and particulates mid-session, adding to the problem you're solving (NBC Select, August 2025)
Note if your home was built before 1978: Household dust in older homes may contain lead from deteriorating paint. The EPA specifically recommends wet-cloth cleaning not dry dusting or dry sweeping to avoid dispersing lead particles back into the air (EPA, updated November 2025). This guide uses damp microfiber throughout, which satisfies that requirement.
Step 1 Clear the high zone first
Target: ceiling fans, light fixtures, tops of door frames, upper cabinet surfaces, wall vents
Gravity is doing half the work. Dust knocked off a ceiling fan blade lands on the bookshelf. Dust from the bookshelf lands on the floor. The floor gets vacuumed last. Start anywhere else and you're cleaning surfaces twice.
Ceiling fans, tops of door frames, light fixtures, and room corners near the ceiling are where dust accumulates heaviest precisely because they're inconvenient and rarely disturbed. Ignoring them allows layers to compact over time into clumps that go airborne when finally disturbed (Martha Stewart, January 2026; NBC Select, August 2025). Hard-to-reach spots like ceiling fans and tops of cabinets don't need weekly attention a monthly pass is the standard recommendation, while high-traffic and frequently touched surfaces should be done weekly (Real Simple, June 2025).
High-zone order:
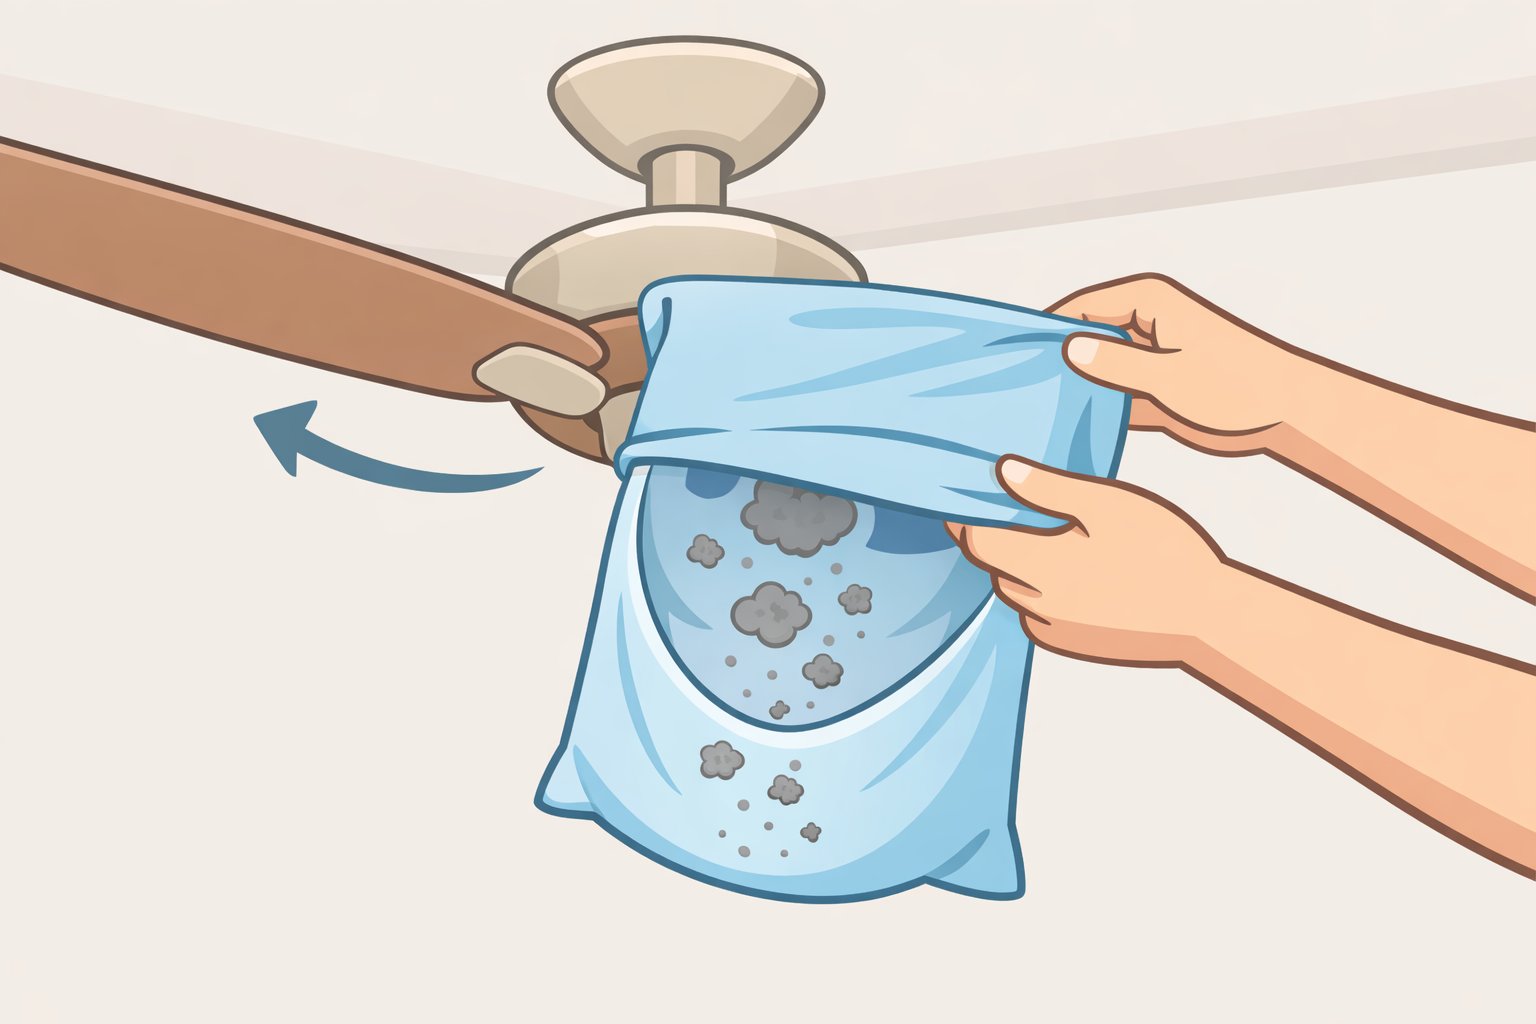
- Ceiling corners and ceiling-mounted light fixtures extendable duster, steady strokes in one direction
- Ceiling fan blades slide an old pillowcase over each blade and pull back. This traps debris instead of scattering it across the room (BHG, February 2024)
- Tops of door frames, curtain rods, and upper cabinet surfaces
- Wall vents and air registers use the brush attachment of a vacuum here if buildup is heavy
⚠ Popcorn ceilings in pre-1985 homes may contain asbestos. Do not disturb the surface. Have it tested before any cleaning (Bob Vila, April 2022).
Step 2 Where to start dusting a room: mid-level surfaces, left to right
Target: shelving, furniture, electronics, upholstery, blinds, and lampshades
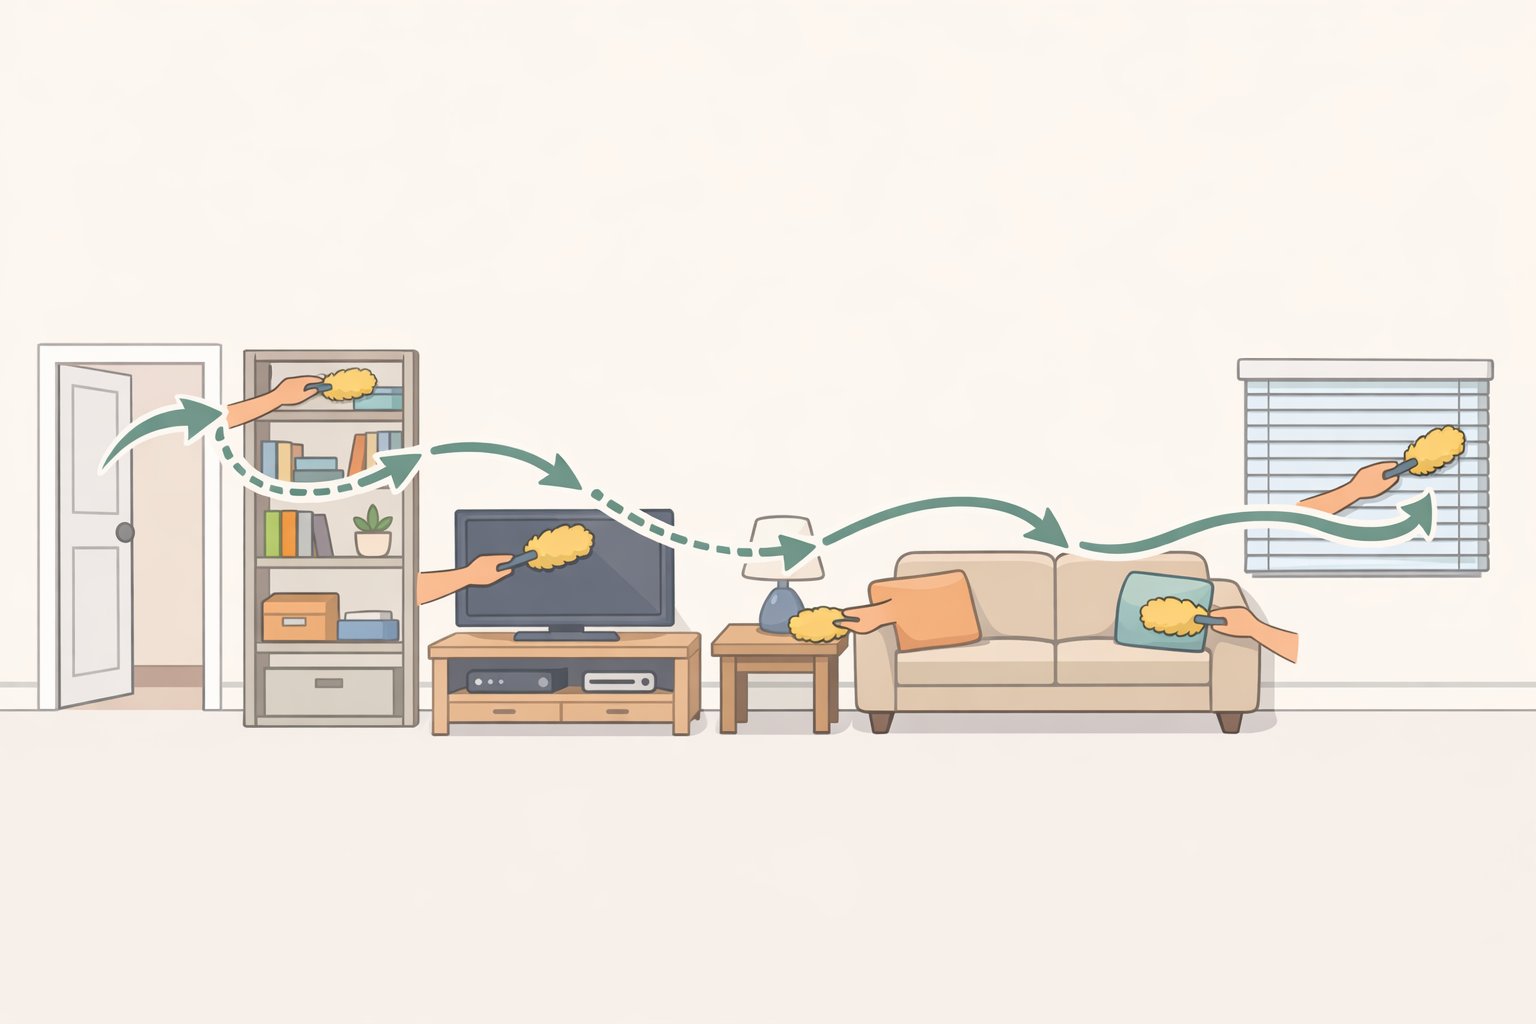
Enter at the doorway. Start on the left side. Work top to bottom and left to right across the room until the circuit is complete. This is the method Jena Touray of The Maids recommends, and the reason is simple: it's systematic. You cannot accidentally skip a surface or re-dirty something already cleaned (Martha Stewart, January 2026).
Moving in one direction not back and forth keeps dust traveling forward onto uncleaned surfaces rather than redistributing it across finished areas (NBC Select, August 2025). And don't limit the pass to flat surfaces. Dust settles on vertical ones too cabinet doors, sides of appliances, wall-switch plates. Missing those leaves a meaningful portion of what's present (The Spruce, December 2024).
Mid-level order and technique notes:
-
Shelving and bookcases remove objects, wipe each one, wipe the shelf surface underneath. The area directly beneath an object is where dust concentrates most.
-
Picture frames, mirrors, wall-mounted items dust horizontal ledges and frame edges; vertical surfaces collect more than they appear to.
-
Tabletops, desks, counters fold the cloth flat, keep it in full contact with the surface, move in horizontal strokes. Don't flick the cloth; flicking releases captured dust back into the air (Martha Stewart, January 2026).
-
Blinds close slats in one direction, dust, then close them the opposite way and dust again (Martha Stewart, January 2026). Wipe a dryer sheet along the slats afterward; the light residue it leaves helps repel static-driven dust accumulation (Martha Stewart, January 2026).
-
Lampshades use a lint roller. A damp cloth smears fabric shades.
-
Electronics and screens use a dry microfiber cloth on screens. For TV screens specifically, a dryer sheet works well and leaves a static-repelling film. Keep moisture away from all electronics, and follow manufacturer instructions if there's any doubt.
-
Wood furniture wipe with the grain, never against it, using a barely damp cloth. Apply any polish or cleaner to the cloth first, never directly to the surface (Amish Furniture Factory, September 2025). Follow immediately with a dry cloth to avoid moisture damage.
-
Upholstered furniture surfaces a lightly damp cloth or lint roller. Dust mites concentrate in bedding, upholstery, and curtains rather than on hard surfaces, so these warrant a thorough pass (NBC Select, August 2025).
For carved furniture, keyboard keys, or slatted surfaces where a cloth can't reach: a soft-bristle paintbrush, slightly damp, gets into grooves without scratching (Martha Stewart, January 2026).
Step 3 Clear the low zone and vacuum last
Target: baseboards, behind and under furniture, appliances, floors
Any dust displaced from higher surfaces during Steps 1 and 2 has now had time to settle. Clear the low zone before the vacuum comes out.
Behind and beneath large furniture sofas, beds, appliances is where dust accumulates most heavily and is most consistently skipped. Marla Mock of Molly Maid specifically names under-bed, under-sofa, and behind-appliance zones as the areas that lead to the most serious long-term accumulation (Martha Stewart, January 2026). Baseboards need a quick damp-cloth pass; a dryer sheet wiped along them afterward leaves a film that slows future dust adhesion (The Kitchn, November 2025).
Low-zone order:
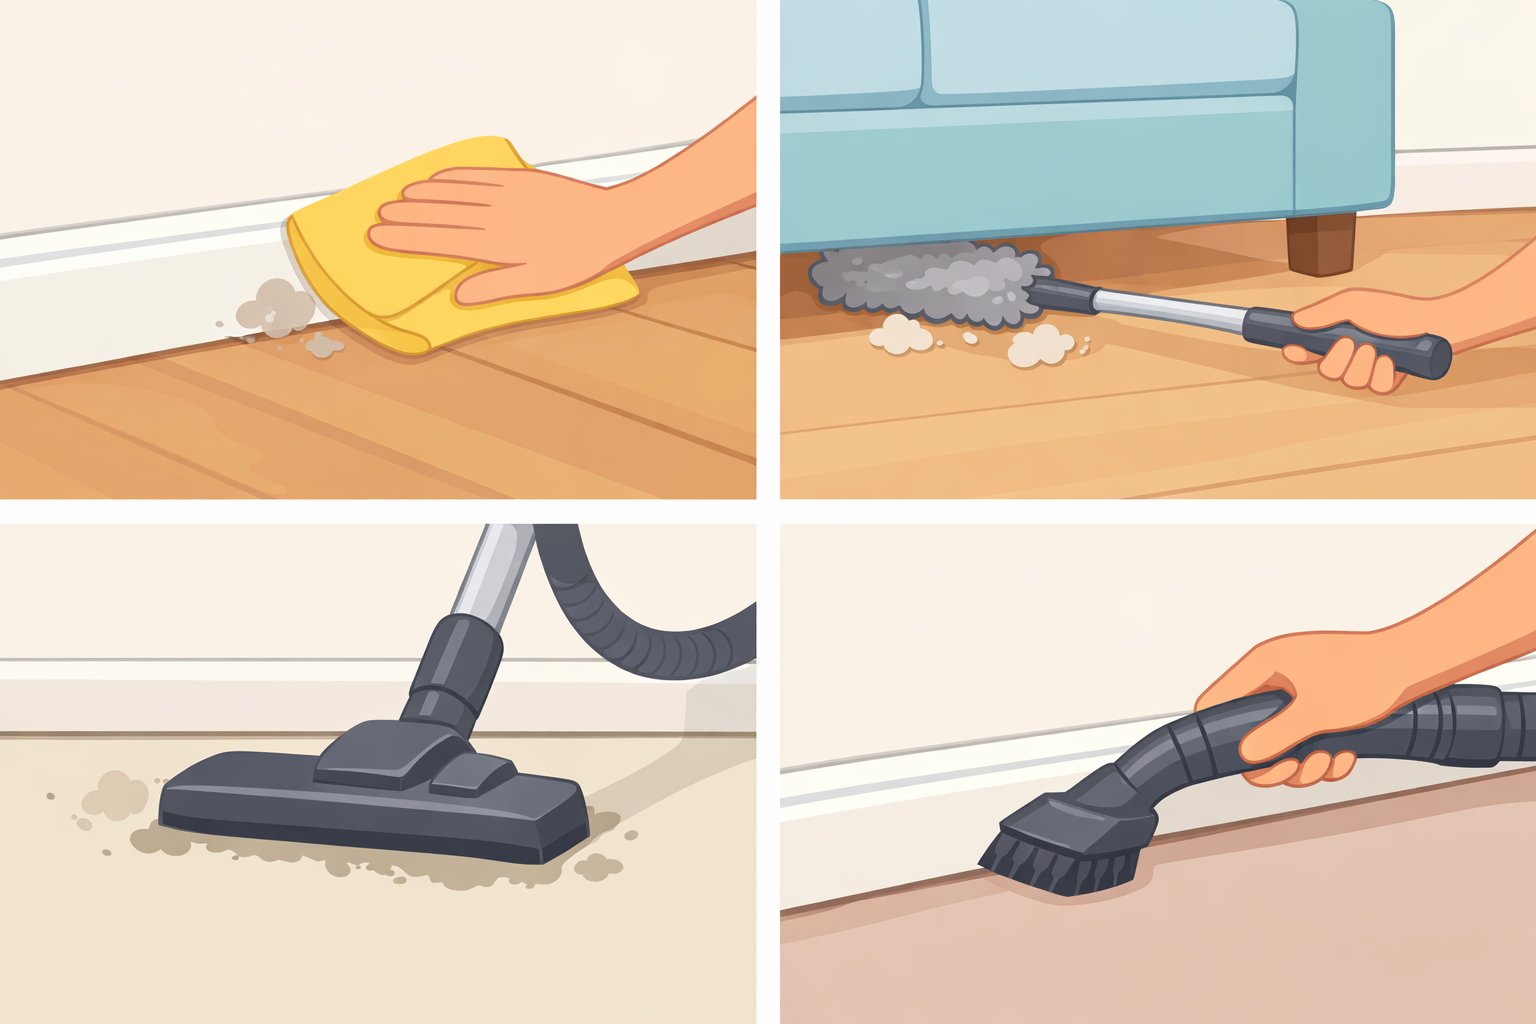
- Baseboards damp cloth, one direction
- Low door frames and light switches
- Pull large furniture forward where possible and dust the floor zone behind it
- Under-bed and under-sofa areas a dust mop with a synthetic cover reaches gaps too low for a vacuum attachment (Martha Stewart, January 2026)
Now vacuum. Run the vacuum over all floor surfaces. Use the brush attachment on baseboards and floor-level vents. Dusting first means the vacuum is capturing everything dislodged during the session not just pre-existing floor debris. Dust first, vacuum last: this sequence is the consistent recommendation across every major cleaning source in this research (Real Simple, June 2025; Good Housekeeping, March 2026).
Keeping dust under control between sessions
The dusting sequence above is the main event. What follows reduces how fast dust returns which means your next session will be faster than this one.
Root causes worth addressing:
- HVAC filters are a primary driver of indoor dust levels. Change them every three to six months in standard households, every two months in homes with pets or allergy sufferers (Martha Stewart, January 2026)
- Leaky doors and windows are among the leading causes of excess indoor dust, allowing fine outdoor particles to infiltrate continuously. If your home seems unusually dusty, check the seals before looking for other explanations (Martha Stewart, January 2026)
- Shoes and doormats removing shoes at the door and using mats on both sides of entryways prevents tracked-in soil from circulating through the home (EPA, updated November 2025)
- Bedding is a leading source of household dust; weekly washing in hot water keeps it from becoming a major contributor between sessions (Martha Stewart, January 2026)
- Humidity control affects dust mites specifically: mite populations drop significantly when indoor humidity stays consistently below 50% (NBC Select, August 2025)
If you only have 15 minutes: Hit the high dust magnets first ceiling fan, tops of door frames, any heavily loaded shelving then move to mid-level horizontal surfaces, then vacuum high-traffic floor zones. You won't finish the room, but you'll remove the bulk of what's there without sending it back into circulation.
The method in five lines
- Start at the highest point in the room ceiling fan, light fixtures, tops of door frames
- Enter at the doorway, work left to right, top to bottom across mid-level surfaces
- Clear the low zone: baseboards, behind and under furniture
- Vacuum last floors, baseboards, vents
- Use a lightly damp microfiber cloth throughout; fold to a clean section when it loads up
Weekly dusting is the standard baseline. Homes with pets or allergy sufferers benefit from more frequent passes on high-traffic areas (BHG, February 2024; NBC Select, August 2025). A lightly damp microfiber cloth outperforms every alternative dry cloths push dust around, feather dusters scatter it, damp microfiber captures and holds it (Martha Stewart, January 2026; NBC Select, August 2025).
Do this in order once, and the next time through the same room will take noticeably less effort. That's what a repeatable system gets you.