
Rolled sugar cookies, made with a classic, chilled sugar cookie dough, are great for holding shapes. The dough is nothing but the basics—butter, sugar, flour, a touch of vanilla—yet within this simplicity lies the magic that makes rolled sugar cookies a canvas for endless possibilities.
Royal icing is equally versatile and ideal for creative cookies. It's made simply with powdered sugar, egg whites and sometimes lemon juice or water. The key characteristic of royal icing is its ability to dry into a hard, smooth finish, making it just right for decorating cookies.
Video of the Day
Whether you're celebrating a special occasion or simply indulging in a moment of joy, our love letter–shaped cookies are here to make every bite memorable. Share them with someone special, or treat yourself. Let these cookies be a delicious reminder that love comes in various shapes—even, sometimes, in the form of a sweet, edible love letter!
Things You'll Need
Stand mixer
Parchment paper
Rolling pin
Rectangular cooker cutter, optional
Knife
Ruler
2 baking sheets
Wire rack
2 mixing bowls for royal icing
Small-tip squeeze bottle or piping bags
¾ cup butter
1 cup granulated sugar
1 tsp vanilla extract
1 egg, large
3 cups all-purpose flour
3 egg whites
1 lb. powdered sugar
1 tsp. vanilla extract
2 tsp. lemon juice, optional
Red food coloring
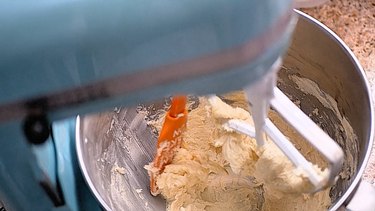
1. Cream the butter, sugar and vanilla
In a stand mixer, cream the butter, granulated sugar and 1 tsp. vanilla together until fluffy.
2. Scrape down sides of bowl
Scrape down sides of bowl to make sure all the ingredients are mixed properly.
3. Add egg and whip
Add one whole egg and whip until fluffy.

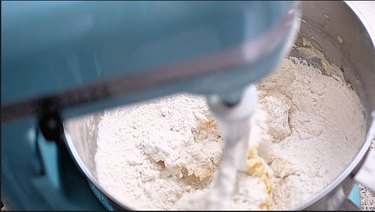
4. Add the flour
Add the flour, then mix on low until just incorporated. Be careful not to overmix.
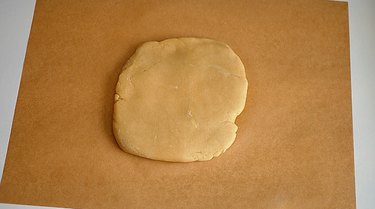
5. Chill the dough
Shape the dough into a flat disk (greater surface area helps it chill faster) and chill in the fridge for 30 minutes to 1 hour, so it will be easier to roll out.
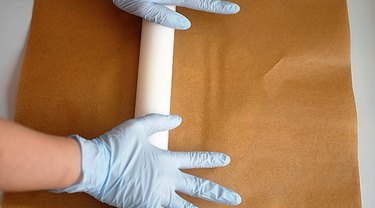
Roll out cookie dough between sheets of parchment paper so the dough doesn't stick to your rolling pin. Alternatively, you can sprinkle flour on a counter or other flat surface before rolling.
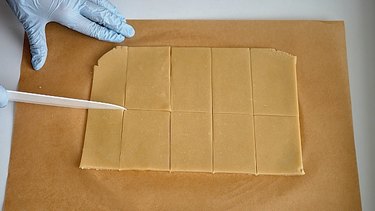
7. Measure rectangles
Trim straight edges on the rolled-out dough with a knife. Use a ruler and the knife to mark rectangles. We chose 2" x 3" rectangles, but you can make them any size you like. Alternatively, you can use a rectangular cookie cutter.

Cut the dough into rectangles and bake on two cookie sheets at 350°F until edges start to brown, about 10 to 12 minutes. Cool cookies completely on wire racks.
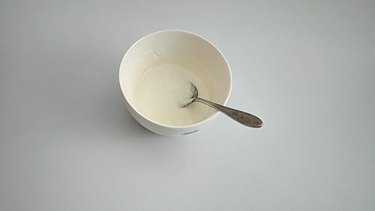
9. Mix icing
Beat three egg whites in the mixer until they are frothy. Run mixer on low speed and gradually add powdered sugar and 1 tsp. vanilla to incorporate. Mix on medium-high speed until stiff peaks form. Divide icing into two bowls.
Tip
Add 2 tsp. of lemon juice to your icing, if desired.
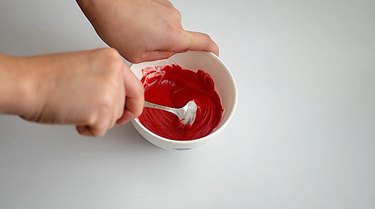
10. Make red icing
Add red food coloring to one bowl of the icing and mix to the desired shade.
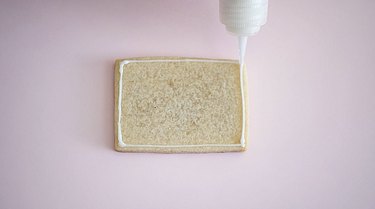
11. Pipe white icing border
Fill a small-tip squeeze bottle or piping bag with white icing, and pipe a border around edges of cookie.
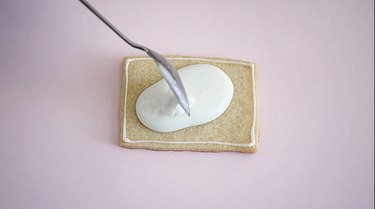
12. Fill in icing
Spoon in more white icing within the border.
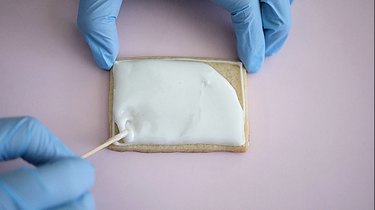
13. Spread icing
Use a toothpick to spread out the icing to the border.
14. Shake icing
Shake cookie gently to smooth out icing. Let dry 1 to 2 hours.

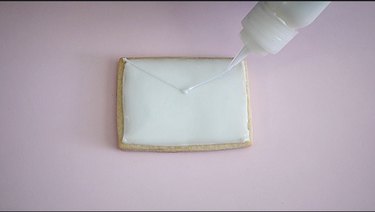
15. Add "envelope" lines
Pipe lines of white icing to simulate the flap and seams of an envelope. Let dry 1 to 2 hours.
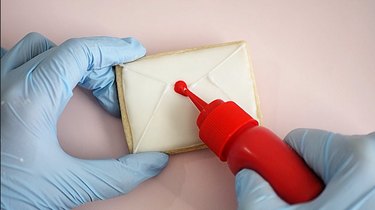
16. Pipe heart
Pipe a red heart in center of cookie to "seal" the envelope.
Let the decorated cookies dry fully overnight (8 hours or more). Enjoy!