
Mirror tiles are one of the most popular craft trends on social media. On TikTok, we've seen makers create everything from macrame disco ball wall hangings to mirror-tiled wall decor. Perhaps one of the most popular DIY projects of the moment, though, is the viral disco ball mirror, which makes for some truly dazzling home decor.
Disco ball mirrors are typically created with a Styrofoam base that's cut and carved to create a one-of-a-kind frame and then bedazzled in mirror tiles. But that's not the only way to create this trending craft. We tested several techniques and found that papier-mâché works just as well—and is loads of fun.
Video of the Day
Video of the Day
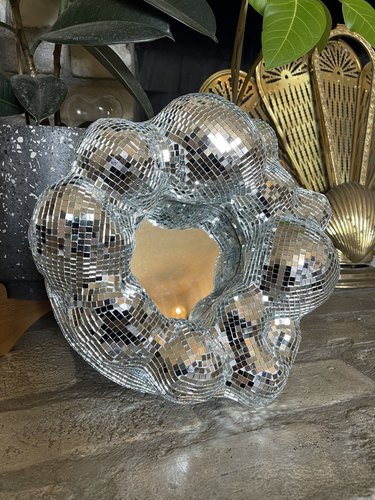
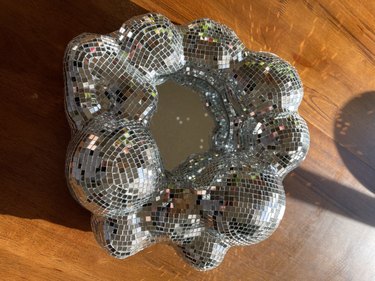
Part paper craft, the beauty of this papier-mâché mirror is that you can use upcycled materials (think: an old picture frame or framed mirror, leftover birthday party balloons, strips of magazines and newspapers) in the process. Once complete, you're left with a sparkling, trendy wall mirror that can be displayed alongside your favorite pieces of wall art or set on a shelf to brighten any space. We even placed ours on a tabletop alongside flowers to create a fun centerpiece. The options are endless!
When you're ready to get your sparkle on, check out our step-by-step tutorial for creating a one-of-a-kind, handmade disco ball mirror.
Things You'll Need
An old framed mirror, or 8-in. round craft mirror and 12-in. round piece of wood
3 self-adhesive disco mirror tile sheets (or more if your upcycled mirror is larger than 12 in.)
E6000 glue (optional)
2 rolls of masking tape
Strips of paper from old magazines, catalogs or newspapers
Cut-resistant gloves (optional)
Baking soda
Paintbrush
How to make a Disco Ball Mirror:
1. Glue craft mirror to wooden round
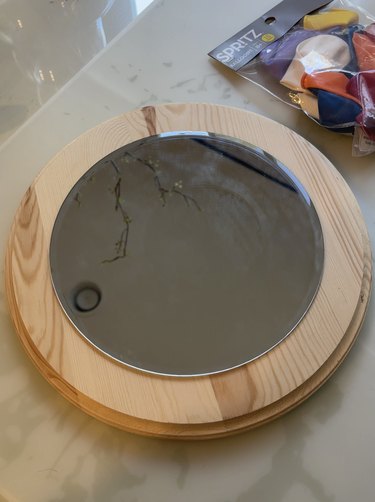
If you're not using an upcycled mirror for this project, start by creating the mirror base. Take an 8-in. craft mirror and apply hot glue to the back. Then, place the mirror at the center of the base and press down gently (after all, the mirror is breakable!) to secure it in place.
2. Blow up balloons and tape along frame
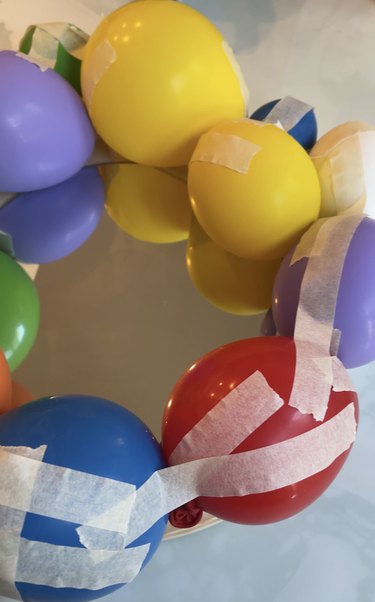
Once the base is prepped and ready, reach for party balloons and blow up a few in different sizes. This is where you can have fun with customization. Add clusters of small balloons nestled next to a larger balloon. Use masking tape to secure down the inflation outlets and then place strips of tape across the sides to secure as desired. (Otherwise, the balloons will float upward.)
3. Cover balloons and frame in masking tape
When the balloons are secured in place, cover the frame and balloons with small strips of masking tape. This step helps create a protective barrier and base for the papier-mâché and allows you to start playing with overall sculptural aspects of the mirror. Stretch strips of tape across two balloons to connect them further and create more of a "wall" along the side of the frame.
4. Mix papier-mâché paste
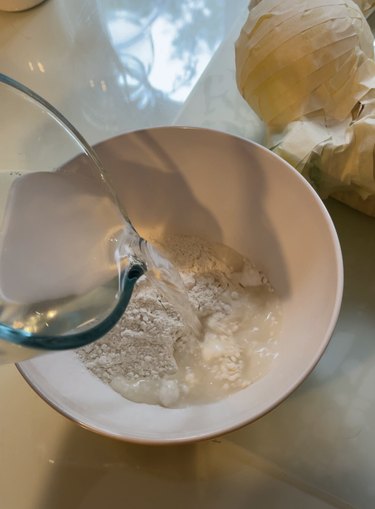
To create a DIY papier-mâché paste, mix equal parts all-purpose flour and warm water. The resulting consistency should be pastelike, so if it is too watery or too thick, consider adding more flour or more water until it reaches the desired consistency.
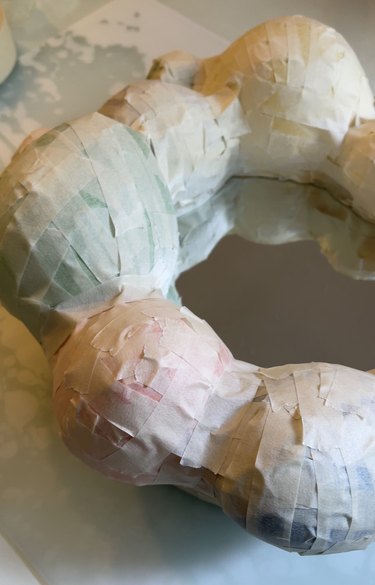
5. Apply two layers of papier-mâché
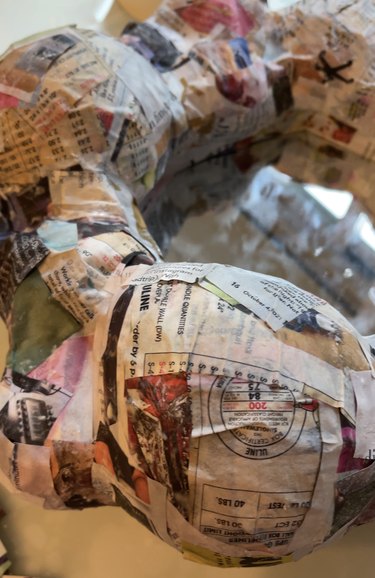
At this point, the balloon mirror frame will feel a bit flimsy with only masking tape keeping it intact. Add durability by applying two layers of papier-mâché to the frame, allowing it to dry between layers. Start by dunking a strip of old magazine paper (newspaper and catalog paper also work well) into the papier-mâché paste. Remove the excess paste with your fingers so the strip is coated (but not dripping). Lay the strip flat across the masking tape surface. Repeat until all masking tape is covered in one layer of papier-mâché.
The more layers of papier-mâché added, the more durable the frame will be. With this in mind, wait for the first papier-mâché layer to dry and then follow the same steps to apply a second coat. Let this layer dry before moving on to the next step.
6. Cover balloon frame in air-dry clay
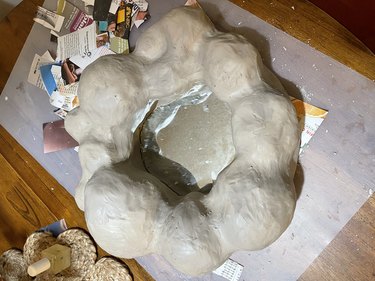
When making a papier-mâché mirror, the key is to make it as durable as possible—it is a hollow papier-mâché sculpture, after all. For added stability, include a layer of air-dry clay, which creates a stronger base.
To apply air-dry clay, break off small pieces and roll them flat with your palms. Place a sheet of clay onto the papier-mâché frame and gently blend the edges to the base using your thumb to keep it in place. Then, add another piece of clay and blend the edges into the base and previous clay piece for a smooth finish. Continue this process until the entire base is covered in air-dry clay.
Tip
If you don’t have air-dry clay, add one to two more layers of papier-mâché (for a total of three to four layers). Alternatively, make your own papier-mâché clay to add durability to the mirror structure.
7. Paint with acrylic paint and baking soda mixture
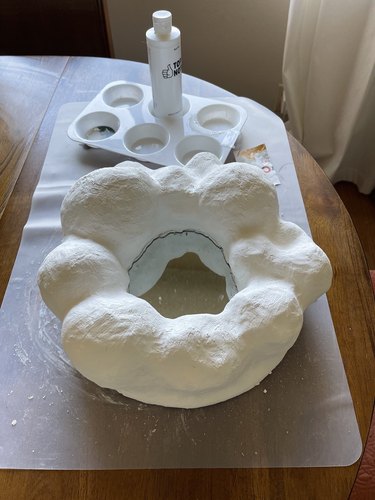
The last step in prepping the base for disco tiles is to apply a coat of acrylic paint mixed with baking soda. This mixture creates a plasterlike consistency that we love to use on our papier-mâché projects because it allows for more durability, can help fill in any gaps or cracks (especially if the air-dry clay cracked a bit while drying), and has a textured finish that mirror tiles easily stick to.
Mix one part baking soda with two parts acrylic paint and blend it together with a paintbrush. Apply the paint mixture to the mirror frame in thick globs, smoothing it with even brushstrokes. If you have cracks to fill, add a glob of paint mixture directly to the crack and let it sit for a few minutes before smoothing with a paintbrush. You might need to go over these areas multiple times before the surface looks seamless.
Tip
For a stained glass look, choose colorful, self-adhesive disco tiles or try going the DIY route by adding a few drops of ink dye to the mirror tile sheets before applying them to the mirror.
8. Apply disco tiles
Warning
Since the tiles are made of tiny glass mirror pieces, consider wearing a pair of cut-resistant gloves to protect your fingers from slices or cuts from glass chips. These tiles are already self-adhesive, which makes application super easy. However, if you wish to secure them further, apply the tiles with a touch of E6000 glue.
Once the paint layer dries, it's tiling time! Applying disco tiles to any project can feel super tedious—especially on parts where they're applied individually—so we recommend turning on a podcast or your favorite music playlist to get in the zone.
To tile the mirror frame, start on the outer edge and apply the tiles in strips. This will make the process go by a bit faster and act as a good baseline to guide you while working up and across each round area. Cover as much as you can while working in strips and then move on to applying individual tiles to nooks and crannies. Next, add strips along the edge (where the frame meets the center mirror) and work your way up.
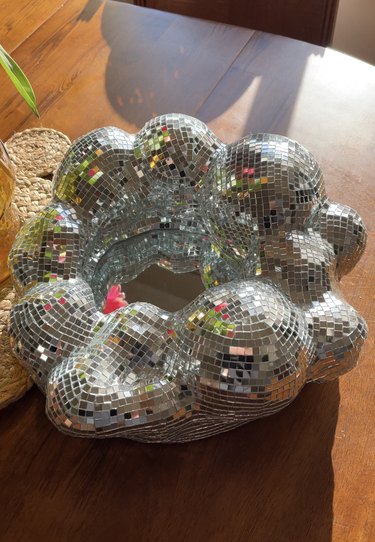
And just like that, you've created an utterly dazzling disco balloon mirror to add some extra sparkle to your home decor!