Pickleball has become a pretty big dill (get it?) in recent years, and it's easy to see why. For starters, it's low impact and gentle on the body, especially when compared to other racket sports, like tennis. This makes it ideal for players of all ages and athletic levels. A pickleball court doesn't require much space, so one can easily be set up at home. And honestly, playing pickleball is just a ton of fun!
Video of the Day
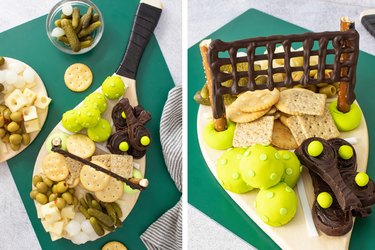
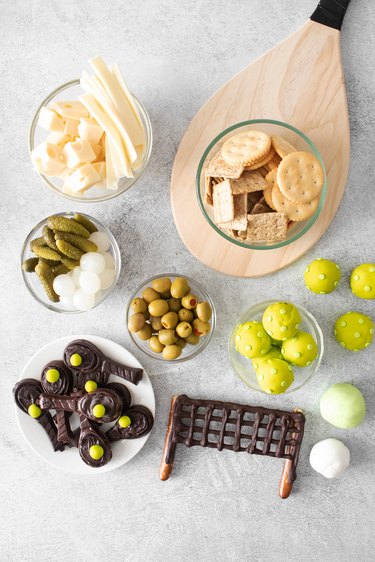
If you can't get enough of the sport, you're going to swoon over this pickleball charcuterie board. It's the perfect pickleball party idea, whether you're hosting a pickleball tournament or planning a birthday party with a playful theme. And get this: The board features both a savory side and a sweet side. The savory section is filled with goodies like Swiss cheese and mini pickles, while the other is covered in chocolate rackets and pickleball Oreo truffles. Even the net is edible! It's made of chocolate and pretzels—the perfect salty-sweet snack.
Of course, we couldn't design a pickleball-themed charcuterie board on just any old surface. This DIY project is made on an actual pickleball paddle! That said, to ensure it's safe for food, be sure to use a clean and unused paddle (we like this one!). If you're feeding a crowd, consider making more than one board and display them as centerpieces. This way, everyone can get in on the pickleball fun.
Video: Have a Ball With This Pickleball Charcuterie Board
Part 1: Build the Chocolate Pretzel Net
Things You'll Need
Pretzel rod
Chocolate chips or chunks
Royal icing
Parchment paper
Squeeze bottle
Paper and pen

How to make a Chocolate Pretzel Net:
1. Plan the net pattern
If you're working with a long pretzel rod, break it in half. Two equal-size pieces are ideal. If the original rod is about 3 inches, you can leave it as is and simply use two for your net. The pretzels will act as "poles" on either side of the net.
Tip
Chop or break the pretzel rod into shorter lengths if you want the net to be lower and closer to the paddleboard, or “ground.” It’s the most accurate recreation, but we recommend making the net higher than normal to fit crackers underneath. It will also make the board more visible over other ingredients.
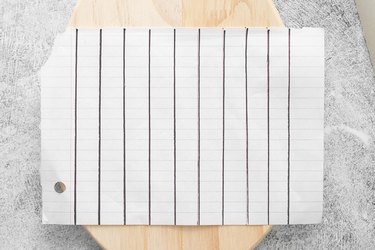
Cut a piece of paper into a rectangular shape, making sure it spans the width of your paddleboard. We recommend using lined paper as a shortcut. Draw vertical lines to create a grid.
2. Create chocolate net
Melt chocolate in the microwave by heating it in a microwave-safe bowl at high heat for 60 seconds. Stir and heat for another 30 seconds and then repeat until melted. Be sure to use an oven mitt, as the bowl will be super hot. (Another option is to create a double boiler on the stove top with a stainless steel bowl and small pot.) Carefully spoon the melted chocolate into a squeeze bottle.
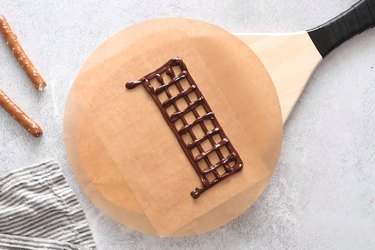
Place the net pattern atop the paddleboard. Lay a piece of parchment paper on top. Pipe chocolate along the pattern, making sure to create horizontal lines at even intervals. We followed every other line of the lined paper.
Let the chocolate net harden. This can take one to two hours depending on the temperature of your kitchen. To speed up the process, pop it in the fridge.
3. Attach pretzel poles
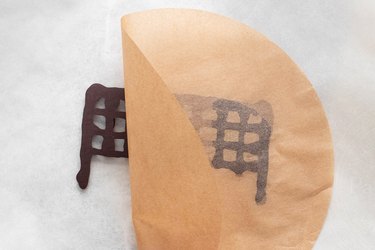
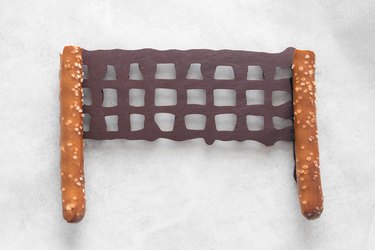
Gently flip over the parchment paper with the chocolate net onto another sheet of parchment. Peel away the top sheet and then pipe royal icing along the back side of each "pole."
Adhere a pretzel rod to each side and let it dry completely.
Part 2: Make Pickleball Truffles
Things You'll Need
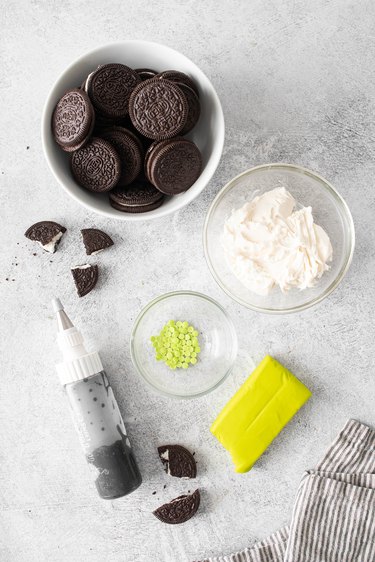
22 Oreos
4 oz. cream cheese, softened
Bright green fondant
Bright green circle sprinkles
Royal icing
Squeeze bottle with fine tip
Fondant roller
How to make Pickleball Truffles:
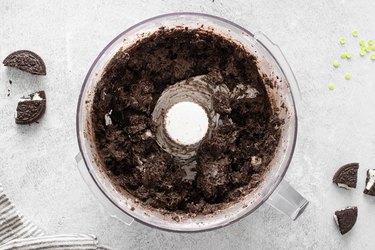
Break up the Oreos and add them to a food processor. Pulse until the cookies turn to crumbs.
Add the cream cheese and pulse until combined. The texture should be tacky but not overly sticky, clumping together easily. If the mixture is too dry, add a bit more cream cheese.
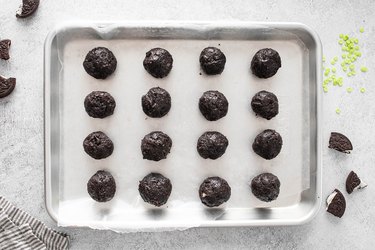
Form the mixture into balls. Place them on a parchment-lined baking sheet and then chill in the freezer for 15 minutes.
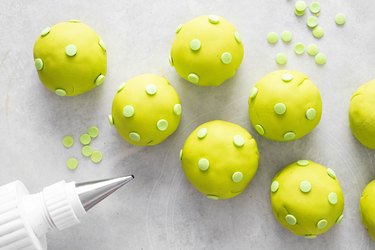
2. Decorate pickleball truffles
To finish your pickleball truffles, roll out a sheet of bright green fondant about 1/8-in. thick. Cut out circles with a glass or circular cookie cutter.

Wrap the fondant circles around the truffles, making sure to roll each one to close the seams. Next, using royal icing, stick bright green circle sprinkles onto the truffles.
Tip
If you don’t have a squeeze bottle with a fine tip, you can use a toothpick to dot royal icing onto the truffles.
Your mini pickleball truffles are now complete! If you end up with extra pieces, consider using them as cake decorations or cupcake toppers. It's a fun way to emphasize the pickleball theme while sprucing up other desserts.
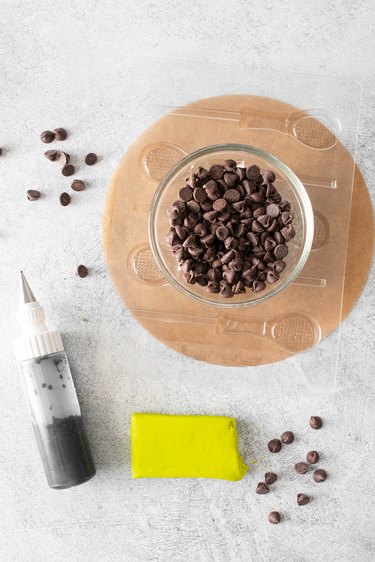
Part 3: Create Chocolate Paddles
Things You'll Need
Chocolate chips or chunks
Royal icing
Bright green fondant
Tip
You can find tennis racket candy molds on Etsy. Some craft stores might also sell similar pieces.
How to make Chocolate Paddles:
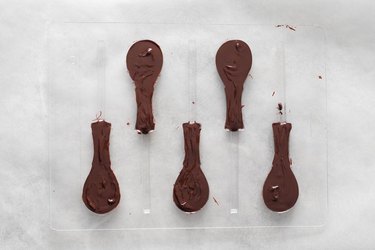
1. Fill candy molds
First, melt the chocolate. One method is to create a double boiler on the stove top with a stainless steel bowl and a small pot. You can also place chocolate in a microwave-safe bowl and heat on high for 60 seconds. Mix, heat for another 30 seconds and repeat until it's smooth and melted.
There are two options for filling the candy molds. One technique is to spoon melted chocolate into each candy mold. Alternatively, if you prefer a neater fill, you can transfer melted chocolate into a squeeze bottle and pipe it into the mold.
Chill the mold in the refrigerator for two hours or until completely set.
Tip
After filling the mold, gently tap it to eliminate air bubbles. If that doesn’t work, use a toothpick to gently stir the chocolate while it’s still warm.
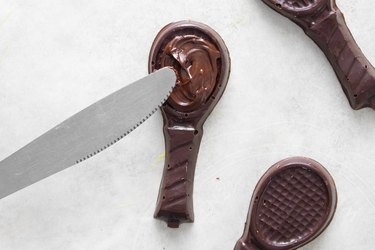
2. Decorate chocolate paddles
Melt a bit more chocolate or if you used a squeeze bottle, fill a jar with warm water and place the bottle inside. This will help soften the chocolate.
Spread melted chocolate on top of the tennis racket to conceal the netting imprint. After all, these are meant to be edible pickleball paddles!
Tip
If you don’t want to melt more chocolate, spread chocolate icing or royal icing on top.
Roll bright green fondant into small balls and place them atop the paddles as mini pickleballs. If the chocolate has already hardened, you can use a bit of royal icing to adhere the pickleballs.

Part 4: Assemble the Board
Things You'll Need
Pickleball paddle
Strips of white cheese slices
Swiss cheese cubes
Cocktail onions
Cornichons (tiny French gherkins)
Green olives
Round and square crackers
Bright green fondant
White fondant
Pretzel net
Pickleball truffles
Chocolate paddles
Tip
Before starting, place pickled items in a strainer. This will help limit moisture buildup on your board.
How to assemble the board:
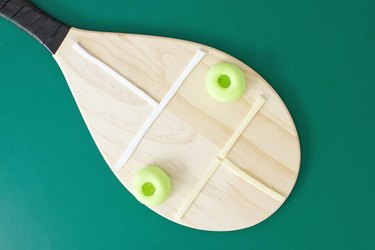
1. Set up court
On one half of the paddleboard, add strips of cheese to mark the savory section. Next, roll out white fondant into a flat sheet about 1/4-in. thick. Slice fondant into strips and place it on the other half—this will mark the sweet section of your board.
Place a ball of bright green fondant on each side of the paddleboard. Using the bottom of a pretzel rod, make an indent in each one. This is where the pretzel rod "poles" will be inserted.
2. Add charcuterie ingredients
On the savory side, add green olives, blocks of Swiss cheese, cornichons and cocktail onions. On the sweet side, add pickleball truffles and chocolate paddles.
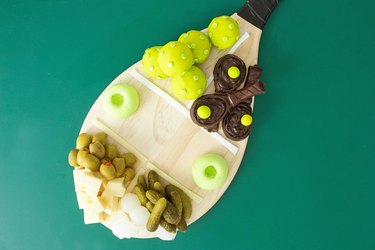
Carefully "install" the chocolate pretzel net and then place crackers underneath.
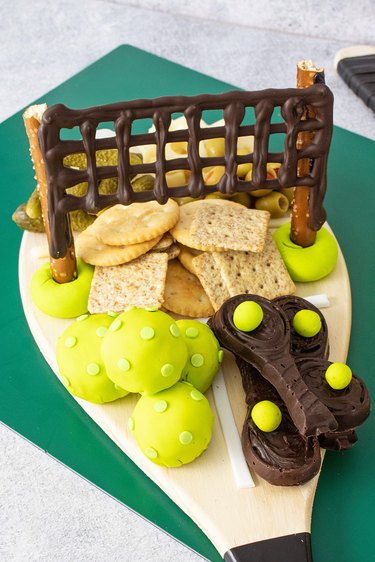
To style your pickleball charcuterie board, focus on party supplies in varying shades of green. You might even already have items around the house that work well! For example, the green surface we used is actually the back of a cutting mat. Round it all out with some funny pickleball home decor or art. Personally, we're loving this printable "Dill With It" poster by Etsy maker MoodDesigninc.

To complete the pickleball theme, serve your board with a coordinating dink (er, drink). Delicious ideas include water or seltzer infused with cucumber, cocktails with sour apple schnapps or martinis with green olives.
Needless to say, with this clever DIY pickleball charcuterie "court," you'll score big at the next team gathering!