Have you ever bought some beautiful flowers at the grocery store only to be disappointed when you take them home because you're not sure how to make a flower arrangement that looks as good as something you'd find at a florist shop? You've come to the right tutorial because the basics of DIY floral design are pretty simple, even for a beginner who doesn't know a hydrangea from a peony. With just some simple hacks, you can turn grocery store flowers into a beautiful floral arrangement that will be sure to impress the next time you need a centerpiece or a hostess gift for a dinner party.

Video of the Day
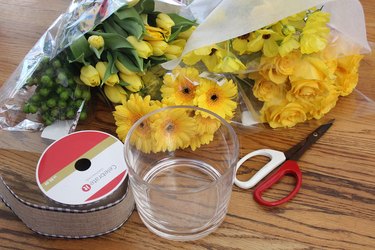
Things You'll Need
Vase
Grocery store flowers
Floral shears
Greenery
Ribbon
Double-sided tape
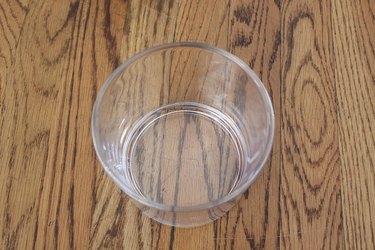
Step 1: Start With a Vase
It's not necessary to purchase a new vase for your DIY flower arrangement. You probably have something at home that can serve as your vase. If it holds water, it will probably work. Consider using a Mason jar, a large coffee mug, a teapot or a pitcher. I used a glass vase that I had kept from an old floral arrangement. Then, take a look at the size of the opening of your vase. As a rule of thumb, you'll want to purchase enough flowers so that they cover four times the size of the vase opening. This four to one proportion creates a lush, full arrangement.
Video of the Day
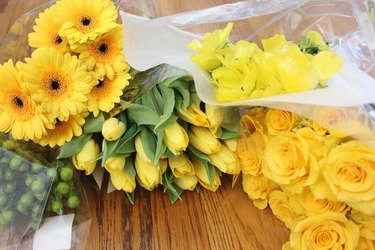
Step 2: Select a Color Scheme
As you're browsing through the fresh flowers at the grocery store, it can be difficult to choose colors and determine which colors complement each other. My simple hack for choosing a color scheme is to go monochromatic. Having all your flowers in the same color category makes shopping a breeze, and all the flowers in your finished arrangement will have a cohesive quality.
The key is to select different types of flowers so that even though they are similar in color, they are varied in texture. For this arrangement, I chose four bunches of cut flowers — roses, gerbera daisies, tulips and ranunculus—plus some added greenery. I purchased these flowers at Trader Joe's, but I also like finding cut flowers at farmers' markets and even Costco. Whatever you do, don't buy a premade flower bouquet at the store and then plop that in a vase. You'll be paying a premium for a mixed bouquet with a lot of filler flowers.
Step 3: Fill the Vase With Water
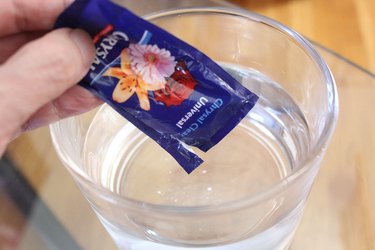
Fill the flower vase about three quarters full with room temperature tap water. When you buy grocery store flowers, they usually come with a packet of flower nutrients. Mix the contents of the packet in the water until it dissolves.
Step 4: Remove the Leaves
Any organic material that sits in the water will produce bacteria, so it's a good idea to strip the stems of any leaves. Leaves left on the stems will get soggy and make the water murky.

Step 5: Cut the Stems
Using floral shears, cut the stems diagonally. This angle creates maximum surface area on the stems to absorb water. Also, when a stem is cut at an angle, it prevents the end of the stem from accidentally butting up to the surface of the flower vase and blocking the intake of water.

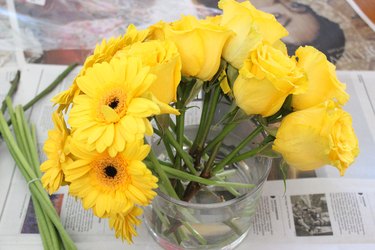
Step 6: Arrange the Buds in the Vase
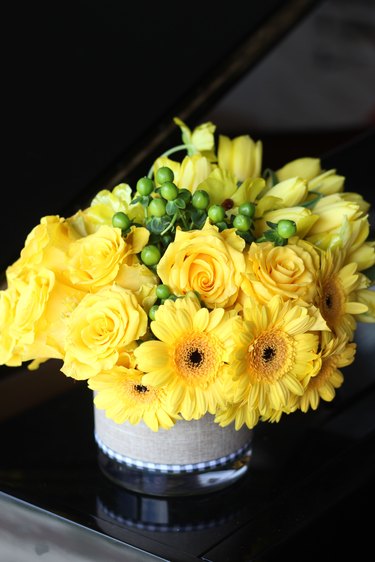
The actual placement of flowers in a vase perplexes a lot of beginning floral arrangers, but I have a hack for that too. I like to arrange the stems so that all the different types of flowers are in their own section. In other words, all the roses are grouped together, the tulips are in their own section and so on. This technique takes the guesswork out of how to combine the different varieties. The resulting arrangement has a modern look that appears very high end.
Starting with your first type of flower, arrange the buds so that the blooms are resting just beyond the rim of the vase. This way, all you see are the flowers rather than the stems. Professional-looking arrangements usually do not show stems.

Step 7: Add the Other Flowers
After your first type of flower is placed in one section of the vase, proceed with the next type of flower. Again, cut the stems diagonally and position them in the vase so that the blooms rest just beyond the rim and then place additional blooms on top of those sitting on the rim.
After you add each type of flower, the arrangement becomes more full. Throughout this process, think about what shape you want for your floral arrangement. The classic shape is a round dome, which looks very sculptured. But it's fine to think outside the box — or the vase, if you will — and let the flowers extend more naturally from the vase.

For the ranunculus and tulips in this arrangement, I allowed them to jut out from the dome shape created by the roses and daisies.
Step 8: Add Some Greenery
Adding a touch of greenery to the DIY floral arrangement provides a beautiful accent to the flowers, especially if the flowers are monochromatic. The greenery also helps fill in any gaps that may still appear in the arrangement. I selected a bunch of St. John's Wort from the grocery store because I liked the berries, but eucalyptus and succulents also work well. You can even forage greenery from your garden.

Step 9: Adjust the Flowers
Once all the flowers are positioned in the vase, rotate the arrangement to view it from all angles. Do some flowers stick out too much? Trim those stems. Do some flowers look too short? Manually pull them out a bit so they are more visible.

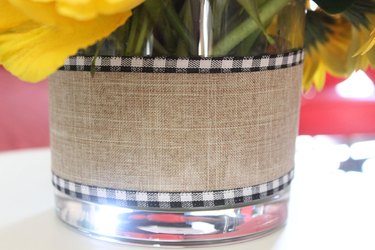
Step 10: Hide the Stems
There are two schools of thought on stems being visible in a transparent vase. Some people prefer the natural look of being able to see the stems, while others find visible stems absolutely taboo.
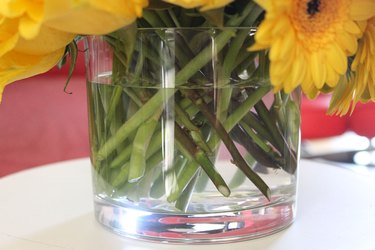
Most florists hide the stems for a more professional look. As for me, I keep the stems visible if I'm creating an impromptu arrangement for my dining table, but if I'm giving the flowers as a gift, I always hide the stems. The simplest way to do this is to tie a ribbon around the vase, securing it with double-sided tape. Of course, if your vase is opaque, then you don't need to worry about hiding the stems. Wrapping the vase with a ribbon is still a nice touch, however.
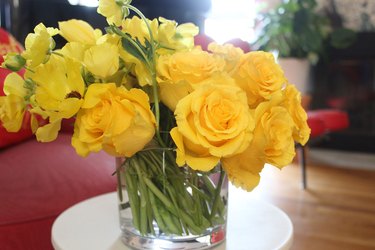
This beautiful DIY arrangement will elevate your floral game for any occasion, be it Valentine's Day, Easter, Mother's Day or birthdays and anniversaries.