November is a favorite time of year at our house. It signifies the holidays, a time when we both enjoy sending out and receiving seasonal greetings from our friends and family. Like many, we enjoy keeping these cards out on display to add to our holiday decor. This year we created a card stand using an antique salvaged wood beam we'd recently come across.
Video of the Day
Things You'll Need
Wood beam or board, 34 inches by 4 inches
Hammer
Yardstick or tape measure
Clamps
Circular saw
Low-grit (or finer) sandpaper
Compressed air (optional)
Low-odor clear finishing spray
Felt furniture protectors
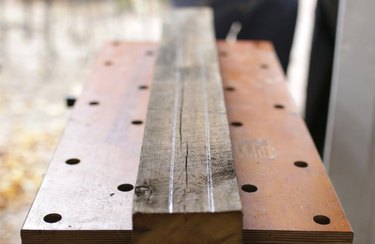
We found and worked with a salvaged antique wood beam measuring 34 inches in length by 4 inches in width and depth. Similar wood beams can be found at a local salvage yard or warehouse. For those without access to antique finds, the same concept could apply to a new board or beam from the hardware store.
Video of the Day
Step 1
Cut the wood to match the above dimensions or follow the same steps below on a different sized beam to create a custom look.

Step 2
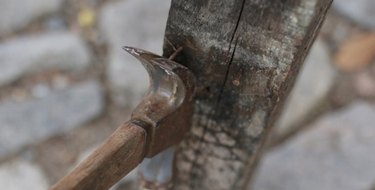
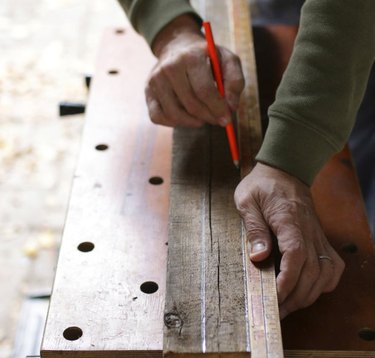
Prep the wood by removing any jagged splinters or exposed nails. Decide which sides will display best as the front and top portions (these will be in the most direct path of sight), and then position and clamp it to a workbench to hold it steady for measuring and sawing.
Step 3
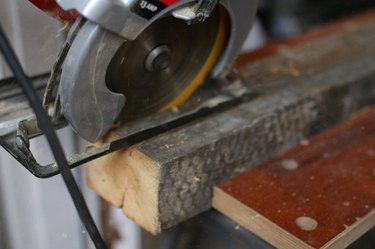
To create the display you'll want to make two even and slightly angled cut lines into the board. The angles will help display the cards better, and the front cut should be slightly deeper than the rear, to help create a tiered effect.
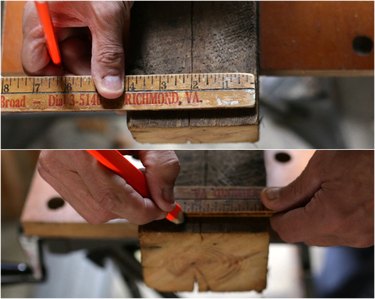
Measure the top width of the board, marking two even lines at least 1 inch apart with a pencil. For example, for our 4-inch wide board, we made marks on the 1-inch and 3-inch marks.
Step 4
Make the same marks along the opposite end, and then use the straight edge of a ruler to connect each mark, resulting in two parallel lines along the top of the board. These lines will act as the guide for making cuts.
Step 5
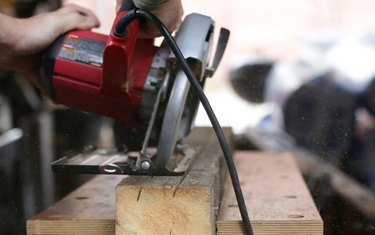
To make a tiered effect, the front-facing cut should be deeper than the rear-facing cut; ¼-inch difference in depth between the two will achieve a nice balance. First decide which side of the board will be front-facing, and then adjust the circular saw to a ½-inch depth on a 15-degree angle. Next, make an even cut down the top of the board, using the pencil line as a guide.
Step 6
Repeat on the rear-facing line after readjusting the circular saw to a ¼-inch depth on a 15-degree angle.
Tip
If using a wider beam, make three or more cut rows following the same 15-degree angle and making each progressive cut with a ¼-inch difference in depth.
Step 7
Clear the beam of sawdust and use a sheet of low-grit sandpaper to smooth each side and edge of the wood.

Tip
Using a can of compressed air will help clear away small debris from the freshly cut lines in the top of the beam.
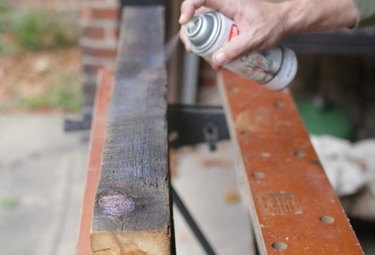
Step 8
In a well-ventilated area, apply three thin and even layers of a low-odor clear finishing spray, which will not only help provide a permanent protective finish but will also prevent any residual debris crumbling from the wood once inside.
Step 9
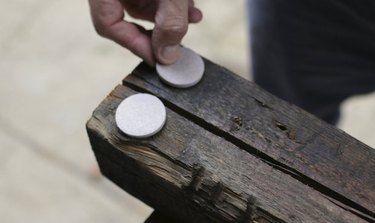
Allow the finish to completely dry, about three hours, before adhering heavy-duty felt discs at each corner on the underside of the beam. These discs will provide protection against surface scratches where the card stand will be displayed.
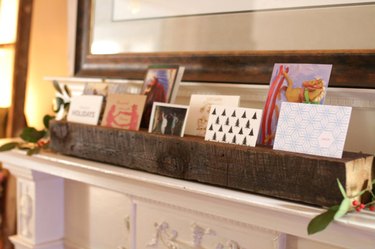
A stand like this would work well on a mantle, entryway console table or even as a focus centerpiece along a buffet.
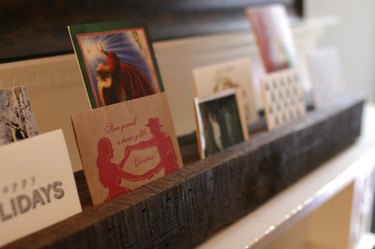
Display cards by sliding them into the cut lines, staggering to show breadth and variety. Tall, vertical cards work well on the back row, and smaller, horizontal cards display well on the front row.
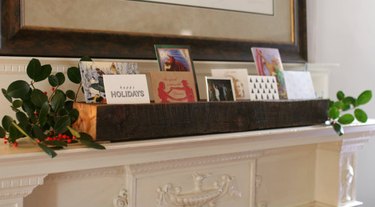
To kick off the decorating season, we pulled out a few of our favorite holiday cards we have saved over the years from dear friends who sent handmade greetings or from close relatives who have since passed. After sliding them into the card stand, we nestled a few fresh trimmings from our holly tree around the beam to create a festive mantle display.
As new greetings arrive throughout the season and make their way into the card stand, the look and feel of the display will evolve and change, which keeps it fun.
Outside of the holidays, this card stand could be used to display a rotation of family photos or a mix of greeting cards throughout the year.