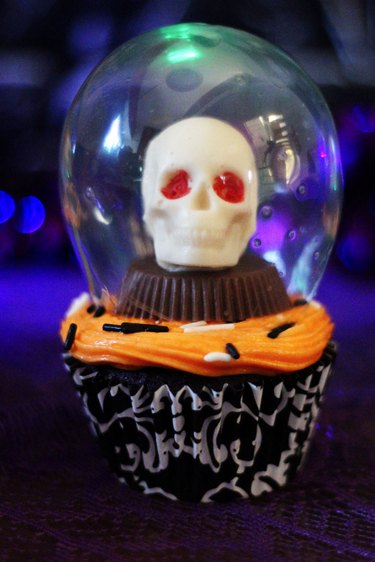
What wizardry is this, that a specter from the underworld has been summoned to speak to us through this crystal ball? And not just any crystal ball, but a crystal ball cupcake. Actually, the magic is in the clear glass-like globe made of gelatin, which makes it edible. And the spooky apparition within the globe is molded from white chocolate. Why, this cupcake is so yummy, it's scary! But beware, this crystal ball does predict the future—a future filled with fun, deliciousness and the oohs and aahs of all who lay eyes on it.
Video of the Day
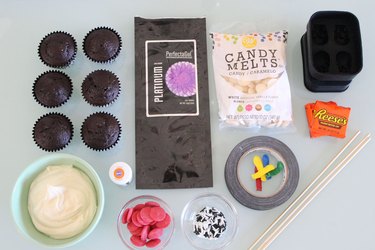
Things You'll Need
Water balloons
Wood skewers
Tape
Foam blocks
Gelatin sheets
Cooking spray
Scissors
Skull head silicone mold
White chocolate candy melts
Red candy melts
Cupcakes (from scratch or cake mix)
Vanilla icing (homemade or store-bought)
Orange icing dye
Black and white sprinkles
Reese's Peanut Butter Cups
Make the Clear Globes
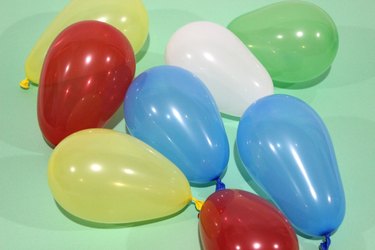
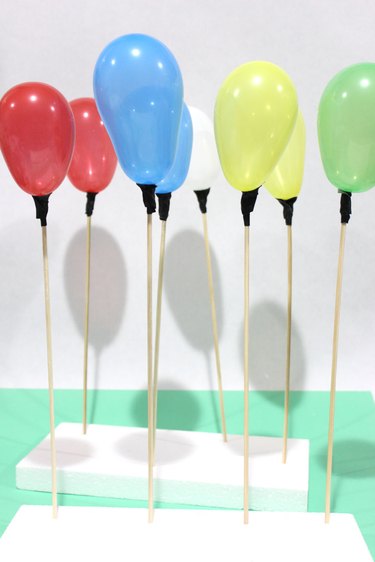
Step 1: Inflate Balloons
Water balloons are the right size and shape to create the clear crystal balls. Don't use regular balloons, as they are too big. Inflate the balloons to about three inches at the widest point. Don't worry if the balloons are more long than wide. We'll only need the top section of the balloons for the globes.
Video of the Day
Step 2: Tape Balloons to Skewers
Securely tape the tied ends of the balloons to wood skewers.
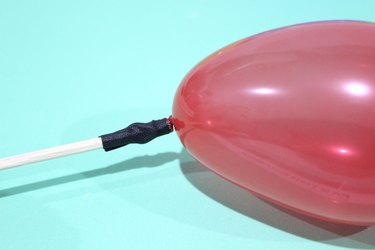
Stand the skewers up by inserting the pointy ends into foam blocks.
Step 3: Soak Gelatin Sheets
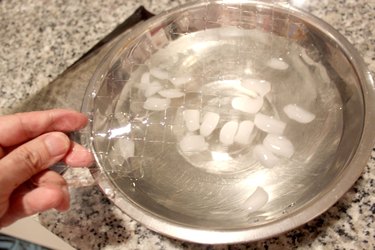
Gelatin sheets come in different grades, with platinum sheets having the greatest strength. To make our globes as rigid as possible, select platinum grade gelatin for this project. Start by separating the sheets and placing 12 of them, one by one, into a bowl of ice water for about 10 minutes.
Step 4: Melt the Gelatin
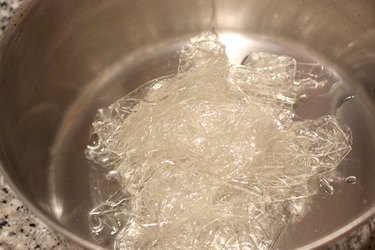
After 10 minutes, the gelatin sheets will be limp and rubbery. Remove them from the ice water and ring out all the excess water. Place them in a small saucepan, and add three tablespoons of the water that was used to soak the gelatin sheets. Heat the saucepan on low heat and stir the gelatin. It will start melting immediately.
When the gelatin is completely melted, pour it into a small bowl that can hold one of the balloons.
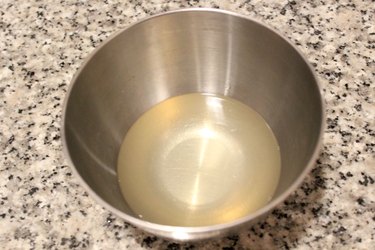
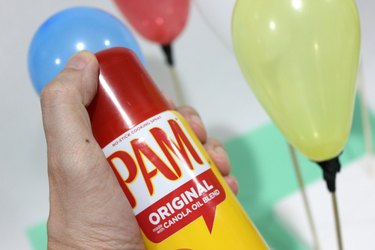
Step 5: Lightly Grease the Balloons
The balloons need a very light, practically invisible, coating of oil so they can separate from the gelatin when it hardens. Apply a small amount of cooking spray to your hands, and rub your hands together until it looks like the oil is absorbed into your skin. Then rub your hands on the surface of the balloons. The balloons don't look like they're getting any oil, but they are. In fact, if the balloons are shiny, they have too much oil, and the gelatin won't adhere to them. After every three to four balloons, re-grease your hands before continuing with the rest of them.
Step 6: Dip Balloons in Gelatin
After allowing time to let the melted gelatin cool to room temperature, dip the balloons into the gelatin. Turn the balloons around in the bowl so the gelatin makes contact with all sides. Don't worry about covering the bottom part of the balloon with gelatin, as only the top section will be used to make the crystal ball.
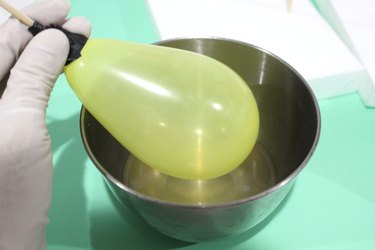
After the balloons have been dipped in the gelatin, stick the skewers back into the foam block and let the gelatin harden on the balloons for about 10 minutes. Then dip the balloons one more time in the gelatin and place the skewers back in the foam. Allow the gelatin to harden for a full 24 hours. You'll know they're done when you hit the surface with your fingernail and it feels like plastic.
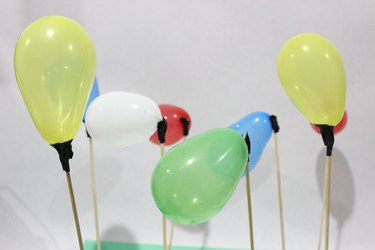
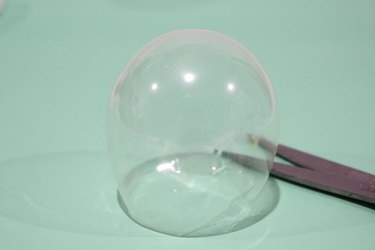
Step 7: Deflate Balloons
Cut off the ends of the balloons with scissors to release the air. The balloons will immediately contract, and some of the hardened gelatin will contract as well. That's fine—just push out the globe from the inside with your fingers to reshape it.
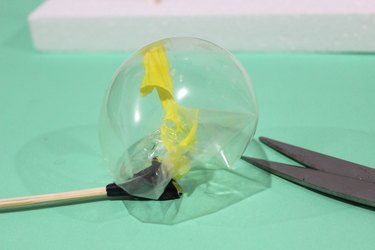
Step 8: Trim the Bottoms
With scissors, trim the bottoms of the globes so they are about four inches high. When you've cut an even edge on the bottom, the globe will stand up without leaning.
Make the Skull Heads
Step 1: Melt White Chocolate
Place white chocolate candy melts in a microwave-safe bowl, and follow package directions. The key is to melt the white chocolate in intervals of 30 to 40 seconds, checking after each interval. As soon as it's smooth and creamy, stop. Overheating will actually make the candy melts harden again.
Step 2: Spoon Into Mold
Skull heads are very easy to make if you have a skull head silicone mold. You can purchase them online. One part is for the face, and the other is for the back of the head.
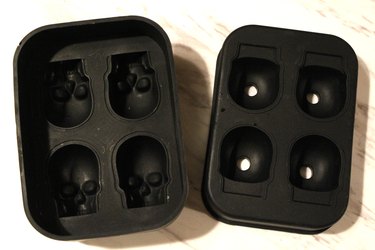
Spoon the melted white chocolate into the main part of the mold, i.e., the part for the face. Fill the mold about two-thirds full.
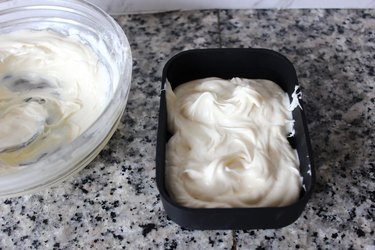
Position the other half of the mold into the first half, and press down. The excess chocolate will come out the holes at the top. Place in the freezer for one hour.

Step 3: Remove from Mold
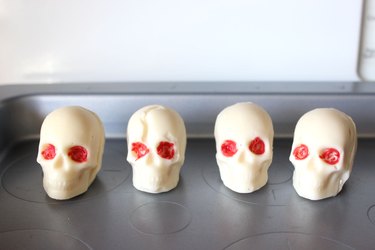
When the chocolate is hardened, pull off the silicone mold to reveal the skull heads.
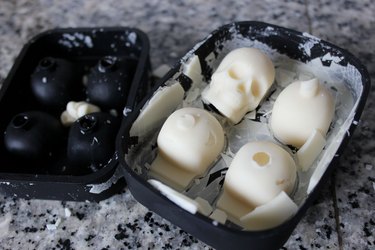
There will be seams in the skull heads where the two parts of the mold met. You can either leave them as is, or scrape off the seams with a knife. If you have skull heads that look deformed because the chocolate did not settle properly into the mold, that's a bonus for you. Deformed skulls are the best.
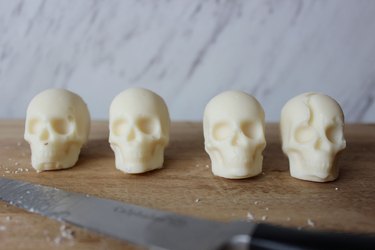
Step 4: Add Red Eyes
We want these skull heads to look extra creepy, and red eyes will do it. Heat a few red candy melts in the microwave, and stir with a toothpick.
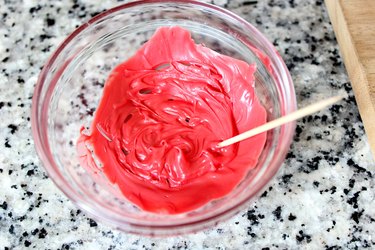
Using the toothpick, color in the eyes with the melted red candy. You don't have to be too neat here. Messy red eyes look scarier.
Assemble the Cupcake
Step 1: Bake Cupcakes
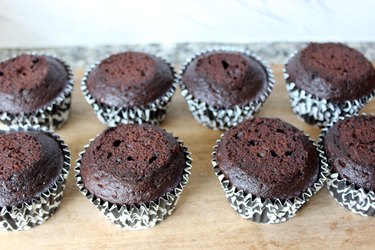
Using your favorite recipe or a box mix, bake up a batch of cupcakes. I used a box mix of, what else, Devil's Food cake. If the tops of your cupcakes are very rounded, level them off with a knife. We want the tops to be flat.
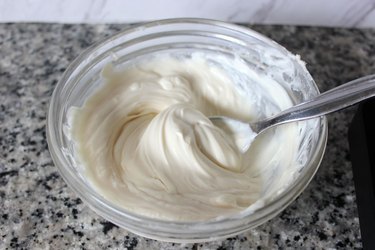
Step 2: Color the Icing
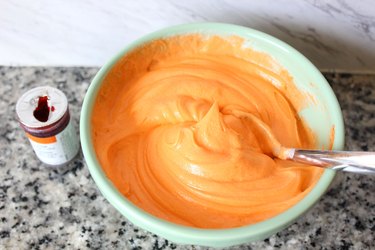
Make your own buttercream frosting or purchase a tub of vanilla frosting at the store. I made my own frosting with a basic recipe of two sticks of butter, three cups of powdered sugar, two tablespoons of heavy cream, two teaspoons of vanilla and a pinch of salt. You can leave the frosting white, but dyeing it orange adds to the Halloween spirit. Place a few drops of icing dye in the frosting and stir. Keep adding very small amounts of dye until the frosting is the shade of orange you want.
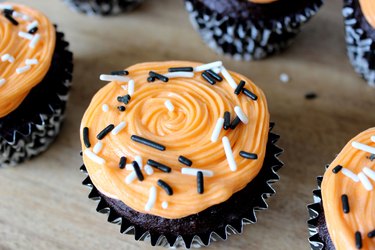
Step 3: Frost the Cupcakes
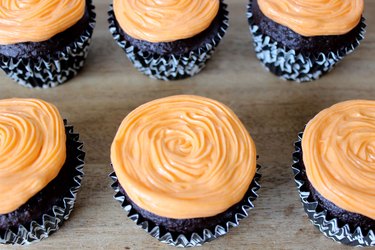
Frost the cupcakes with the orange icing, either using a spatula or a piping bag.
Step 4: Add Sprinkles
Drop some black and white sprinkles onto the outer part of the frosting. The black and white contrasts nicely with the orange.
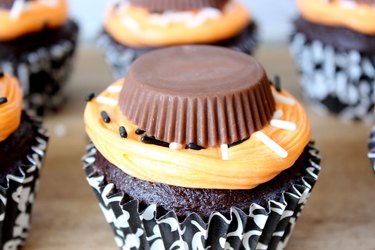
Step 5: Position the Peanut Butter Cup
The skull head needs a stand so it doesn't sink into the frosting, and the perfect stand is a Reese's Peanut Butter Cup. Unwrap the peanut butter cup and place it upside down in the center of the frosting.
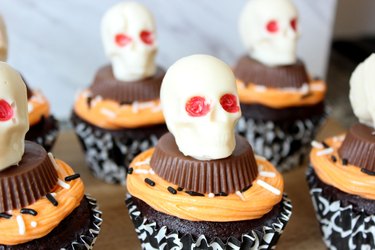
Step 6: Attach the Skull Heads
Position the skull heads on top of the peanut butter cups. To keep them in place, apply a small amount of melted white chocolate to the bottom of the skull heads. When the chocolate hardens, it will act like glue.
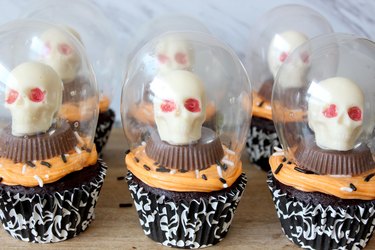
Step 7: Cover with Clear Globes
Place the clear gelatin globes over the skull heads and peanut butter cups. The crystal balls are complete, ready to add mischief and wonder to your Halloween festivities.
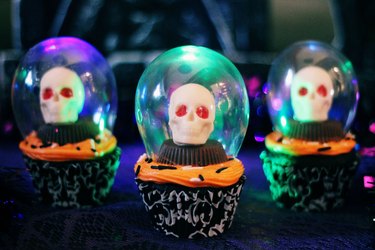
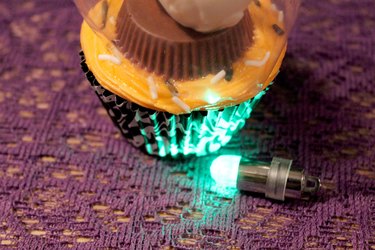
Step 8: Enhance with Lighting
Crystal balls are all about good lighting. When displaying your crystal ball cupcakes, place some LED miniature lights behind them on the platter, and the lights will reflect off the globes. These lights are typically used for centerpieces and can be purchased online. They come in various colors, and the ones I used even change hues continually.
These cupcakes will definitely raise spirits this Halloween season.