It's hard to believe autumn is right around the corner—one of our favorite seasons where rustic decor comes back into the spotlight. In the spirit of autumn, today we're sharing a tutorial for how to make this rustic fall wreath with big, three-dimensional leaves and rosettes, using little more than recycled paper grocery bags. This is a great project to tackle with kids and if you're like us, helps to recycle those paper grocery bags that might have been stacking up.
Video of the Day
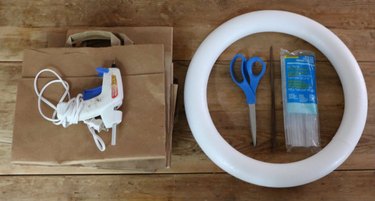
Things You'll Need
Styrofoam wreath form, 15″ round
Brown paper grocery bags, 3 to 4
Scissors
Chopstick or pencil
Glue gun & sticks
Step 1
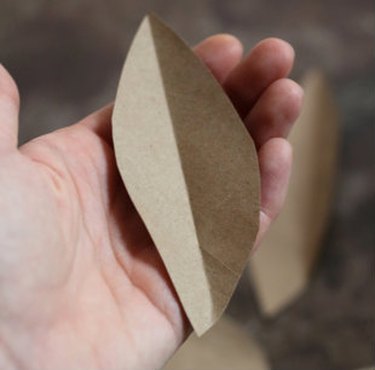
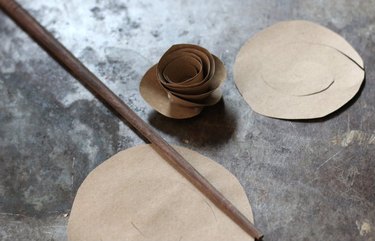
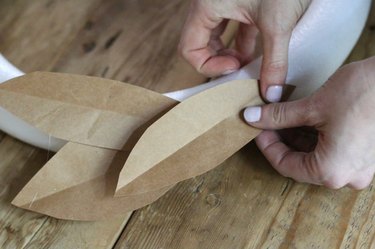
Using brown paper grocery bags, cut out leaf shapes about 5 inches in length. Cutting these shapes is a great job to give kids taking part in the project.
Video of the Day
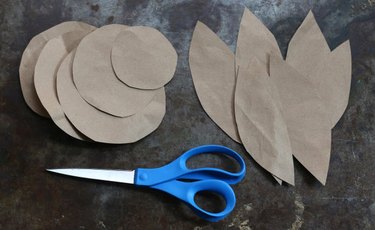
They don't have to be perfectly symmetrical or the same size, since we're going for a more rustic, charming appeal. For our 15" wreath form, we used 50-60 leaf cutouts.
Step 2
Gently press each leaf shape in half, so the tip of one side is folded down the middle. If it doesn't fold perfectly all the way down the leaf that's OK since the bottom portion will be overlapped with other leaves.
Tip
Keep in mind, some grocery bags come in slightly different colors. If using different colored bags, cut enough leaf and rosette shapes from both that will mix and pair well together for added interest.
Step 3
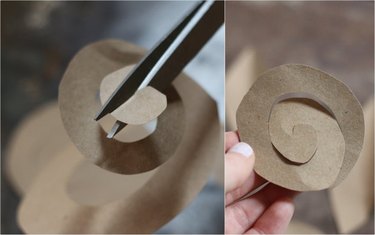
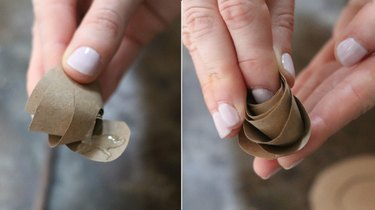
For the rosettes, cut rounded shapes from grocery bags ranging from 3 to 6 inches in diameter. We used 17 rosettes for this wreath, and you can choose to use more or less depending on your preference for filling them in. Different sized circles will result in smaller or larger rosettes, allowing room to group different sizes together on the finished wreath. Again, it doesn't matter if these are perfect circles, since slight variations will add interest to the flower petals we'll make from them.
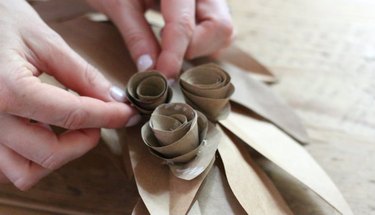
To make the rosettes, first cut a spiral into each of the rounded shapes, leaving a bit of a circle in the center. That center will act as the base of the finished rosette.
Step 4
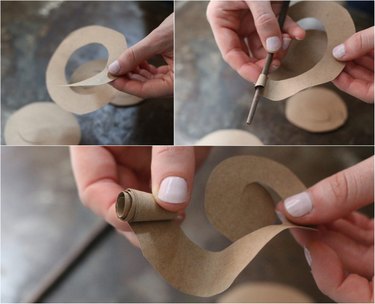
Using a chopstick or pencil as a starter, gently roll the outer edge of the spiral in towards the center until it's completely rolled up next to that center base. This is another fun step to ask kids participating in the project to help with.
Step 5
From here, loosen the grip on the rolled spiral to create a looser bloom on the rosette. Re-tighten and loosen as you like until you reach the desired rosette shape.
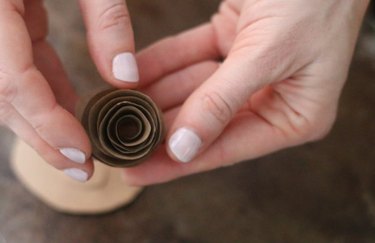
Step 6
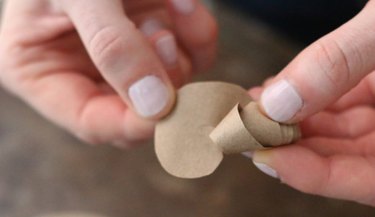
Using a glue gun, apply a dollop (or messy blob in our case) of hot glue to the circle base, gently pressing the rosette down to secure.
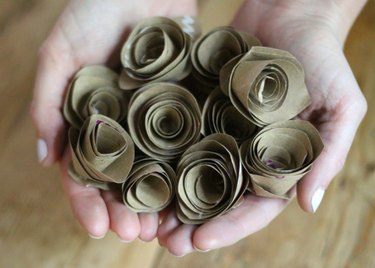
Making these rosettes can be quite fun and slightly addicting. Before you know it, you'll have a handful ready for decorating the wreath.
Step 7
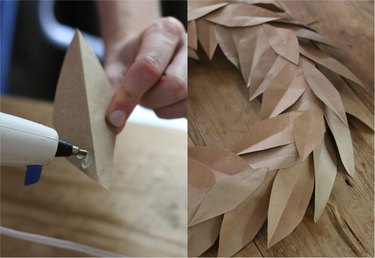
To assemble the wreath, use a small amount of hot glue near the base of the leaves to adhere to the wreath form and layer the folded leaves in a braid-like manner all the way around. Using glue at the base allows for easier layering around the circumference of the wreath and helps create that great three-dimensional leaf effect.
Step 8
Once leaves have been adhered all the way around the front and sides of the wreath form, glue additional smaller leaves at your discretion to help cover up any exposed areas or gaps.
Step 9
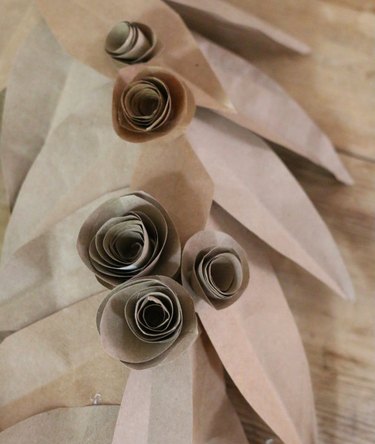
Arrange rosettes in small groupings around the wreath to create a scattered effect.
We grouped two larger rosettes with a smaller one on 4 opposite areas around the wreath, then glued down smaller sets of two or even a single rosette in and around the gaps to create a more uneven, natural placement and feel.
Step 10
Once glue has fully dried, it's time to display your new autumn wreath! Since it's made of paper, indoor decorating is ideal, unless you have a covered porch for displaying on the front door.
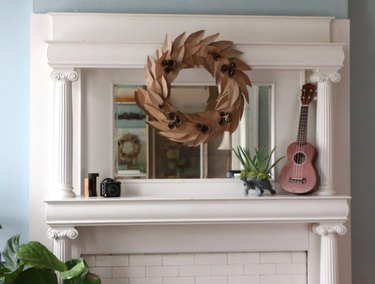
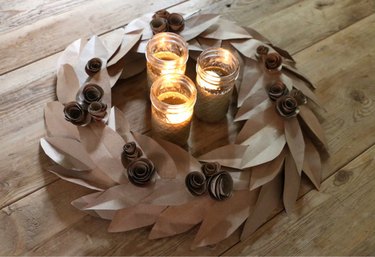
We found several places around our house where our wreath made a welcome addition—from the front entryway, to our fireplace mantle (spot our succulent turtle planter still going strong?) and even grouped with votive candles to serve as a holiday centerpiece on our dining room table.