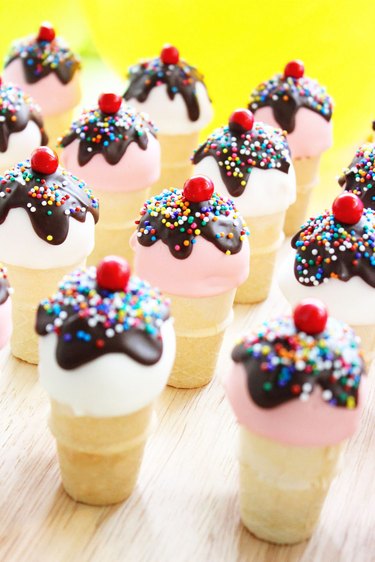
One of the happiest sweet treats in the world has to be an ice cream cone—holding one in your hand, you can't help but smile. Well, if an ice cream cone can be such a joy, imagine a cake pop ice cream cone. Mind blown! Instead of being filled with ice cream, the miniature cone holds a cake pop topped with a candy coating, sprinkles and even a "cherry" on top. Besides being as tasty as can be, these cake pops won't drip on you like ice cream. The adorable confections will certainly be the hit of any birthday party, shower or picnic.

Video of the Day
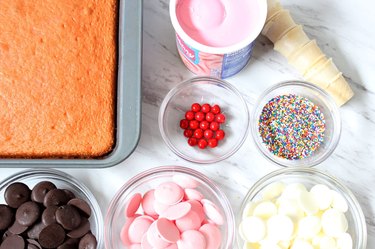
Things You'll Need
Cake
Butter knife
Large mixing bowl
Frosting
Ice cream scoop, 1 1/2-inch
Candy melts—chocolate, vanilla and strawberry
Miniature cones
Sprinkles
Red sixlets
Step 1: Prepare the Cake Pop Mixture
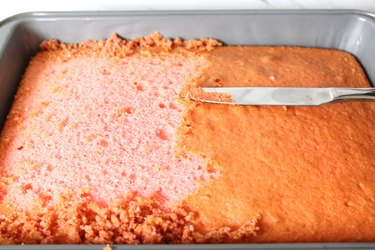
Bake a cake using your favorite recipe or a box mix. You can choose any flavor you'd like. I used a strawberry cake mix. Allow it to cool. Then, using a butter knife, scrape the browned edges from the top, bottom and sides of the cake. Removing the browned sections will keep your cake pops consistent in color and texture.
Video of the Day
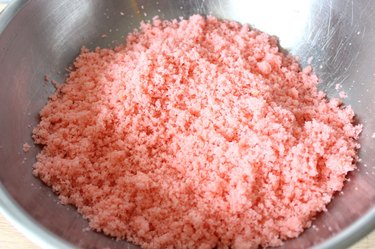
Remove the cake from the pan and crumble it with your fingers in a large mixing bowl. It should have the consistency of moist breadcrumbs.
Tip
I always use a pair of food-safe rubber gloves so my friends and family don't feel like I've gotten my fingers all over their cake pops.
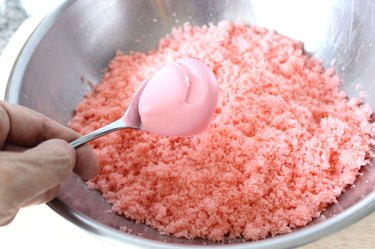
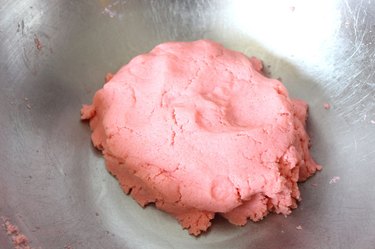
Add three heaping tablespoons of frosting to the cake crumbs. I used a tub of prepackaged strawberry frosting from the store. Knead the mixture with your hands, adding additional frosting if necessary, until the mixture resembles cookie dough.
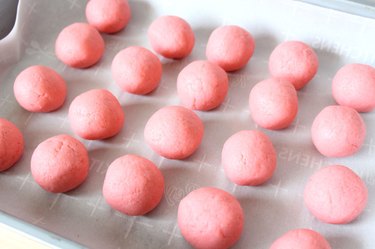
Step 2: Roll Into Balls
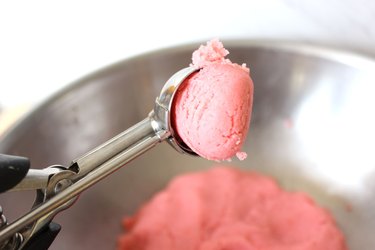
Using a 1 1/2-inch diameter ice cream scoop, scoop out some of the cake mixture. The scoop will help you make cake pops that are all the same size.
Roll each scoop of cake mixture between your hands to form uniform balls.
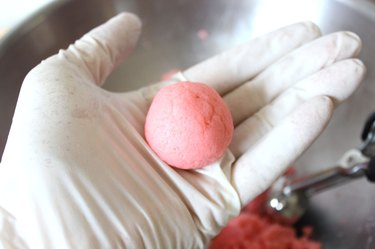
Place them in a pan lined with wax or parchment paper, and freeze for at least half an hour to harden.
Step 3: Add Weight to the Cones
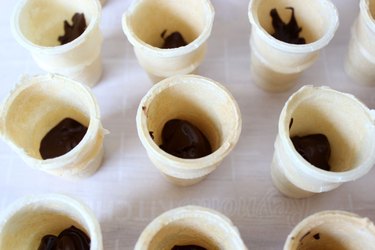
These cake pops can be top heavy, so to help distribute the weight, we'll add some chocolate to the bottoms of the ice cream cones. Start by melting a bag of chocolate candy melts in the microwave in 30-second intervals, stirring until you have a creamy consistency. Be sure to use a microwaveable bowl. Different brands of candy melts vary their instructions, so check the package.
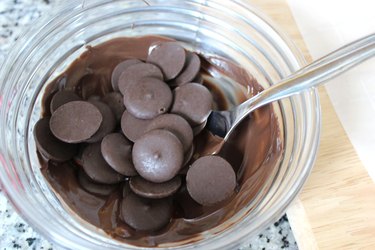
Spoon some chocolate into each miniature ice cream cone. Besides helping to stabilize the cake pops, this chocolate provides a sweet surprise as people finish their cones.
Step 4: Dip the Cones
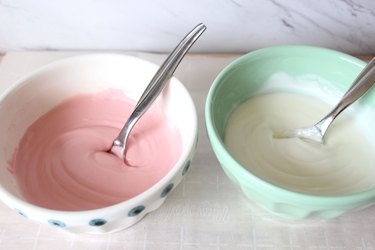
Decide what color you would like your cake pops. I decided on white and pink so they would look like vanilla and strawberry ice cream. Melt a bag of candy melts in your desired color(s) in the microwave in 30-second intervals, stirring until creamy.
Tip
If your melted candy seems stiff, add a tablespoon of vegetable shortening to thin it and make it easier to coat the cake pops.
Holding the miniature cone upside down, dip it about 1/8 inch into the candy melts to coat the rim.
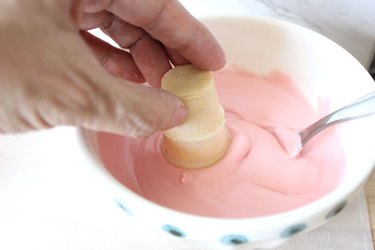
Step 5: Add the Cake Balls
Remove the cake balls from the freezer. Immediately after each cone has been dipped in the candy melts, position a cake ball on top of the cone. Place them back in the freezer or refrigerator for about half an hour to harden. The candy melts will lock the cake ball in place.

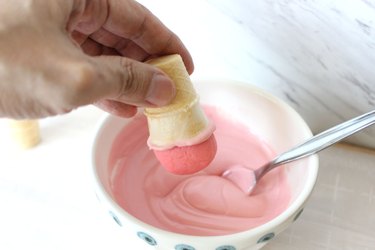
Step 6: Dip Cake Pops in Candy Coating
Holding the cake pop by the cone, dip the cake portion in the candy melt coating until it reaches just beyond where the cone was originally dipped. It helps to rotate the cone as you dip to make sure you've coated all sides.
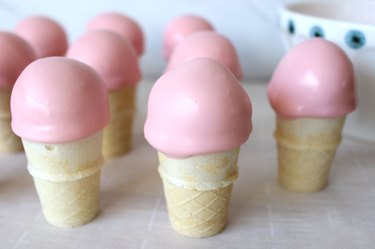
Place the cake pops upright and allow the candy coating to harden, about 15 minutes. They already look like ice cream cones!
Step 7: Add Chocolate Topping
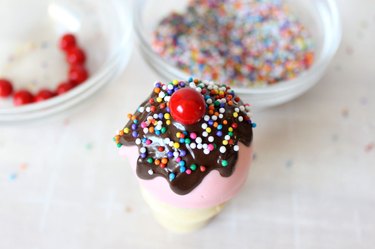
We all know ice cream cones are better when dipped in chocolate, so let's add some chocolate topping to the cake pops. Depending on when you last used the melted chocolate to spoon into the cones, you may need to re-melt the chocolate. Spoon some of the melted chocolate candy on top of the cake pop, using the spoon to create drips down the sides. Don't worry about the drips being uneven, or if they even drip down onto the cone. That's how real ice cream cones look.

Step 8: Add Sprinkles and Cherry
Before the chocolate has hardened, place a red sixlet candy at the very top for the cherry. Then add some rainbow sprinkles around it.
These ice cream cone cake pops could not be more magical if a unicorn delivered them to you at the end of a rainbow.