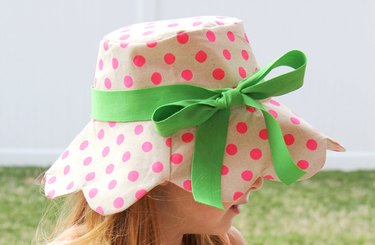
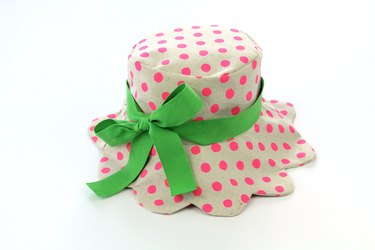
Looking to protect your child's head from the sun this spring and summer? You can sew your very own classic bucket hat! Download our free bucket hat pattern, with optional scalloped brim edge, and follow along with our in depth step-by-step tutorial. Your kids will look cute and be protected from the sun, in just a couple of hours!
Things You'll Need
Video of the Day
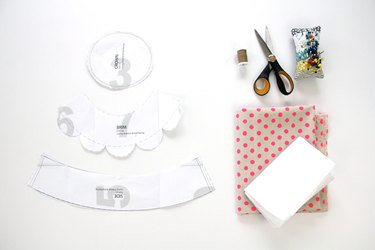
You will need the following materials to make your own kids bucket hat:
Video of the Day
- 1 yard mid-heavyweight cotton fabric
- 1 yard light-mid weight iron-on interfacing
- Free bucket hat pattern
- Pins
- Sewing needle
- Coordinating thread
- Scissors
- Needle and thread for hand sewing
- Sewing machine
Step 1: Print Out and Tape Together the Pattern Pages
Download and print out the free pattern pages and follow the instructions printed on the pattern pages to tape them together at the gray page borders. Cut out your pattern size based on the size chart on the pattern pages. Need a visual? Refer to the above materials image for a pattern that has been cut out. The pattern includes a 1/2" seam allowance, unless otherwise noted.
Please note: The scalloped edge is optional. If a regular bucket hat is desired, simply cut the pattern on the straight line. Furthermore, you can change the size of the scallops on your pattern easily. Simply hand draw wider half circles around the outer brim of the hat for your desired scallop edge and size.
Step 2: Cut Out Pattern Pieces From the Fabric
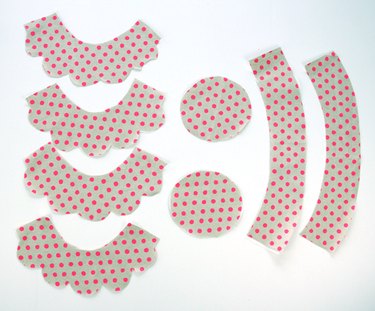
Fold your fabric in half, wrong sides together. Place your 'brim' paper pattern pieces on top of your folded fabric. Use either pattern weights or pins to secure the paper to the fabric. Cut out your 'brim' pattern pieces from the fabric. This will give you two mirror image pattern pieces. Unfold your fabric, and repeat for the 'side' pattern piece, and 'crown.'
Repeat for exterior, lining, and interfacing.
Step 3: Iron on the Interfacing
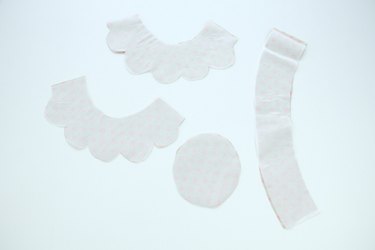
Following the instructions that came with your interfacing, iron the interfacing onto the wrong side of your lining pattern pieces.
Step 4: Sew Side Seam
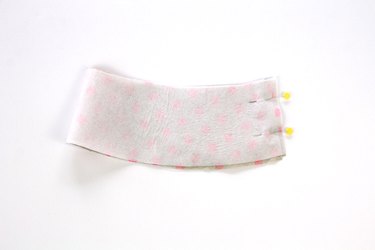
Fold your 'side' pattern pieces right sides together, matching up the raw side edge. Pin and sew. Press open seam. Repeat for both lining and exterior.
Step 5: Pin Crown to Side
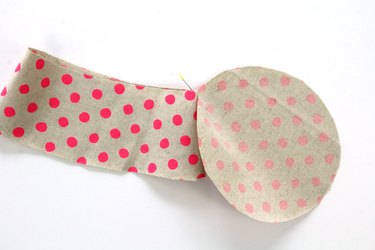
Starting at the 'side' seam, pin the raw edge of the 'crown' to the top raw edge of the 'side', right sides together.
The top of the 'side' is the smaller inner curve circular opening.
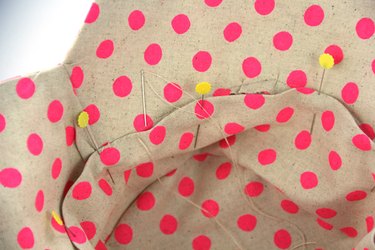
Step 6: Continue Pinning Crown to Side
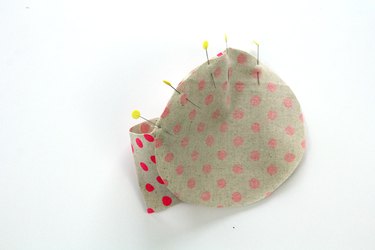
Continue pinning the 'crown' to the top edge of the 'side' right sides together, by pinning and curving the fabric around as you go.
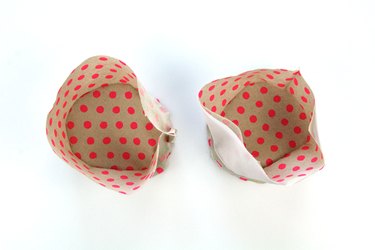
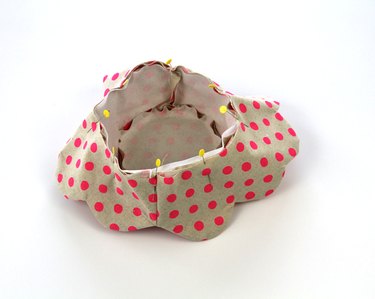
Step 7: Sew Crown to Side
You should have something that looks like this when you are finished pinning the 'crown' to the top 'side'. Repeat for both the lining and exterior.
Sew around the top edge, using a 1/4" seam allowance.
Please note: Sewing a curve can be tricky. It requires a bit of finagling on the sewing machine, and moving the fabric as you go. Be careful not to get any folds or tucks of fabric in your stitches as you sew.
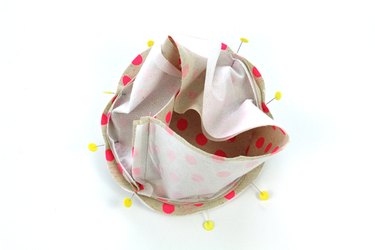
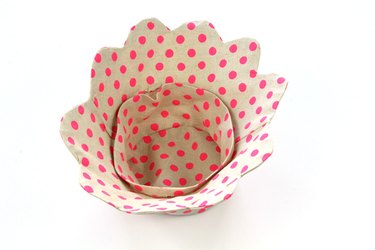
Step 8: Clip Curved Seams
You should have the top portion of your lining and exterior bucket hat sewn now. Carefully clip the curved sewn seam, making sure not to clip the stitches, and set aside for a moment as we sew the 'brim' in the next few steps.
Step 9: Sew the Brim

Place your two 'brim' pattern pieces right sides together, pin the side seams. Sew, and press seam open. Repeat for both exterior and lining.
Step 10: Sew Brim Lining and Exterior Together
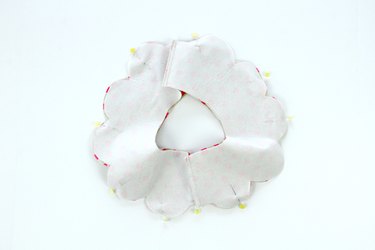
Place your lining and exterior 'brim' pattern pieces right sides together and pin around the outer edge. Using a generous 3/4" seam allowance, sew around the curves of the scalloped edge, pivoting along the curves.
Step 11: Clip Brim Seam Allowance
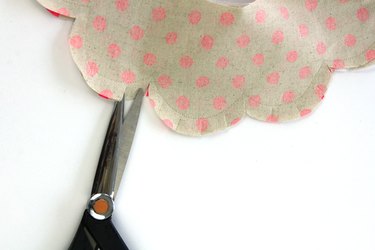
If you are making the scalloped hat version, it is very important that you clip all curved seams of the outer scalloped edge as well as the pivoted points. Make sure to clip as close to the sewn line as possible, with multiple notches around the curves.
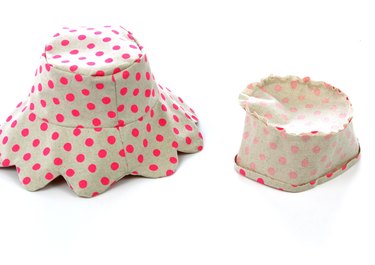
Step 12: Turn Brim Right Side Out and Press
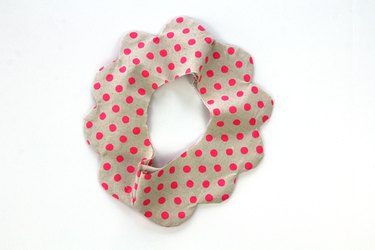
Turn the 'brim' right side out and press, using a blunt pointed object to push out any edges or curves.
Step 13: Pin Brim to Hat
Slip the 'brim' over the exterior hat, right sides together, matching up the raw edges. make sure your 'side' seam and one 'brim' seam are lined up. Pin the raw edges together all the way around.
Note: It helps to pin on four opposite sides (back, front, middle, middle), and gently stretch and curve your fabric as you pin in between those four main pins.
Step 14: Sew Brim to Hat
Sew the 'brim' to the hat, curving the hat as you sew around. Press seam up, towards the inside of the hat.
For the lining hat, fold the bottom raw edge 1/2" towards the wrong side of the fabric and press.
Step 15: Slip Lining Inside Hat
Slip the lining hat inside your main hat, so that the right side of the fabric is showing.
Step 16: Pin Lining and Sew
Pin the lining in place, enclosing the seam, and sew around using a hand needle and thread. An easy whipstitch is perfect, making sure to only catch the lining fabric as you sew so that the stitches do not show on the exterior of the hat.
Step 17: Press Hat
For a crisp looking hat, this last step is vital. Make sure to press all seams, as well as the brim. If needed, a tailor's ham (or curved stuffed object) can help get the best finish over the curved side of the hat.
For additional cuteness, wrap a ribbon around your hat and tie in a bow.
Enjoy Your New Bucket Hat
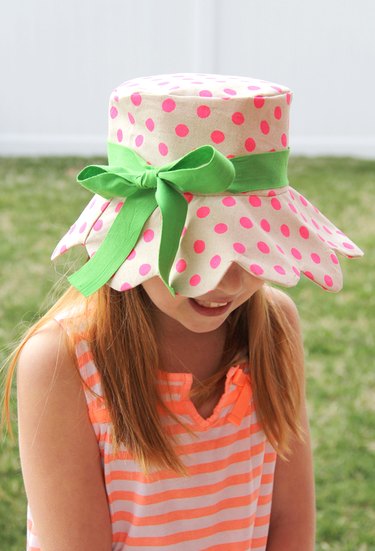
Slip your new bucket hat on your little one's head as they play outside, and you are worry-free. Just make sure to use that lotion still, especially on the rest of their body.