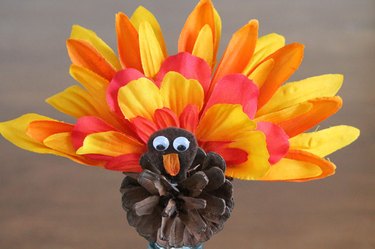
Kids and adults alike can get in on the fun this Turkey Day by creating these fun and colorful pine cone turkeys. Pine cone crafts are always fun for fall, and this project is easy enough to add to your list of seasonal crafts for kids.
Use these cute pine cone turkeys as Thanksgiving decorations around the home. They can also be part of creative DIY centerpieces, napkin holders or even place cards for a festive, family-made Thanksgiving tablescape. You get to show off your Thanksgiving craft and decorate the table for dinner at the same time.
Video of the Day
Video of the Day
Things You'll Need
Silk flowers in fall colors
Pine cones
Iron and ironing board
Sharp scissors
Hot glue gun
Brown felt
White glue
Wiggly eyes, a.k.a. googly eyes
Select silk flowers
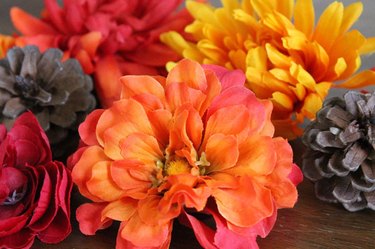
Select a variety of silk flowers in fall colors such as orange, yellow and red to use for your pinecone turkey craft. They should be similar in size but include several different flower shapes. Pull the silk flowers off of their stems. Remove the center by popping the center of the flower off to remove it from the backing.
Tip
Silk flowers are readily available at craft stores. As an alternative, you could cut flower shapes out of colored construction paper or felt. It will still be an easy Thanksgiving craft project but will take a little longer to complete.
Separate the petals
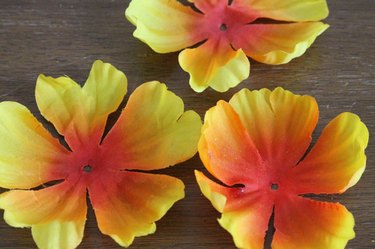
Separate the individual petals, which will become your pine cone turkey's tail feathers.
Repeat with more flowers
Repeat this process with the different flowers until you have several different sizes, shapes and colors of petals to choose from.
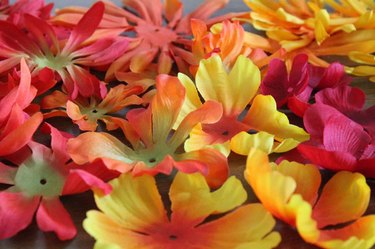
Press the petals
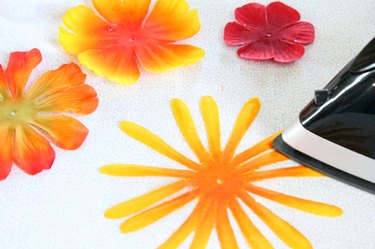
Use an iron on low heat to press the petals flat. You may want to place the petals between two pressing cloths to keep any of the flowers' colors from getting onto your iron or ironing board.
Layer the petals
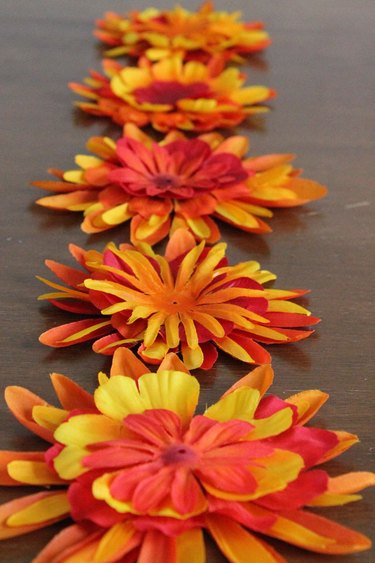
Arrange the different petals in layers to mix and match new combinations of color and shape.
Cut the petal stack in half
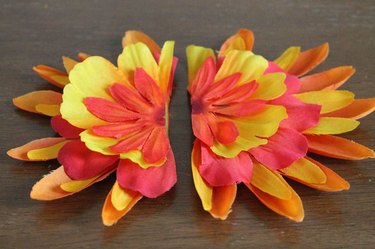
With a a sharp pair of scissors, cut the flower petal stack in half.
Glue the petals
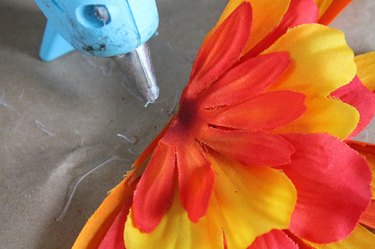
Hot glue the semi-circular stack of flower petals together at the center.
Glue the petals to the pine cone
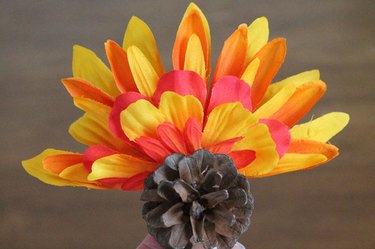
Holding the pine cone horizontally, place the petal arrangement in between the scales at the back of the pine cone. When you are happy with the position of the flower "turkey feathers" and the pine cone "body," glue the feathers in place.
Cut a felt turkey head
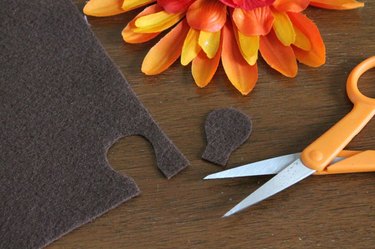
Cut a turkey head and neck shape from brown felt, about 1 inch in length. The shape is similar to a light bulb shape.
Glue the googly eyes
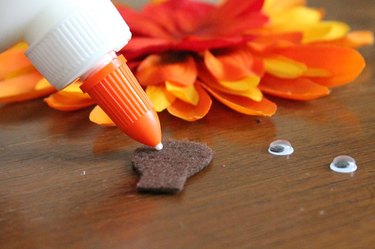
Glue two wiggly eyes onto the turkey head with two dots of white glue.
Glue the neck
Glue the turkey's neck onto the front of the pine cone.
Add a beak
Trim a small orange petal into a triangle as the turkey's beak. Glue it to the felt head, just under the googly eyes. As soon as the glue has dried, your pinecone turkey craft is complete!
Decorate with your Thanksgiving turkey craft

Place these colorful turkeys around your Thanksgiving table to serve as place cards and decorations, or even use a whole gang of them for a whimsical centerpiece.