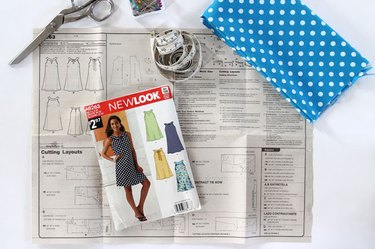
You've set up your sewing machine, practiced your stitches, chosen your fabric and pattern, and transferred all the pattern marks. Now you're ready to read the pattern directions and make your garment. It seems like it would be simple to just follow the instructions, but reading pattern directions can be a bit like reading a foreign language if you don't know the sewing vocabulary or where to start.
Video of the Day
Step 1
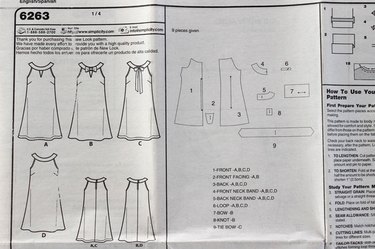
Open up your pattern directions and determine the letter for the design variation you'd like to make. This will be important in knowing which pattern pieces you'll be using to complete your garment.
Video of the Day
Step 2
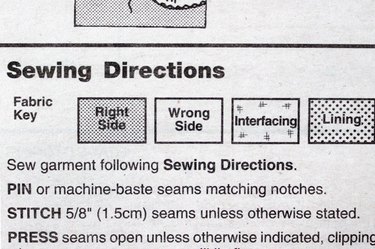
Find the fabric key on the pattern directions so you'll know how to place the pattern pieces onto the fabric. The fabric key will illustrate how the pictures show the right and wrong sides of the fabric and which pieces are the interfacing and lining.
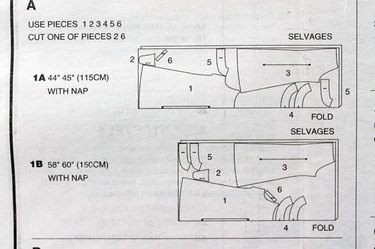
Step 3
Find the section on your pattern directions with the cutting layouts. This area shows you how to place the pattern pieces on the fabric before you begin to pin and cut them out.

Each design variation and fabric width will have its own cutting layout.
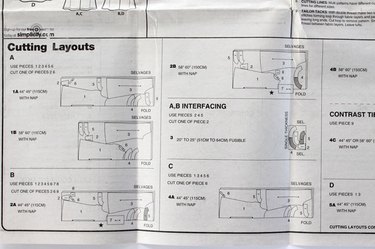
Look closely to find the letter of your garment variation and the width of fabric you're using. This section will tell you which pattern pieces you'll be using and how to lay the pieces out onto the fabric. Most fabrics come in either 44-inch/45-inch or 58-inch/60-inch widths, so there are usually only two choices here. Think of the cutting layout like a map.
Tip
Be sure to lay out all of the pattern pieces onto your fabric before you pin and cut to make sure you have enough fabric.
It's important to know which edge is the selvage and which edge is the fold so you'll be able to place the pattern pieces correctly.
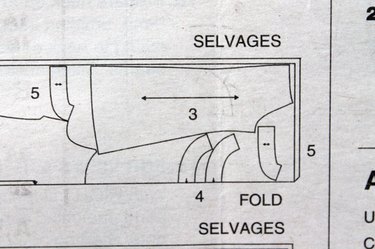
The selvage edge of the fabric is the woven edge that runs along each side of a piece of fabric's lengthwise grain. The selvage edge keeps the fabric from fraying.
When the two selvage edges are placed together, the opposite edge becomes the folded edge of the fabric. Some pattern pieces will be placed on the fold.

There is also a cutting layout for the interfacing that you'll need for your garment.
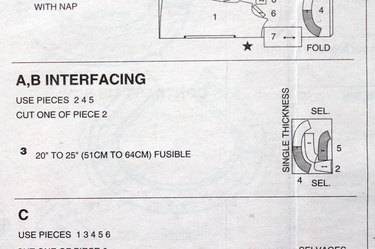
Interfacing is a stabilizer used to add body and give support and shape to the garment. It can be fusible, which is applied to the fabric using an iron, or non-fusible, which needs to be sewn in. Interfacing also comes in many different weights; the pattern should specify which type you will need for your project.
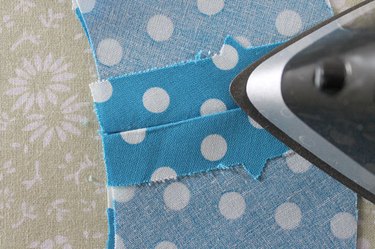
If your pattern calls for fusible interfacing, you'll notice one side has a glossy sheen to it. This side has the adhesive.

The other side of fusible interfacing will have a more matte finish. There is no adhesive on this side.
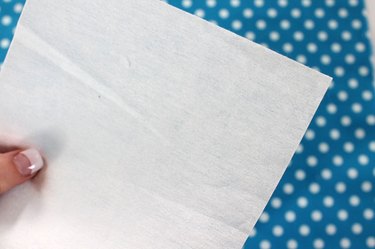
When attaching the fusible interfacing, the fusible side with the adhesive will be placed on the wrong side of the fabric, and then you'll use an iron to adhere it.
Step 4
Once you've laid out your pattern pieces correctly on the fabric, you can pin and cut out the pieces. Transfer any marks from the pattern to your fabric to guide your sewing. You can see which marks to transfer and how to do this in this article: Learn to Sew: How to Mark Your Fabric Before You Cut.
Step 5
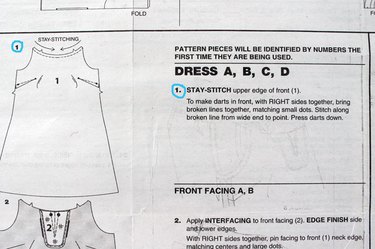
You're now ready to follow the pattern directions starting with the number 1 instruction. There will be an illustration and written instructions in numerical order for each step of the process.
If you continue to follow the step-by-step instructions in the order on the pattern directions, you will be able to complete your project. However, there may be some techniques and vocabulary mentioned that you are unfamiliar with, so here's the scoop on the lingo to understand what it all means.
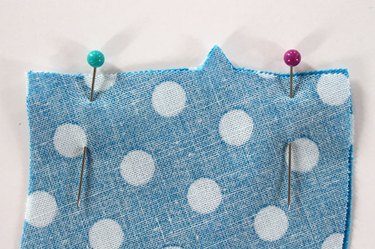
Pin
When the directions tell you to pin two pieces with the right sides together, be sure to match up the edges and the notches before you pin.
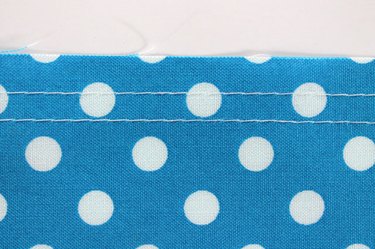
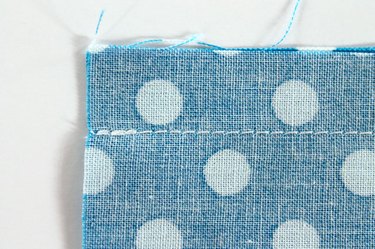
Stitch
A stitch line is usually 5/8 inch away from the edges of the fabric unless it tells you otherwise. To get a 5/8-inch seam, line up the edge of the fabric along the 5/8-inch line on the needle plate and put the presser foot down onto the fabric to hold it in place.
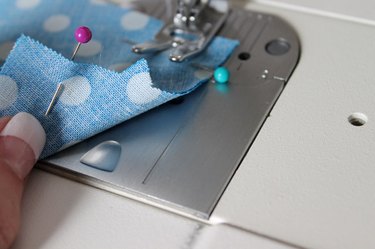
Set your machine to a straight stitch, unless the pattern directions tell you otherwise.
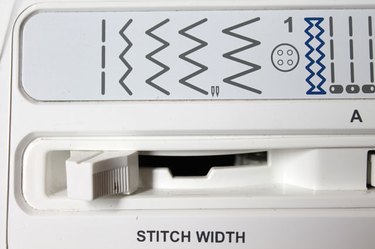
Set your machine to a medium stitch length for a regular seam.
Seam Allowance
The distance from the edge of the fabric to the stitch line is called the seam allowance.

Press
After sewing a seam, press open the seam allowance with an iron unless otherwise stated so the seams will lie flat. This is a very important part of the process so your garment will hang nicely.
Stay-Stitch
A stay-stitch is sewn 1/2 inch in from the cut edge to keep the edges from stretching, especially on a curved edge.

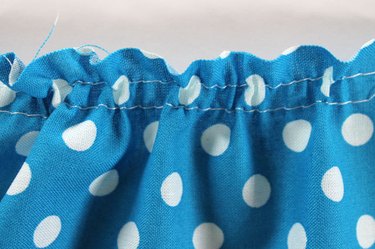
Ease-Stitch or Gather
An ease-stitch or gather-stitch is used when one piece has more curve or volume to it than the other to which you are connecting. First, set your machine to the longest stitch length. With the right side of the fabric facing up, sew 5/8 inch away from the edge. Stitch again in the seam allowance 1/4 inch away from the first stitch line so you have two lines of stitching.
You will then pull on the bottom thread to gather the material to make it the length of the connecting piece.
Back-Stitch
A back-stitch is used to hold the end of a stitch line in place. When you get to the end of the seam, put your machine in reverse and stitch 3 or 4 times then put your machine in the forward position and stitch again 3 or 4 times.
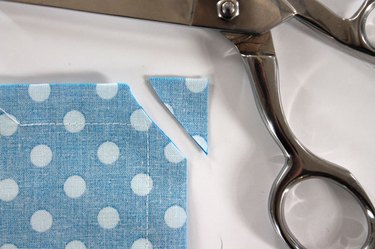
Trim Corners
When a garment has a corner, the directions will instruct you to trim the corner. This just means to cut the bulk out of the corner at an angle as close to the stitching as you can get without cutting the stitches. Trimmed corners will help the seams lie flat and your garment will look polished and finished.
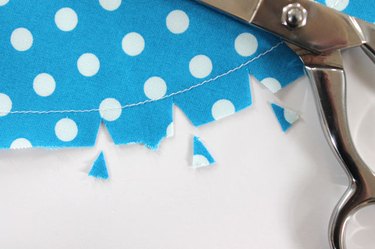
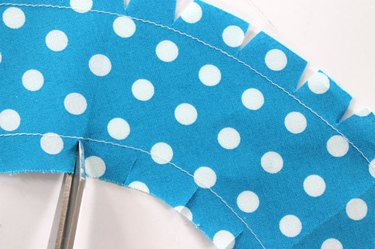
Notch Curves
When a seam curves, the outer edge of the fabric is a different length than the stitching line. When you try to fold the seam allowance under a curved seam, it will bulge or strain and will look bulky. When the curve is convex, you will notch the seam allowance to reduce the bulk. This simply means to cut out little triangles at regular intervals as close to the stitching line as possible without cutting the stitches.
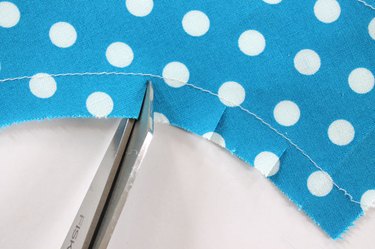
Clip Curves
When the curve is concave, you will clip the seam allowance at regular intervals as close to the stitching as possible without cutting the stitches.
Finished Seam Edges
It's a good idea to finish the edges of your seams, even if your pattern doesn't specifically call for you to do so. Finishing the seam edges will keep them from fraying and make it last much longer. You can learn different ways to finish edges here: Six Easy Ways to Finish a Seam Without a Serger.
Don't miss the rest of the series!
- Read Part 1: Essential Sewing Tools
- Read Part 2: Basic Sewing Machine Stitches
- Read Part 3: Choosing Patterns and Fabrics
- Read Part 4: How to Mark the Fabric Before You Cut