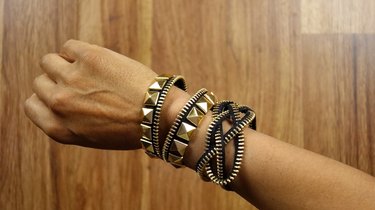
My favorite DIYs tend to involve turning stuff into other stuff. For me, projects like these aren't simply innovative, they border on magical -- in a presto-chango kind of way. Zipper crafts fall into this category for me, and the seasoned crafter is well-aware of this humble fastener's repurposing potential. One of my favorites is turning zippers into bracelets, and a quick Google search proves that lots of DIYers have come up with some pretty fashion-forward zipper bracelet designs. In fact, with some imagination, you may even be able to create an original design of your own! Here are three to get you started.
Video of the Day
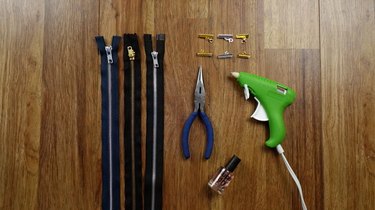
Things You'll Need
3 zippers with metal pulls and teeth (medium to heavy weight) at least 20 inches long and 1 inch wide
3 pairs of metal ribbon clamps with jewelry fasteners attached (2 pairs 1-inch wide, and 1 pair ¾-inch). Choose finishes that match your zipper hardware
Glue gun and glue sticks
Long nose pliers
Clear nail polish (or fray stop liquid)
Pronged studs (for the studded bracelet)
Tool of choice for bending stud prongs (e.g. flat head screwdriver, thimble, metal file, etc.)
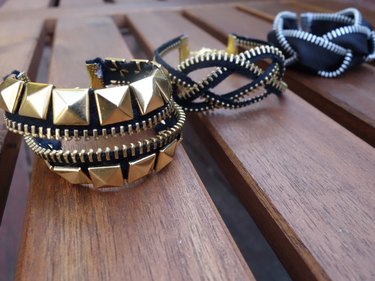
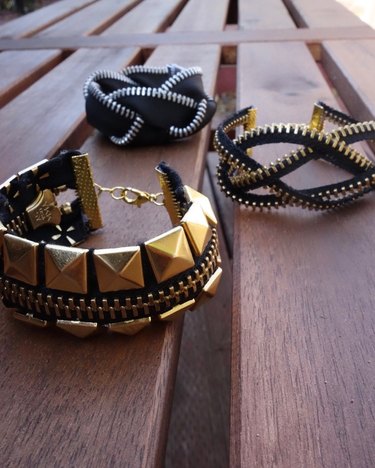
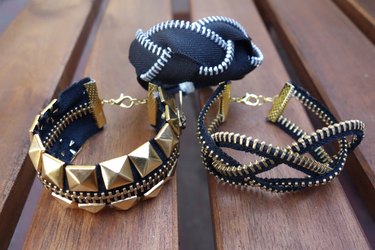
Studded Bracelet
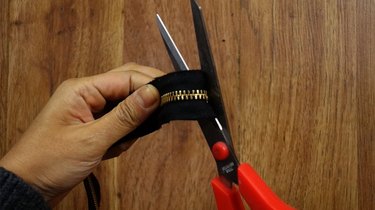
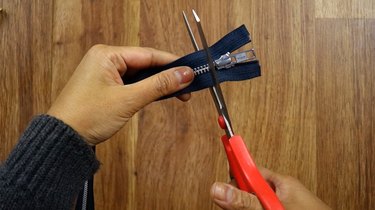
Step 1: Cut Zipper to Desired Length
A quick way to find out what length you should cut is to measure a bracelet you already own that fits you perfectly. Be sure to take into account the length of the jewelry fasteners attached to your ribbon clamps, then subtract this from your zipper's cut width. It's important that you use the end of the zipper with the pull for this particular bracelet.
Tip
Your zipper will have extra material above the pull that you may choose to trim down. If you do, leave about ¼ - ¾ of an inch above the pull -- enough to give the ribbon clamp something to grab onto.
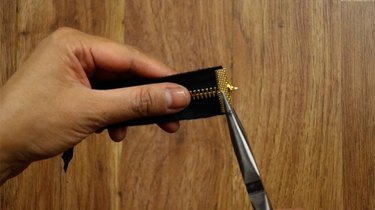
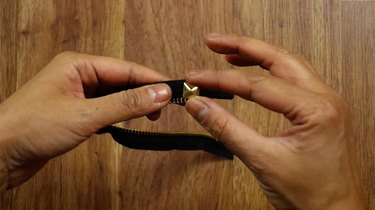
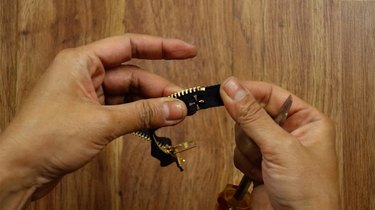
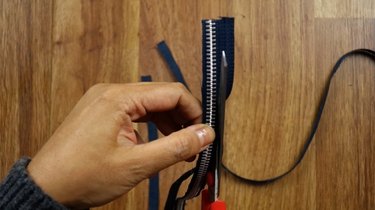
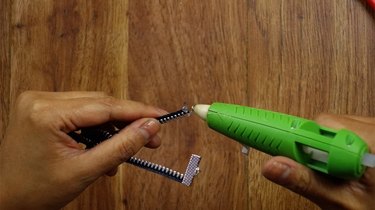
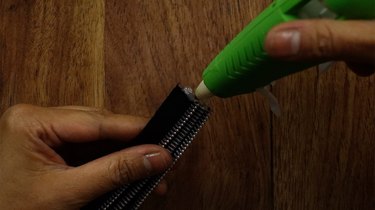
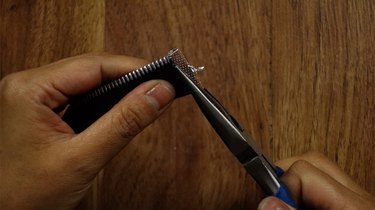
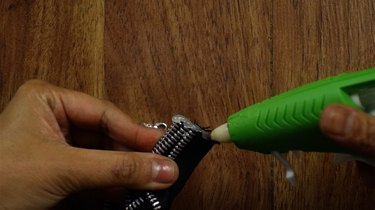
Step 2: Glue and Clamp the Cut End
Create a new zipper stop on your cut end by applying glue to the edge and clamping your ribbon clamp over the glue, using your pliers to bend the clamp tightly over the edge. The glue will give the clamp a better grip and create a stronger bond. It's important that you complete this step right after cutting your zipper. If not, you may accidentally detach your zipper pull from the zipper -- which you don't want!

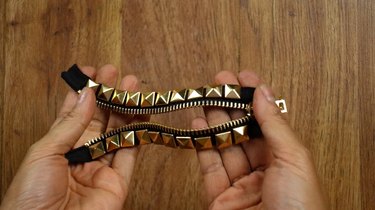
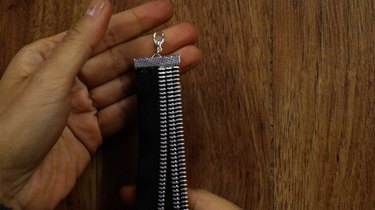
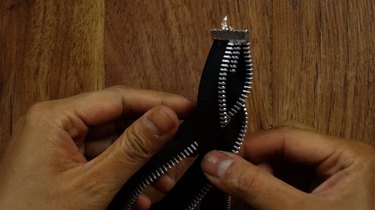
Step 3: Stud Your Bracelet
Unzip all the way down to the new stop you created, then apply two rows of studs -- one on either side of the zipper. You can choose to leave some space between each stud, or apply them edge to edge. If you choose to space them apart, bear in mind that you'll have to ensure that the spaces are uniform (which will take a bit more time).
Tip
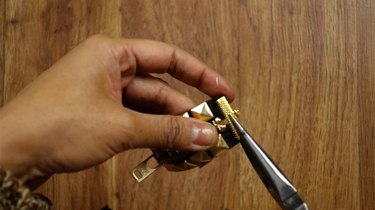
If you’ve never studded anything before, check out this tutorial on how to apply pronged studs. Basically, you’re going to push the prongs of the stud through the fabric, then use any flat, stiff tool (preferably metal, such as a flat head screwdriver or the end of a metal nail file, etc.) to bend the prongs down to secure.
Step 4: Finish the Other End
Once you're done studding, it's time to glue and clamp the other end as you did the first. Take care to use a ribbon clamp with the opposite clasp end you used earlier, so that you'll be able to attach the two ends of your bracelet together.
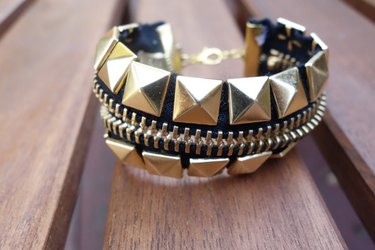
Once you've finished this step, your studded bracelet is ready to rock!
Knotted Bracelet
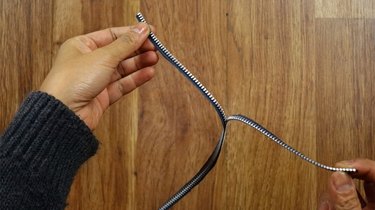
Step 1: Cut Ends Off Zipper
Cut both ends off of the zipper you'd like to use, as you won't need either the pull nor the stop.
Step 2: Cut Fabric From Edges
Cut the fabric along both sides of the zipper teeth, leaving a little under 1/16" of an inch (or so).
Step 3: Separate Zipper Pieces
Separate the two sides of your zipper by pulling apart at the teeth.
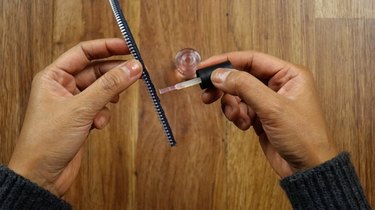
Step 4: Prevent Frayed Edges With Polish
To prevent the edges of the cut material from fraying, paint clear nail polish (or fray stop liquid) along the entire length of both edges.
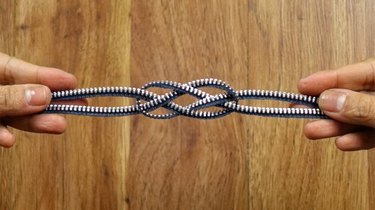
Step 5: Tie Your Knot (Lots of Photos Ahead!)
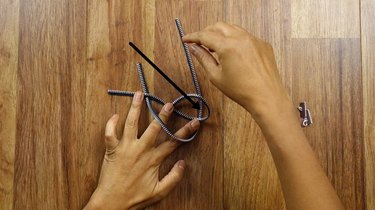
Start with both pieces lying parallel vertically on your work surface. Take the bottom of the left piece and form a loop, with the bottom end on top.
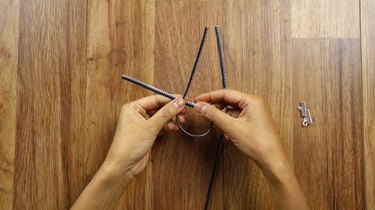
Now lay the loop sideways on top of the piece on the right. Pin down the loop with one of the fingers of your left hand.
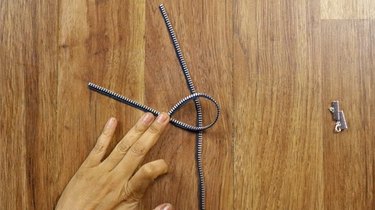
Next, take the bottom end of the piece on the right and bring it up toward the top end of the looped piece. You're going to form an "X" with those two ends, with the piece in your right hand underneath the piece on your left (see below). Continue to hold the loop secure to the table.
Here's what it looks like when you've formed your "X," (circled below) with the left piece on top and the right piece underneath. You're probably going to have to use another finger to hold down that "X" to prevent the zipper piece from moving out of position.
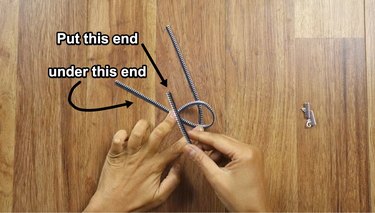
Almost there! Take a look at the part of the piece that's underneath the loop. It's pointed out below:
You're going to take the end of the right side piece (the one that's part of the "X") and pull it underneath the piece that's beneath the loop (pointed out above). Be sure to just pull it underneath that part beneath the loop, not through the loop (follow the path of the white arrow below).
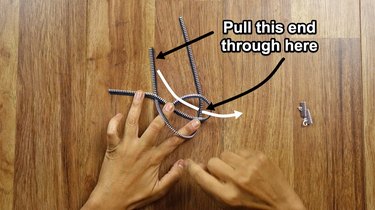
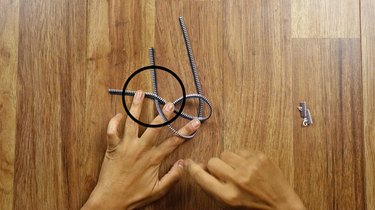
Here's what it looks like when you pull that end through, as described.
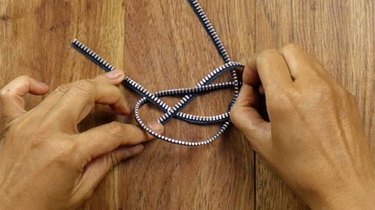
Your knot is coming together now! Next, tug on all four ends and work your knot so that it's symmetrical.
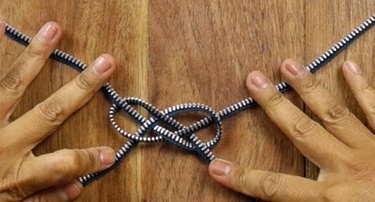
Your ends will probably not be equal lengths (and they'll be too long) at this point, but you'll cut them to size. Just concentrate on making your knot look pretty.
Step 6: Cut and Finish the Ends
Measure and cut your bracelet to your size. To finish the ends, apply glue to the tips of the end pieces, and clamp them down with the ¾-inch (½-inch would work, too) ribbon clamps.
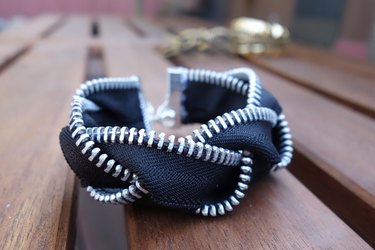
Your knotted zipper bracelet is all done! Looks kinda Celtic-meets-steampunk, no?
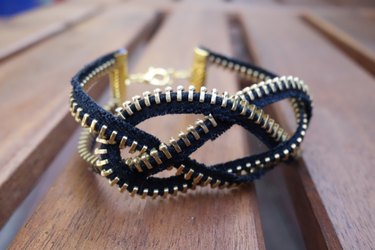
Braided Bracelet
Step 1: Cut Ends Off Zipper
As in Step 1 for the knotted bracelet above, cut off the ends of your zipper, removing the pull and zipper stop.
Step 2: Separate Halves
As in Step 3 for the knotted bracelet, separate the two halves lengthwise (though, unlike the knotted bracelet, you won't trim off the fabric edges).
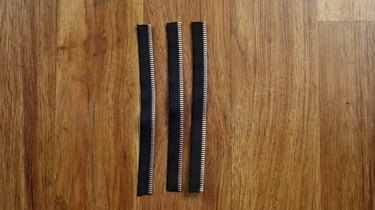
Step 3: Cut 3 Equal Lengths
You'll need 3 pieces about 10 inches or longer for your braid. If your zipper isn't long enough to yield three pieces of this length, you might need to use another zipper. You won't cut the bracelet to its final length until later; for now, simply cut three pieces of equal length.
Step 4: Glue Pieces Together At the Ends
Glue the ends of the three pieces together in an overlapping fashion with the teeth edges aligned in rows. See the images below.


Step 5: Glue and Clamp to Finish End
Go ahead and finish up that edge by first applying glue and then attaching a ribbon clamp using your pliers.
Step 6: Braid
Now, braid the three pieces together.
You'll find that your braid will naturally curve under, forming a semicircle.

Step 7: Trim Excess
Braid until you've reached your desired length (accounting for the length of your fasteners). As you did for the first end, align the teeth in consecutive rows, then cut the excess so the end edges match up.

Step 8: Finish Other End
Finally, glue the ends together in the same way you did the opposite end, then glue and attach the final ribbon clamp.

Your braided bracelet is done!
These would look fab with a simple tee and your comfiest pair of distressed jeans. Plus, they're totally stackable, so flaunt your DIY prowess by rocking two or three at once!