Cutting a knit sweater is a convenient way to reshape or resize it. It's also how you'll attach the sleeves, if you're knitting a full sweater from scratch. It's an intimidating prospect, because if you don't do it correctly, a few innocent snips can cause it to unravel completely.
Don't stress over it too much — keeping a cut edge intact is a fundamental part of knitting, and there are well-established techniques for doing it safely.
Video of the Day
Video of the Day
Reasons for Cutting Knit Sweaters
Knitters refer to cutting a sweater as steeking, and you'll find this technique comes in handy when you want to alter your sweater. There are plenty of reasons to snip a sweater, such as:
- Altering the length: Cutting a sweater's hem can shorten it to a more desirable length, whether it's hand-knit or store-bought.
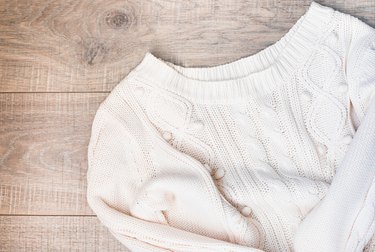
- Altering the neck: If you cut the neckline of a sweater, you can instantly change the style. For example, you can give a plain crewneck sweater a V-neck or boatneck.
- Changing the style: A pullover style can be cut straight up the middle to turn it into a cardigan.
- Stranded color-work: If you're knitting stranded color-work, it's easiest to knit the sweater in the round, then steek the sweater to create the sleeves. This allows you to not only avoid purl rows but also keep an even tension throughout the project and avoid any disruption in the design. This technique can also be used on a stranded color-work cardigan.
Tip
The sewing machine technique is best for fibers that don't stick together naturally, such as cotton, linen, and silk.
Steeking a Sweater With a Sewing Machine
If you own a sewing machine, you can use it for quick, simple steeking. This technique will give you the strongest reinforcement possible.
Things You'll Need
Straight pins
Sewing machine
Scissors
1. Place Pins Where Needed
Use straight pins to mark the area of the sweater that needs to be steeked.
2. Sew Short Stitches
Using your sewing machine, sew a line of short stitches around this area. These stitches will prevent the sweater from unraveling.
3. Cut Inside the Stitches
With sharp scissors, cut into the area inside the stitches. Be sure you do not cut into the machine stitching.
How to Steek a Sweater Without a Sewing Machine
If you've ever worked with animal fiber yarns, you may have noticed that they stick together more than other fibers, such as cotton or linen. As you knit, the fibers stick together more and more. Unreinforced steeking takes advantage of this stickiness, and it's especially useful for stranded knitting.
Things You'll Need
Straight pins
Scissors
1. Pin the Area
Mark the area of the sweater that needs to be steeked with straight pins.
2. Cut Into Sweater
Carefully cut into the area, snipping very slowly. The fibers will stick together without any reinforcement because the fabric is made from animal fibers that naturally felt together.
Tip
If you are concerned about the unreinforced fibers unraveling, rub the edges of the cut section together to felt them. This will help them stick together.
How to Steek a Sweater With a Crochet Hook
If you don't own a sewing machine and are familiar with crochet, you can use a crochet hook to secure the stitching before you cut the sweater.
Things You'll Need
Contrasting color of scrap yarn
Crochet hook that's recommended for your scrap yarn
Scissors
1. Mark the Sweater
Mark the area of the sweater that needs to be steeked.
2. Insert the Crochet Hook
Using a contrasting scrap of yarn, insert your crochet hook along the line of the marked area.
3. Single Crochet the Marked Line
Single crochet all the way around the marked line, always inserting the crochet hook into the knitting and pulling up a loop.
4. Cut Inside the Stitches
With scissors, cut into the area inside the crochet stitches.