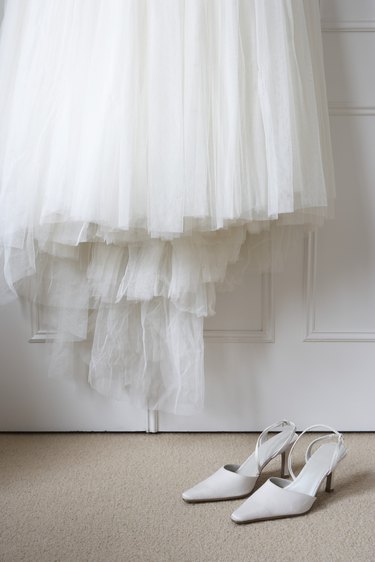
If you're torn between the elegance and drama of a floor-length wedding gown and the comfort and economy of a short wedding dress, then a detachable wedding skirt may offer the best of both worlds. With careful planning and the appropriate embellishments, you can create an elegant wedding skirt that can be worn during the ceremony and then removed afterwards to reveal a less elaborate dress you can dance in unencumbered and wear again in other social settings.
Taking Measurements
Video of the Day
Step 1
Put on the shoes you'll wear on your wedding day, as well as your wedding dress and any bulky undergarments you will be wearing under your detachable skirt, such as a petticoat, bustle or hoop.
Video of the Day
Step 2
Measure around your waist and from your waist to the floor using a tailor's measuring tape.
Step 3
Measure around bulky undergarments at the midway point (approximately at knee level) and at the bottom. The measurements will dictate the amount of fabric you'll need. In most cases, 4 to 5 yards of fabric will be sufficient to make your wedding skirt, depending on the volume.
Draw and Cut the Skirt Sections
Step 1
Draw a rectangle for the waistband on pattern paper with the following dimensions: The length (or long side) of the rectangle should equal your waist measurement plus 3 to 4 inches to accommodate the closures, and the width (or short side) of the rectangle should equal twice your desired width for the waistband plus 1 1/4 inches for seam allowances, as this rectangular section will be folded in half lengthwise during sewing. For example, if you wish to have a 2-inch waistband, then the short side of the rectangle should measure 5 1/4 inches.
Step 2
Draw a trapezoid on pattern paper that is narrow at the top and gradually flares out at the bottom; this will be the pattern for the three sections that will comprise the skirt. The length of the trapezoid should equal your waist-to-floor measurement. The width of the top, middle and bottom of the trapezoid should be no less than one-third the waist and undergarment measurements taken in Section 1 plus a few inches for seam allowances, gathering, and the desired degree of flaring at the bottom.
Step 3
Cut the pattern pieces. (To ensure symmetry, fold the paper in half and cut the opposite side to match.)
Step 4
Trace the waistband pattern onto the fabric, as well as the interfacing, which is a textile often sewn to the "wrong side" of the fabric to make an area more rigid. (The "inside," or "wrong side," is the side of the fabric that is not meant to be seen. Conversely, the "outside" or "right side" is the side of the fabric that is meant to be seen.)
Step 5
Trace the trapezoid pattern onto the fabric. Draw the remaining two identical skirt sections by tracing the same trapezoid pattern.
Step 6
Cut out all the pieces you have traced onto the fabric.
Sew the Skirt
Step 1
Mark the two back skirt fabrics where the zipper will be. Lay the skirt sections on top of each other, keeping the "outside" of the fabrics together and the zipper marks aligned.
Step 2
Sew the seam from the bottom of the skirt up to the zipper mark, machine-baste the remaining opening edges above the zipper mark, and press open.
Step 3
Use dressmaker pins to secure the zipper (closed and face-down) in place over the machine-basted seam from the previous step. Turn the fabric over so the "outside" is facing you and stitch the zipper using a zipper foot attachment. Remove pins and basting.
Step 4
Stitch the front skirt section to the back section completed in the previous step.
Step 5
Gather the top of the skirt by machine-basting 1/2 inch from the top of the skirt, breaking the basting at the side front seams, and pulling the threads to gather the fabric so the circumference is roughly equal to the waist measurement from Section 1. Turn the skirt right side out and set it aside in preparation for the next step.
Step 6
Baste the interfacing to the "wrong side" of the waistband.
Step 7
Wrap the waistband around the top of the skirt so that the "outside" of the waistband and the "outside" of the skirt are facing each other and the opening of the waistband is aligned with the zipper.
Step 8
Stitch the waistband to the skirt, adjusting the gathers of the skirt evenly as you sew. Turn the skirt inside out.
Step 9
Fold the waistband fabric in half and sew the waistband in place along the seam, tucking the raw edges into the waistband as you sew.
Step 10
Sew the desired closures, such as a hook and eye or ornamental buttons.
Step 11
Fold up the bottom of the skirt twice, with the first fold being a 1/4-inch hem and the second fold a 1-inch hem. Secure the hem in place with pins.
Step 12
Press the hem in place. Remove the pins. Sew the hem using a conventional machine or by hand.
Step 13
Adorn your skirt with tasteful embellishments, such as antique buttons, pearls and lace.
Tip
When selecting a fabric for the detachable skirt, choose the same or matching fabric as your wedding dress.
Avoid costly mistakes by using an inexpensive muslin cloth to make a pattern and test the fit of the skirt before cutting the actual fabric for the detachable skirt.
Make markings on the fabric using a tailor's chalk or any writing implement that does not leave a permanent mark.
Prevent raw edges of the fabric from fraying by finishing all raw edges with a zigzag stitch using a conventional sewing machine.
Use a traditional hand iron when a step calls for pressing fabric in place.