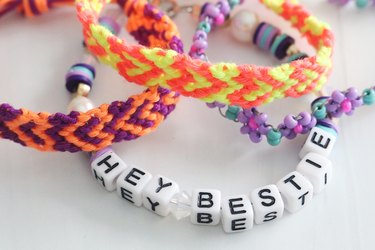
Whether you're pining for long-gone memories of summer camp, loving the Taylor Swift friendship bracelet trend or just a fan of homemade accessories, you'll want to bookmark this creative and colorful DIY jewelry project. We've created three easy friendship bracelet tutorials that are both fun and fab: a heart friendship bracelet made of embroidery thread, a beaded daisy chain bracelet and a classic letter beaded bracelet.
Video of the Day
If you're new to making your own friendship bracelets, this is a great opportunity to try your hand (pun intended!) at the nostalgic craft project. From there, jump into making personalized bracelets for your best friends to celebrate birthdays, concerts, Valentine's Day and just about every other occasion in between.
Ready to treat your BFFs? Keep reading to learn how to make friendship bracelets and find our top tips for completing this easy craft project.
1. Embroidery Heart Friendship Bracelet
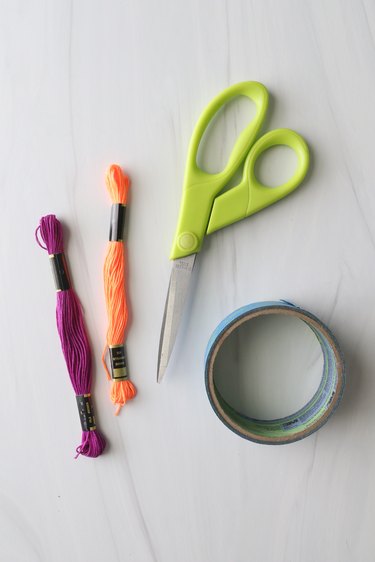
Things You'll Need
Embroidery thread (two colors)
Scissors
Tape
Tip
When making multiple bracelets for your besties, you can use matching colors or a general color palette. Even if they're made using different colors, the completed bracelets will look just as cute.
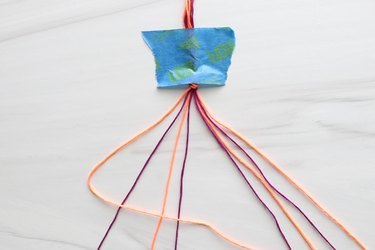
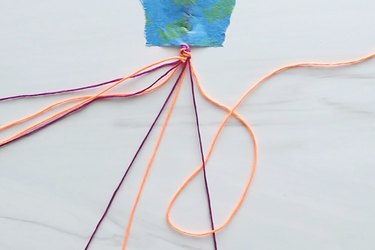
1. Prepare thread
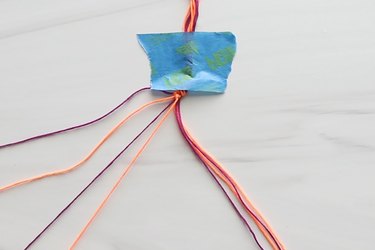
Cut four strands of each color, about 28 in. each, for a total of eight strands. Tie strands together with a knot, leaving about 3 in. of excess thread.
Tape bundle of thread onto a flat surface. This will keep it steady as you work.
Tip
If you want to take your bracelet on the go, attach a safety pin to the knot. This way, you can attach the pin to your pants or another fabric and get to work.
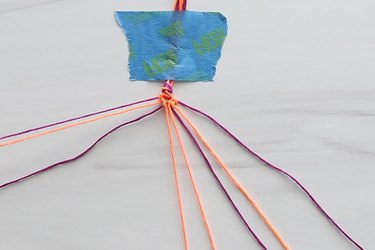
Separate strands of floss into two groups of four, making sure to alternate the colors. The left and right side should mirror each other (i.e., the same color should be on the outside).
2. Make chevron rows
A heart pattern is made by alternating between two "normal" rows and two "special" rows. Normal rows consist of chevrons, or V-shaped rows.
Tip
You’ll be working on one side at a time throughout the entire project. During each step, you’ll essentially tie rows of double knots on each side and then connect them in the middle.
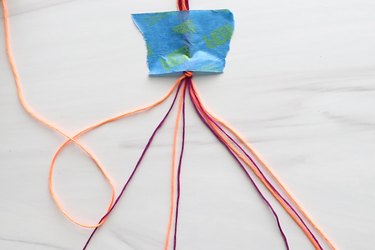
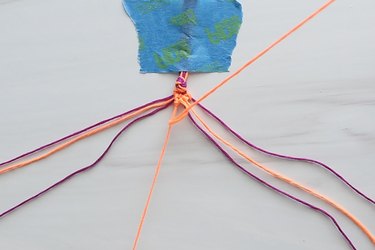
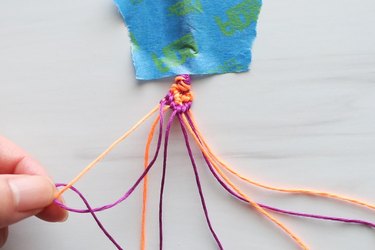
The first step is to make a forward knot, which is a basic knot in bracelet making. Take outermost left strand and place it on next strand, creating a "4" shape.
Bring first strand under second strand through the loop created by "4" shape.
Pull first strand to close knot. Repeat one more time. (Always knot twice regardless of the row you're making.)
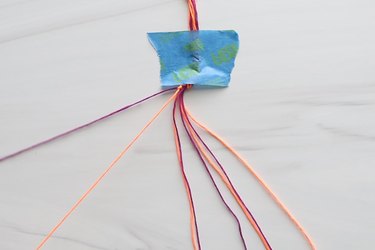
Using the same thread (the original outermost left strand, shown here in orange), make forward knots on next two strands until reaching middle. This completes half the chevron pattern.
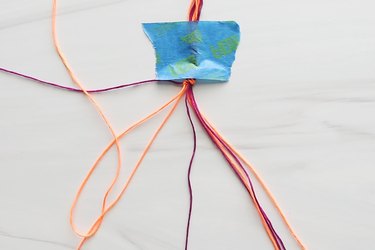
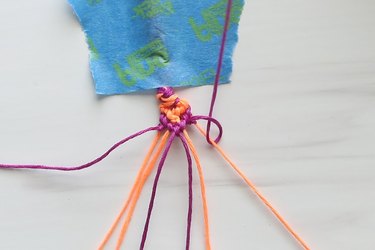
Now, you'll need to mirror this process on right set of stands using backward knots. To make a backward knot, take outermost right strand (shown above in orange) and place it on second to last strand (shown above in purple), creating a backward "4" shape.
Bring outermost right strand under second strand, threading it through the loop made by backward "4." Pull through to close knot. Repeat once more.
Using same thread, make backward knots on next two strands (working backward) until reaching middle. Don't forget to knot twice each time. At this point, you should have two strands of same color in middle.
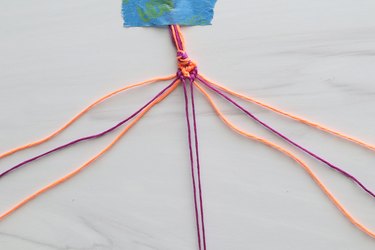
Take strand on left and tie a backward knot around right. This will connect each side, resulting in first complete chevron row.

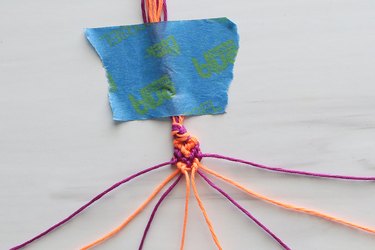
Repeat above steps using new outermost strands, which should be the second color (shown above in purple). Connect them in middle using a backward knot. Now, you have two chevron rows, or "normal" rows.
Tip
If you want to make a chevron friendship bracelet, simply repeat above steps for entire bracelet. You can use the same or different colors of thread.
3. Make two “special” rows
Before starting, make sure strands of embroidery floss are separated into two groups of four. Check that colors mirror each other on each side.
To start a "special" row, take second outermost left strand (shown here in purple). Make a backward knot around outermost strand (shown here in orange). Remember, knot twice!
On right side, take second to last strand (shown here in purple) and make a forward knot on last strand (shown here in orange).
Next, tie knots between outer knots. On left side, take second strand and tie forward knots on next two strands until reaching middle.

On left side, take second to last strand and tie backward knots until reaching middle. Again, you'll have two strands of same color in center.
Take strand on right and tie a backward knot, which will connect it to strand of same color (fourth from left). Repeat another special row, starting with new outermost strands. It will be same as first special row but in opposite colors.
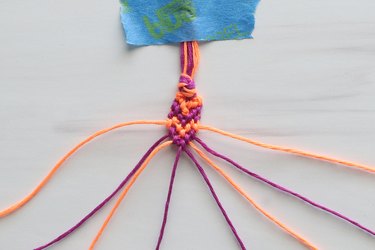
4. Continue pattern
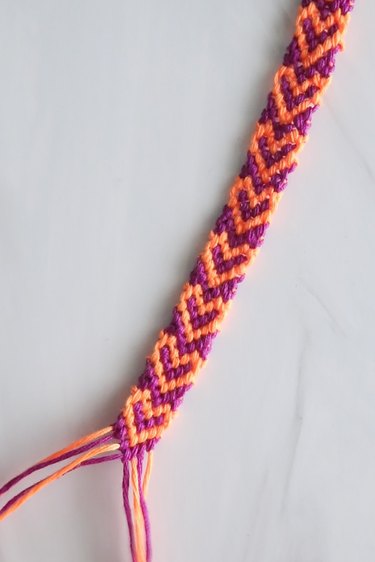
Make another two normal rows, which will "close up" the heart shape. Follow with two special rows, two normal rows, two special rows, etc. As you continue this sequence, heart pattern will eventually reveal itself.
5. Tie ends

Repeat until bracelet is long enough for your preference. Then, tie ends and trim thread as needed. Make another bracelet with same (or different) colors and these DIY friendship bracelets are ready for you and your bestie!
2. Beaded Daisy Chain Bracelet
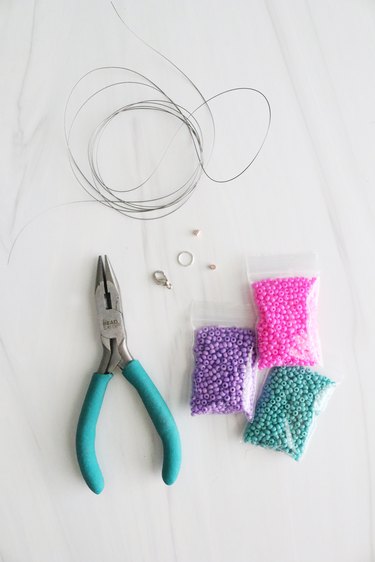
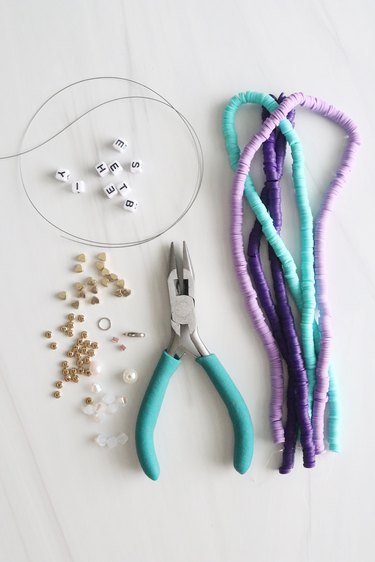
Things You'll Need
Seed beads (three colors)
Invisible beading cord or flexible beading wire
Jewelry pliers
Clasp set
2 crimp beads
Tip
Invisible beading cord is more flexible than beading wire, so it’s the best choice for this friendship bracelet pattern. However, beading wire is easier to see, so we used it for this tutorial. If you'd like to use beading wire, make sure it’s very flexible.
1. Prepare cord
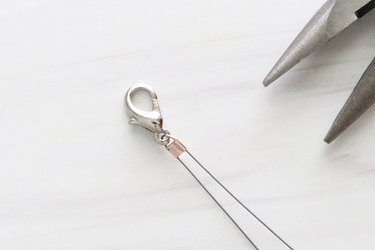
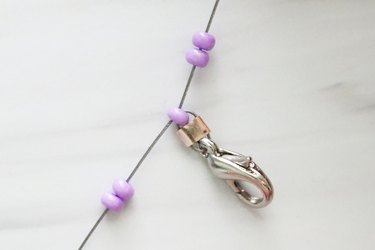
Cut a length of cord measuring at least 4 feet long. Fold it in half and add clasp, sliding it all the way to folded loop. Next, insert both ends through a crimp bead and slide it all the way to clasp. Using the flat portion of jewelry pliers, press crimp bead to secure.
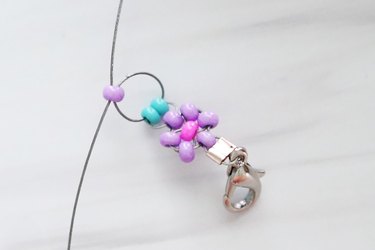
2. Make beaded flower
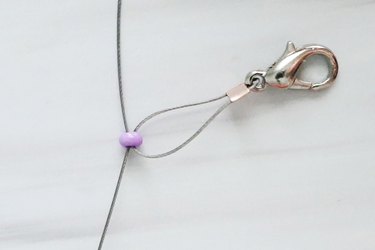
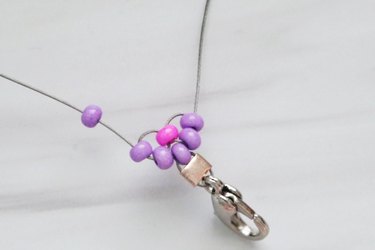
To start your flower bead bracelet, string one seed bead onto a strand. This should be the color you'd like to use for petals. From opposite side (i.e., where current strand is coming out of), insert other strand through bead. Pull to tighten. This creates bottom petal of flower.
To each strand, add two seed beads.
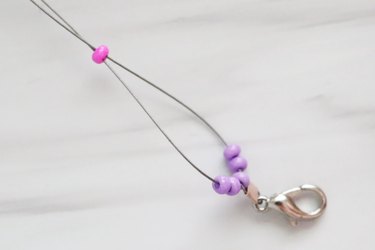
Insert both strands through seed bead that will be center of flower. It should be a different color than other beads.
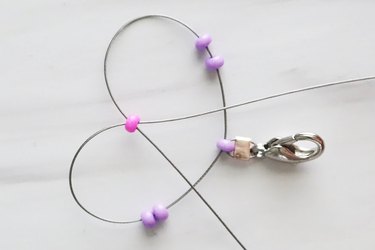
Bend both strands downward so that each strand is positioned just under each pair of beads. This will create a heart shape.
Insert left strand up and through beads on left. Repeat on right side. Pull to tighten. This creates sides of flower.
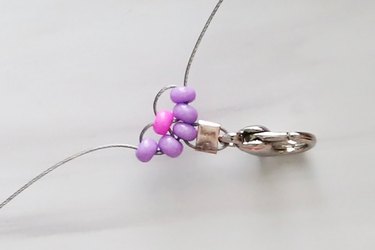
To close up flower, add one seed bead to one strand.
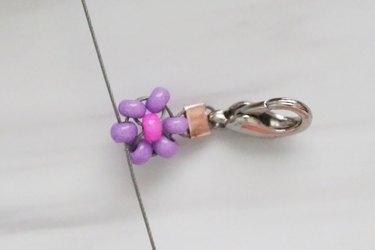
Insert other strand through bead and pull to tighten.
3. Make beaded leaves
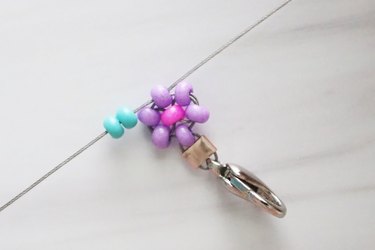
For the "leaves," add two seed beads to one strand.
Insert other strand through both beads and pull to tighten.
Tip
You can use three beads for a wider row or skip this part completely.
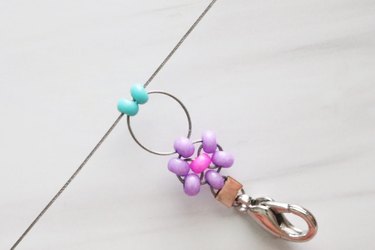
4. Repeat pattern
Add one petal bead to start next flower.
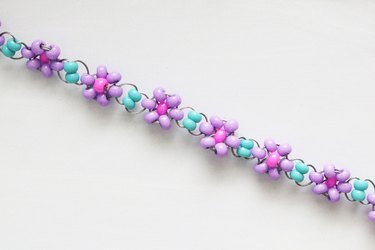
Continue making flowers and leaves until bracelet has reached desired length.
5. Add jump ring
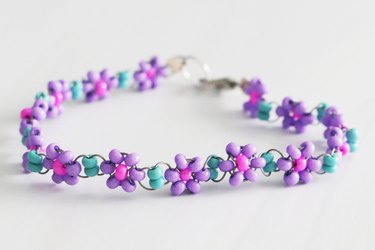
When you've reached end, add a crimp bead followed by a jump ring. Thread ends of cord back into crimp bead. Using flat portion of jewelry pliers, flatten crimp bead to secure. Trim excess cord.
Now, it's time to gift the daisy beaded bracelet to your best bud!
3. Letter Beaded Bracelet
Things You'll Need
Beading wire
Letter beads
Mixed beads of choice
Clasp set
2 crimp beads
Jewelry pliers
Tip
Feel free to use any beads you’d like, including glass, plastic and/or clay beads. You can also make a specific pattern or use random beads like we did for our bracelet. The latter is a great trick for using up leftover beads from your stash!
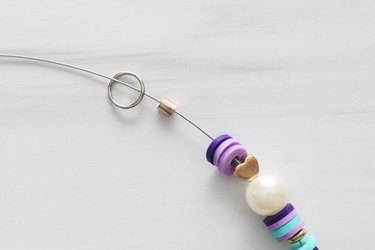
1. Prepare wire
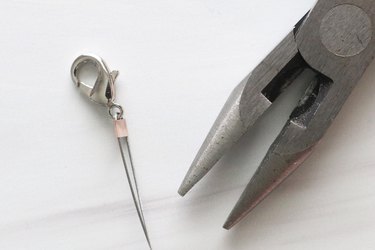
Cut a strand of beading wire slightly longer than desired length. Slide on a crimp bead followed by a clasp. Insert end of wire through crimp bead. Flatten crimp bead with flat portion of jewelry pliers.
Tip
You can also use elastic cord for this bracelet. If you do, you won’t need the clasp set or crimp beads. Simply tie a knot, leaving a few inches of excess cord.
2. Add beads
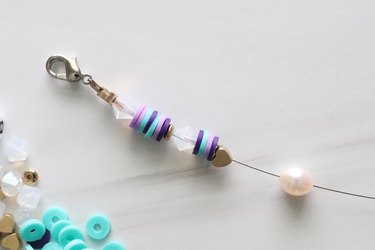
String on first half of beads.
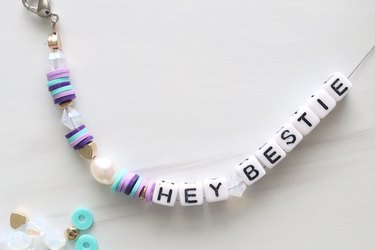
Next, add letter beads to spell out your desired word or phrase. Add a nonletter bead between words to separate them.
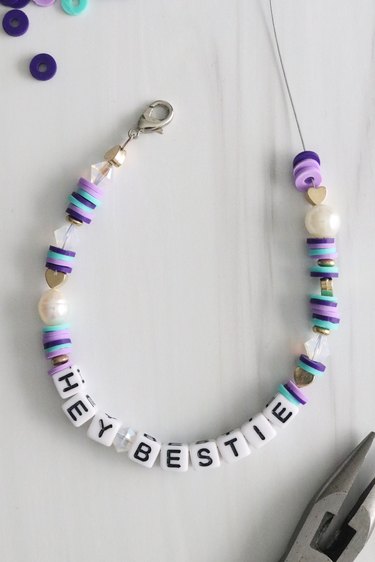
String on remaining beads.
3. Add jump ring
To complete your easy friendship bracelet, add another crimp bead followed by a jump ring. Insert end of wire through crimp bead as well as a few other beads. This will add extra security. Using flat portion of pliers, flatten crimp bead. Cut away excess wire using cutting portion of pliers or scissors.
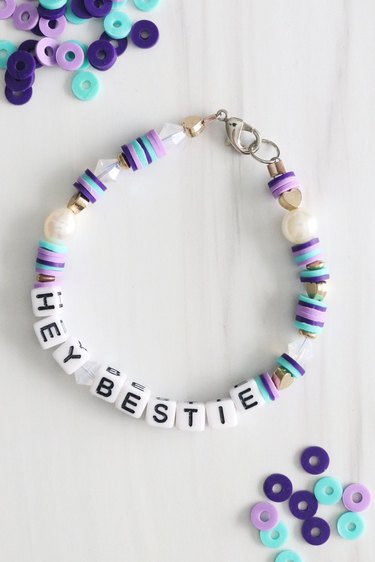
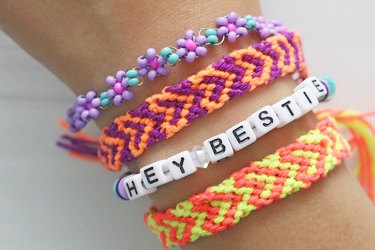
Wear your friendship bracelet on its own or style it with your other creations.

If you ask us, you're never too old to dress up your wrists with adorable bracelets—or to express your love for your besties! Get beading and let the fun begin.