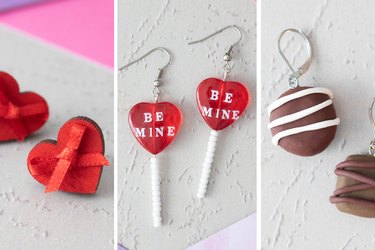
This Valentine's Day, add a nostalgic twist to your celebrations with this delicious trio of DIY earrings: Chocolate Box Stud Earrings, Lollipop Heart Earrings and Dangling Chocolate Truffle Earrings made with polymer clay. Each candy-inspired design calls to mind those epic Valentine's Day candy exchanges of elementary school days past. Think: Russell Stover hearts and heart-shaped lollies galore!
Even sweeter? These DIY Valentine's Day earrings call for basic techniques and supplies, making them ideal for beginner and advanced crafters alike. Plus, there's plenty of room for customization, so you can add your own twist to each pair.
Video of the Day
Video of the Day
Whether you're wearing these earrings yourself or pairing them with cards to hand out on Valentine's Day (or Galentine's Day...or even Anti-Valentine's Day!), they look good enough to eat—though we don't recommend taking a bite! Get ready to charm the dear ones in your life with sweet DIY jewelry that's sure to delight.
Design 1: Chocolate Box Stud Earrings
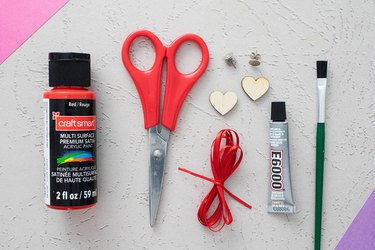
Things You'll Need
2 3/4-in. wood hearts
2 earrings posts
Strong craft glue (like E6000)
Red acrylic paint
Paintbrush
1/8-in. red ribbon
Scissors
Tip
Feel free to use larger wooden hearts or ribbon in another color, such as white or black.
How to make Chocolate Box Stud Earrings:
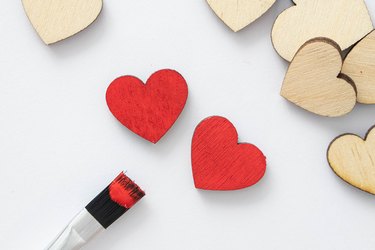
1. Paint wooden hearts
Coat wooden hearts with red acrylic paint. Let it dry and add another coat if needed. You can paint both sides if you prefer, but it's certainly not necessary.
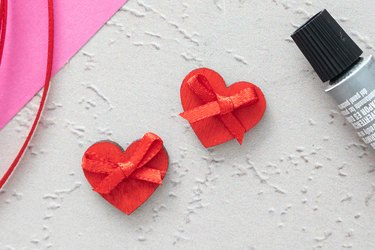
2. Add bows
Cut a strip of red ribbon, tie it into tiny bows and trim the excess. These charming red bows will make the perfect dainty addition to your completed heart-shaped mini chocolate boxes.

Tip
If you'd like to use premade mini bows, simply skip this step.
Glue a bow to each heart. Bows can be placed at an angle or straight across the hearts depending on your preference. Valentine's Day is all about self-expression, so follow your heart. Pun intended!
Tip
Be sure to use a small amount of glue. This will help the front of your earrings look clean and neat.
3. Add earring components
To complete the chocolate box earrings, glue an earring post to the back of each heart. Let it dry completely.
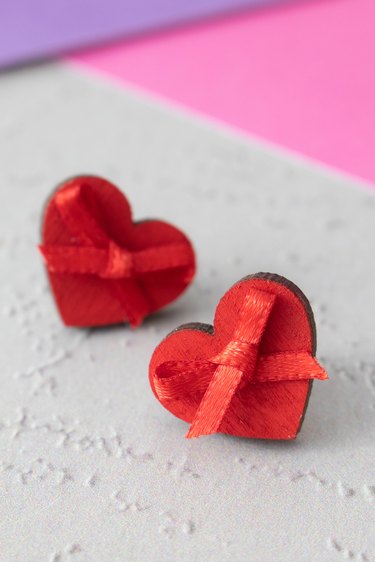
And just like that, these heart-shaped mini chocolate box earrings are ready to adorn any V-tine's outfit!
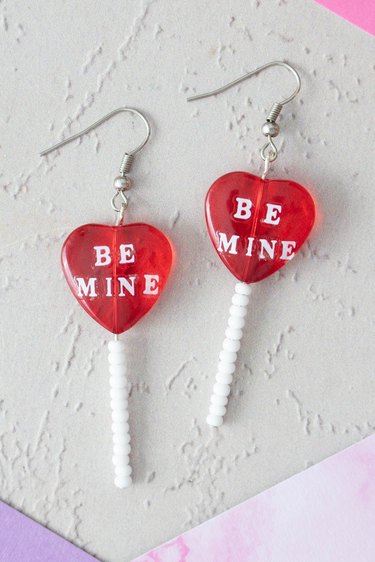
Design 2: Lollipop Heart Earrings
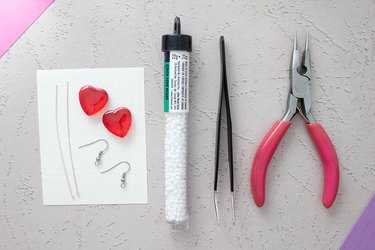
Things You'll Need
2 large glass or plastic heart beads
White seed beads
2 long head pins, about 2.5 in. each
2 earring hooks
Craft tweezers
Jewelry pliers
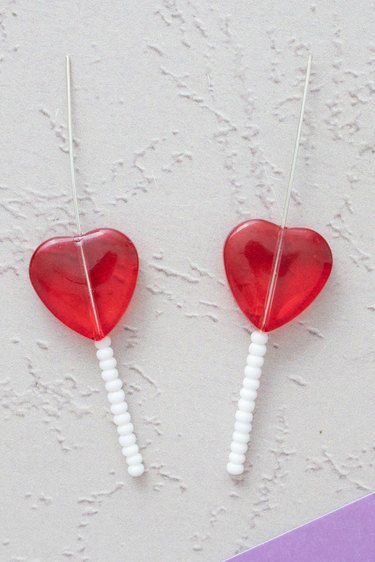
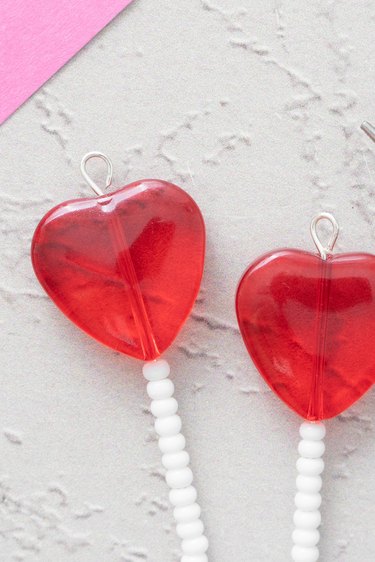
1. Make beaded lollipop charms
Add white seed beads to each head pin. This will form lollipop "sticks." Top it off with one heart bead.
Tip
Depending on the size of your heart beads, you might need shorter or longer head pins. In general, we recommend using head pins longer than you think you'll need. Remember that you can always trim away the excess!
Using the cutting portion of jewelry pliers, trim the excess of head pins, leaving about 1/3 in. Use the round nose ends to bend excess wire into a loop.
2. Add stickers and earring components
Carefully add letter nail stickers to the heart glass beads. Craft tweezers are useful for this step, as nail stickers are very delicate. We chose the phrase "Be Mine," but you're welcome to display any message you please. You could even use different phrases on each heart!
The last step for this DIY is to add earring hooks. Using the round nose ends of jewelry pliers, open the wire loops and add hooks. Close the loop to secure. Look at those lovely wearable lollipops!
Tip
To extend the life span of your earrings, apply a coat of clear nail polish to each bead. This will help prevent the letter nail stickers from peeling off.
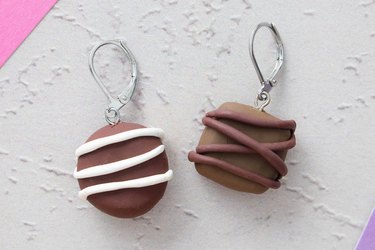
Design 3: Dangling Chocolate Truffle Earrings
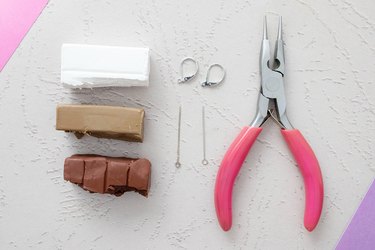
Things You'll Need
Brown polymer clay
Tan polymer clay
White polymer clay
Earring hooks
2 eye pins
Round nose pliers
Tip
You’re definitely not limited to brown and white polymer clay. Feel free to use pink or red shades to make chocolate in different "flavors"—let your imagination flow!
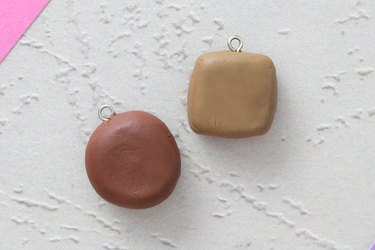
1. Create clay chocolate truffles
Preheat the oven to the temperature listed on the clay's packaging.
Form two chunks of clay into chocolate-truffle-shaped pieces. (Don't hesitate to get creative!) Next, carefully insert one eye pin into each chocolate so the loop is still sticking out. You'll need to open up this loop later, so leave plenty of wiggle room. The loop's hole should be facing you.
Tip
Depending on the size of your eye pins and clay chocolates, you might need to trim the pins with the cutting portion of your jewelry pliers.
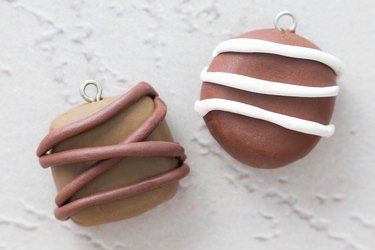
To decorate the chocolate truffles, roll clay in colors of your choice (we went with dark brown and white) into thin ropes. Cut it into small pieces and gently press it onto each chocolate. Next, bake the clay charms according to the package's directions.
2. Add earring components
Once your clay chocolate truffles have cooled, it's time to turn them into an adorable jewelry set! Using the round nose ends of jewelry pliers, open the "eye" of each eye pin loop. Add earring hooks and close the eye. Is it weird to say we're feeling hungry just looking at these earrings?
Tip
If the eye of the pin is stuck in the clay, simply add jump rings to loops and attach to earring hooks as usual.