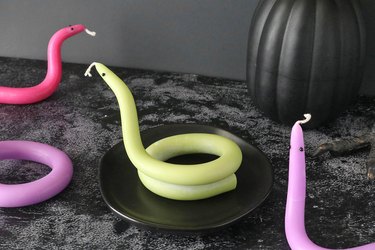
The most fright-filled time of year is officially here, meaning it's time to start planning Halloween DIY projects! We're talking skeleton party platters, creative costumes and, of course, pumpkin carvings. But if you're in the mood to switch things up, you'll want to add these trendy twisted snake candles to your list. They're essentially the popular "bendy" candlesticks and spiral taper candles you might have seen on Instagram and TikTok, but they're designed to look like snakes, complete with hot glue "eyes." The result is a seasonal take on a home decor trend, and honestly, we're obsessed.
Video of the Day
To make your own twisted candle set, all you need to do is soak candlesticks in warm water and mold them into snakelike positions. Once you remove them from the water, the candles will re-harden and hold their new shape. But take note: The project takes some patience and practice, so you'll want to work slowly. This is key for making the best candles possible.
What's more, thanks to the wide variety of candlestick colors available, you can create twisted taper candles that suit your preferences or space. For example, we wanted a vibrant take on Halloween, so we chose neon and pastel hues. It's totally up to you, though! Once you've created your DIY snake candles, display them as centerpieces on your dining table, enjoy them as home accessories or treat loved ones to unique candle gifts.
Ahead, learn how to make three types of twisted candles—a coiled snake, a double wave snake and an S-wave snake—along with helpful DIY tips just in time for Halloween.
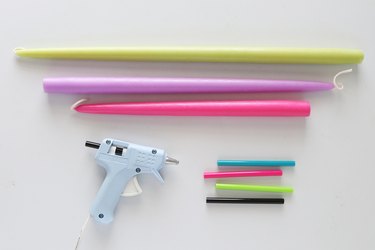
Things You'll Need
18-inch taper candle
15-inch taper candle
12-inch taper candle
Colored mini hot glue sticks
Mini hot glue gun
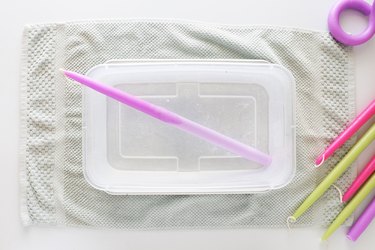
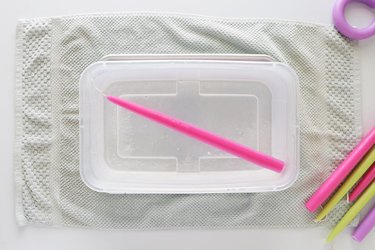
Plastic tub or sink
Hot tap water
Towels to protect your work surface
Tip
You can use both paraffin and beeswax candles, though you might need to do some trial and error. Different candles by different brands might soften at different rates. Colorful taper candles are also sold on Etsy and at craft stores, on Amazon or at small candle retailers. We’re big fans of Candlestock, a small business based in Woodstock, New York that offers beeswax candles in many lengths and colors. The candles we used for this project are from Candlestock and include the colors pistachio, wisteria and hot pink.
Warning
These snake candles are mainly for decorative use. But if you want to light them, be sure to place them on a heat-safe plate first. This will protect your surface from hot wax.
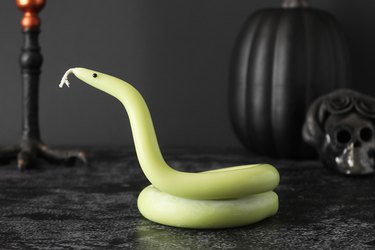
1. Coiled Snake Candle
How to make:
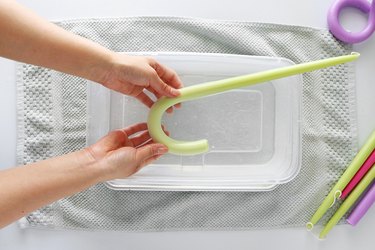
1. Bend the bottom of an 18-inch candle
Fill your sink or plastic tub with hot tap water. It should be hot but comfortable enough to handle. If it's too hot, wait until it cools down slightly before submerging your hands. Safety first!
Soak the 18-inch candle in the water for 15 minutes. If you're using a tub and the candle doesn't fit, you can just soak the bottom half.
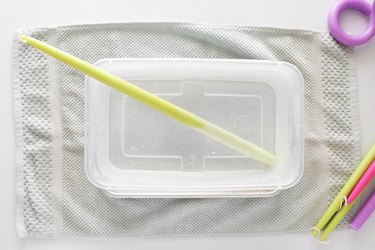
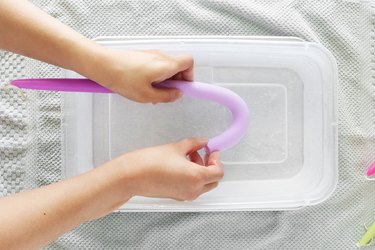
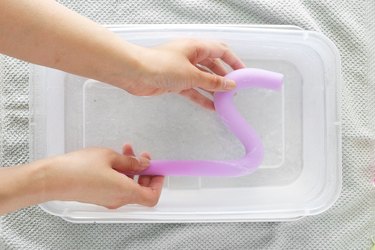
Keeping the candle under water, slowly bend the end of the candle to create a cane shape. Don't take the candle out of the water; otherwise, the candle will quickly harden and crack.
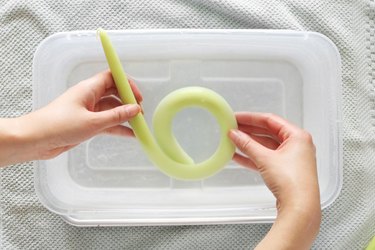
2. Coil the candle so it can stand up
Continue shaping the end of the candle so that it creates a circle. You can do this by simultaneously (and slowly) pushing the longer side and circle toward each other. Continue until a few inches of the longer side overlaps the bottom circle. Keep in mind that this circle will sit flat on the table.
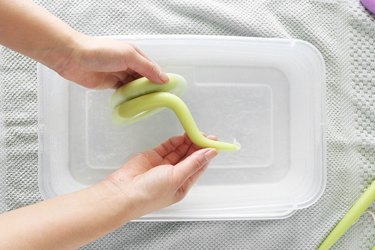
3. Create the neck and head
To give it that classic snake look, bend the top of the candle upward. This is the "neck."
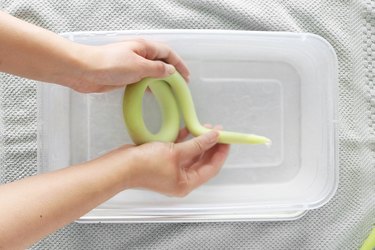
Next, bend the top 1 1/2 inches downward to create the "head." This part will be parallel to the table.
Remove the candle from the warm water. Rinse in cold water and pat dry.
Tip
It’s normal for beeswax and paraffin wax candles to develop a white film during soaking. You can remove it by gently rubbing the candle with a clean towel.
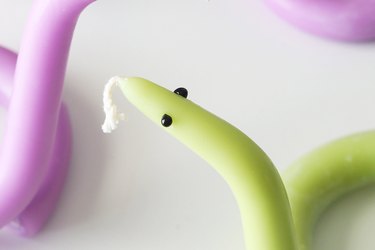
4. Finish your coiled snake candle with hot glue
Using the hot glue color of your choice, carefully apply small dots to the snake's "head," one on each side. Again, work slowly. If you need to redo the eyes, simply wait until the hot glue dries and then carefully remove the dot. It will peel right off.
Tip
To perfect the snake eyes, practice making small dots on a piece of scrap paper first.
2. Double Wave Snake Candle

How to make:
1. Bend the bottom of a 15-inch taper candle
Fill your sink or plastic tub with hot tap water. It should be hot but comfortable enough to touch. If it's too hot, wait until it cools down slightly before submerging your hands.
Soak the 15-inch candle in the water for 15 minutes. If you're using a tub and the candle can't fit, you can just soak the bottom half.
While the candle is under water, slowly bend the end of the candle to create a cane shape. Avoid taking the candle out of the water.
2. Make it wavy
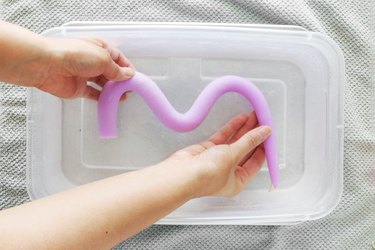
Bend the top half of the candle stick but this time in the opposite direction. This will create the S-shaped wave.
Repeat once more, bending the top of the candlestick in the opposite direction once more. And just like that, you'll have a wave that looks like an "M."
3. Form the neck
Bend the remaining top part of the candle to create the neck. You can bend the topmost part of the candlestick (near the cotton wick) to emphasize the head, but we chose to skip this part for some variety.
Remove the candle from the warm water. Rinse in cold water and pat dry.
4. Finish your decorative candle by adding hot glue eyes
Add the eyes using the hot glue color of your choice. So fun!
3. S-Wave Snake Candle
How to make:
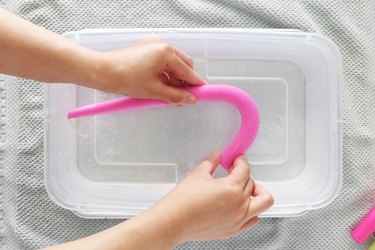
1. Bend the bottom of a 12-inch taper candle
Soak the 12-inch candle in hot water for 15 minutes.
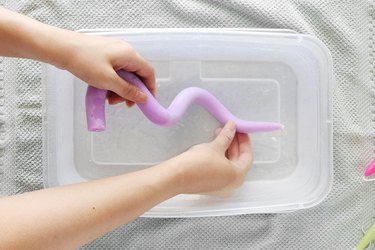
While the candle is submerged in the water, slowly bend the end of the candle to create a cane shape. This is the beginning of the "S" shape. Remember to avoid taking the candle out of the water.
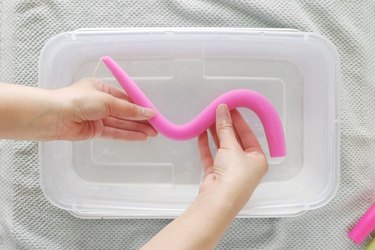
2. Bend the top half of the candle
To finish the "S" shape, bend the top half of the candle in the opposite direction.
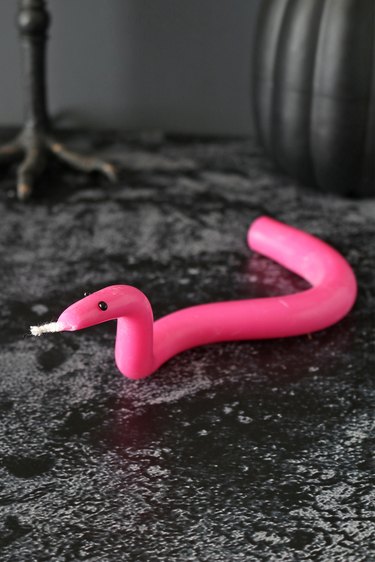
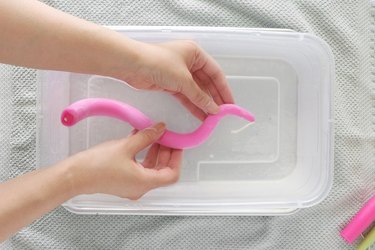
3. Create the snake neck and head
To finish your handmade candle, bend the top part of the candle upward. This will be the neck. Finally, bend the topmost part (top 1 1/2 inches) so that it's parallel with the table.
Remove the candle from the warm water. Rinse in cold water and pat dry.
4. Add the eye details with colored hot glue
Using your mini hot glue gun, carefully add one dot on each side to create snake "eyes."
Your twisted snake candles are ready to slither onto tables, bookshelves and more!
Happy Halloween and crafting!