Things You'll Need
Handle or handle repair kit
Relief valve
Diaphragm assembly
Inside cover
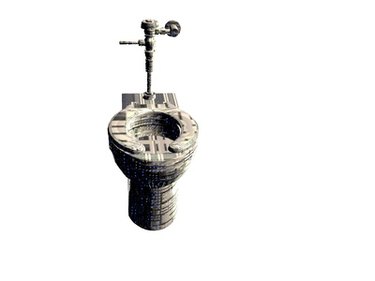
A flushometer consists of a metal pipe extending from the back of a toilet with a slender handle on the side that is used to flush a toilet. This type of flush valve is commonly used for toilets in commercial facilities to provide a durable and accurate flush delivery system. If the flushometer does not work properly, troubleshoot it and perform minor repairs. Common issues are often resolved quickly. If troubleshooting does not correct the problem, call a plumber for repairs.
Does Not Flush
Step 1
Inspect the handle assembly. A broken handle or assembly will prevent flushing. If damaged, unscrew and remove the handle assembly. Replace the handle or repair it with a handle repair kit.
Video of the Day
Step 2
Open the main water supply valve to turn the water on fully. The water supply is normally turned on, but check to make sure it is turned on fully and has not been been turned off inadvertently.
Step 3
Remove the flushometer's CP cover, the round cap on the very top of the pipe extending from the toilet. Then remove the inside cover directly underneath the cap. Inspect the relief valve. Replace it if it is visibly damaged.
Short Flush
Step 1
Remove the CP cover and inside cover. The CP cover is located on the very top of the pipe extending from the back of the toilet. The inside cover is underneath the CP cover and the diaphragm assembly is located beneath the inside cover. Remove and inspect the diaphragm assembly. A damaged diaphragm assembly can cause a short and incomplete flush. Replace it if it is visibly damaged.
Step 2
Replace or repair the handle assembly. A damaged handle can result in a short flush. If damaged, unscrew and remove the handle assembly. Replace the handle or repair it using a handle repair kit.
Step 3
Remove the CP cover and inside cover to remove the diaphragm assembly. If a low consumption diaphragm is installed on a water-saver fixture or a urinal diaphragm is installed on a toilet fixture, replace it with an appropriate diaphragm.
Video of the Day
Long or Continuous Flush
Step 1
Remove the CP cover and inside cover. Remove the diaphragm assembly.
Step 2
Inspect the inside cover. Replace it if it is visibly damaged.
Step 3
Wash the filter rings under running water. Inspect the filter rings and relief valve. If damaged, replace the diaphragm assembly. If it is not damaged, reassemble and reinstall it.
Chattering Noise During Flushing
Step 1
Remove the CP cover and the inside cover.
Step 2
Inspect the inside cover. Replace it if it is visibly damaged.
Step 3
Remove the diaphragm assembly. Inspect the relief valve and diaphragm assembly; replace if visibly damaged.
Tip
Do not use abrasive cleaners on the flushometer. Clean with mild soap and water to avoid dulling the finish.
Tighten couplings with a smooth-jawed wrench to prevent damage.
Warning
Do not use plumbing grease or pipe sealant on valve components or couplings.