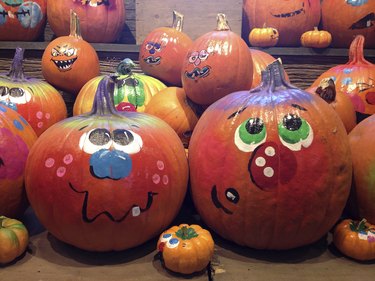
Painting pumpkins is a no-carve option for decorating the orange orbs for autumn holidays or just for fun. While many kinds of paint stick to a porous pumpkin surface, several types, such as acrylics and non-toxic paint pens, provide options for easy cleanup or low fume emissions, making them kid-friendly as well.
Pumpkin Preparation
Video of the Day
No matter whether you're painting on a carved or uncarved pumpkin, first clean the pumpkin's exterior to ensure the paint sticks. Wipe the pumpkin down with a damp paper towel to remove dirt, dust and debris. If the pumpkin is extremely dirty, brush off clumps of dirt outdoors while wearing garden or work gloves, then rinse the pumpkin off with a hose. Allow the pumpkin to dry completely before painting.
Video of the Day
Acrylic Craft Paints
Acrylic craft paints, offered at just about any craft store or the craft section of a department store, provide an inexpensive means of decorating pumpkins in almost any color you can imagine. Place the pumpkin atop newspaper and pour some of the paint colors onto a paper plate or piece of cardboard. Use regular artist's brushes or inexpensive craft brushes to paint the pumpkins. If desired, print out images to cut out and trace on the pumpkin before painting. Acrylics dry quickly and cover fairly well, suitable for painting small areas or large sections of the pumpkin. Paint colors can be layered once the base color dries. Leftover latex house paint, which works in a similar fashion to acrylic, may also be used. Tempera and poster paints designed for children may also be used, but they do not provide consistent coverage.
Spray Paint
Spray paint works wonders for covering large areas of the pumpkin or for spraying through stick-on stencils. Select a well-ventilated area, ideally outdoors, and set the pumpkin atop sheets of newspaper away from other objects. Make a homemade spray booth using a box large enough to house the pumpkin with room to spare to help contain overspray if you're concerned about spraying nearby objects. Shake the can for a minute or so; then spray the pumpkin by holding the can 12 to 18 inches away from it. Rotate the pumpkin by grabbing and turning its stem as needed. Allow the paint to dry as recommended on the can; then apply a second coat. Thin coats create a better finish; applying too much paint at once may result in drips and runs. Create stripes or simple shapes by using painter's tape as borders for the paint. Peel the tape away when the paint dries.
Paint Markers
Paint markers and paint pens provide control for creating detailed images. Select waterproof or semi-permanent paint pens if you plan to display the pumpkins outdoors where they may get wet. Sketch out your idea on paper first to plot it out on paper. Draw the outlines for your design with the paint marker, filling the designs in afterward with the markers. Paint markers even allow you to create colorful backgrounds for your designs, such as a full moon backdrop for a spooky tree silhouette. Paint the background color first, allowing the paint to dry as recommended on the marker; then draw atop the background with the other paint-marker colors.
- Southern Living: 8 Easy Ways to Decorate Pumpkins
- All You: 30 Easy Halloween Pumpkin Ideas
- Zig Posterman: Ziggy Puts the Scare Into Your Pumpkins with Zig Paint Markers
- Real Simple: Easy No-Carve Pumpkins: Heavy Metal
- Family Circle: 12 Painted Pumpkin Ideas
- Zig Posterman: Guide to Paint Marker Types