Things You'll Need
Balloon
5 oz. water
½ cup plaster of Paris
Bowl
Paper plate
Needle
Modelling clay
Acrylic crafts paint
Paintbrush
Acrylic fixative spray
Turtle models or clay sculptures can be used for a science project in biology or as a sculpture for arts class. A turtle model can also be used for decorative purposes in the home. You can purchase a model of a turtle at a toy store or science store. However, model turtles can be quite expensive. Luckily, you can make your own model turtle using materials you can find at your local arts and crafts store.
Step 1
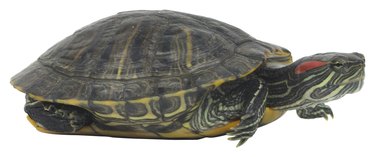
Find a picture of the species of turtle you want to make to guide you in making your turtle model. Print out a colored image of the turtle, or just make the turtle in front of your computer.
Video of the Day
Step 2
Mix 5 oz. of water and half a cup of plaster of Paris in a small bowl. You can purchase plaster of Paris at an arts and crafts store.
Step 3
Blow up a water balloon or small balloon. Cover half of the balloon with the plaster of Paris mixture. Place the balloon on a paper plate or towel, and let it harden for two to three hours. Pop the balloon with a pin or needle after the plaster has hardened and dried.
Step 4
Color the turtle shell using acrylic crafts paint and a small paintbrush. Paint scales on the shell according to your turtle reference picture. Set the turtle shell aside, and let it dry for an hour.
Step 5
Fill up the empty turtle shell with any color of modeling clay. This will give the model turtle weight.
Step 6
Create the turtle's flippers and tail. Mold the clay according to your turtle reference picture. Make webbed toes and flat feet. Use a color of modeling clay that matches the turtle reference picture. Place the flippers and tail under the shell afterward, and push the shell downward to connect them to the shell.
Step 7
Create the head of the turtle. Use the back of a butter knife to create details like nostrils and the beak. Mold the neck using your fingers. Look at your turtle reference picture to help guide you. Place the head under the front part of the shell, and push the shell downward to connect it to the shell afterward.
Step 8
Paint patterns on the flippers and head using acrylic paint. Again, follow the patterns found on your reference picture.
Step 9
Spray the entire turtle model with acrylic fixative spray, and set it aside for an hour to dry. This will help fix the paint to the sculpture and help protect it from dust, dirt and other small particles.
Video of the Day