Things You'll Need
Lumber
Miter saw
Miter box
Protractor
Pencil
Hand saw
Ruler

While most woodworking projects call primarily for 45-degree and 90-degree angles, occasionally a 60-degree angle is useful. This is true of projects involving slanted furniture legs, trim for walls at non-standard angles and case-specific crafts projects. There are a number of ways to cut a 60-degree angle. Modern carpenters tend to use a miter saw, which has an adjustable blade that can be set to any angle within 180 degrees. The predecessor of the miter saw is the miter box, which has pre-cut angles along the sides and can be used with a handsaw. The angle can also be cut by using a protractor to scribe the line onto the piece of wood. This method requires the greatest degree of control.
Miter Saw
Step 1

Measure the piece of lumber to the desired length. Mark the short side of the angle you intend to cut.
Video of the Day
Step 2
Loosen the handle at the base of the miter saw. Push the handle until the arrow on the built-in protractor points to 60 degrees. Tighten the handle.
Step 3
Place the piece of wood on the cutting surface. Hold it firmly against the metal fence at the back of the saw. Align the piece of wood with the groove on the cutting surface, so that when the blade descends, it cuts the piece of wood to the desired length.
Step 4
Maintain the position of the lumber on the cutting surface. Pull the trigger of the miter saw to activate the blade. Push the blade slowly down through the lumber, checking that the angle is cut as you desire. Lift the blade away from the cutting surface when it has completely severed the piece of lumber. Release the trigger to turn off the saw.
Miter Box
Step 1
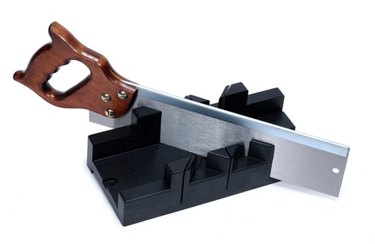
Mark the lumber to the desired length. Place the piece of lumber between the walls of the miter box, with the marked length in line with one of the 60-degree slots.
Step 2
Set the handsaw over the piece of lumber. Align the blade so that it will descend into two adjacent 60-degree slots.
Step 3
Maintain the alignment of the saw blade. Work the saw back and forth across the piece of wood until the cut is complete.
Protractor
Step 1

Measure the length of the piece of wood to the intended short side of the angle. Hold the protractor so that the pivot point is aligned with the marking and the flat bottom of the protractor is perpendicular to the piece of wood.
Step 2
Hold the protractor in place. Find the 60-degree mark on the protractor. Mark the piece of wood at the 60-degree mark. Hold a ruler so that its edge intersects both the original pivot point and the 60-degree mark. Draw a line across the piece of lumber that intersects both points and extends to both edges.
Step 3
Align a handsaw with the line you drew. Carefully work the saw blade back and forth to begin cutting the wood along the line. Check your saw work as you go to be sure that you do not miss the angle. Continue sawing through the wood until the cut is complete.
Tip
A good miter saw is significantly more efficient for cutting angles than is a handsaw.
Warning
Wear safety glasses, ear plugs, and a dust mask when working with wood.
Keep fingers well away from the blade of a miter saw.
Video of the Day