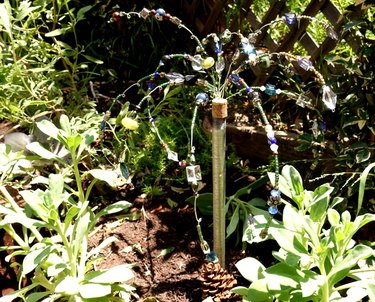
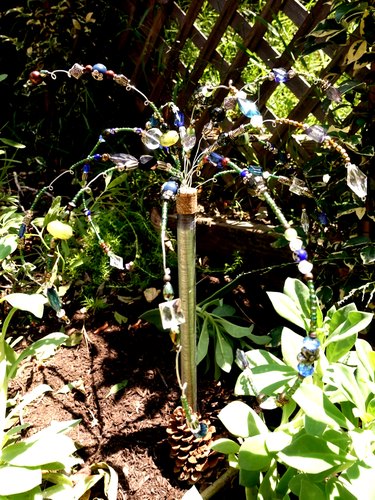
This summer, bring some bling to your yard with a sun-catching glass-beaded garden sparkler. This fun décor item will not only look like a brilliant fireworks display among your greenery, but its spray of plumes will dance in the breeze.
Basically, it's pure happiness on a stick. You can buy a similar item readymade, but why do that when you can make your own for less and with easy-to-find materials? This project is also a great way to repurpose old beaded costume jewelry you may have or that you happen upon at a thrift shop.
Video of the Day
Ready? Let's get sparkly!
DIY Glass Beaded Garden Sparklers Video
How to Make Glass Beaded Garden Sparklers
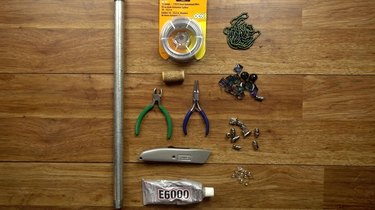
Things You'll Need
An assortment of beads of different shapes and sizes. Make sure a majority are sparkly (e.g. glass or glass-like, multifaceted) and a good portion are shiny (e.g. metallic, pearlescent). A lesser amount of translucent gemstone beads (real or faux) would also look great.
16 - 20 gauge wire, depending on how large your beads are and how much flexibility you'd like your beaded plumes to have.
Cutting pliers
Round nose pliers
1/2-inch pipe of desired length (either metal or PVC) or a wine bottle
Wine cork
Utility knife or sharp paring knife
Industrial glue
Crimp beads and crimping pliers (optional)
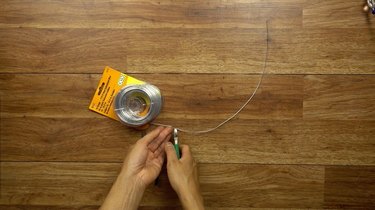
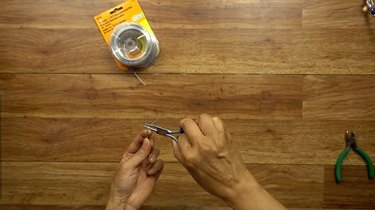
1. Cut wires
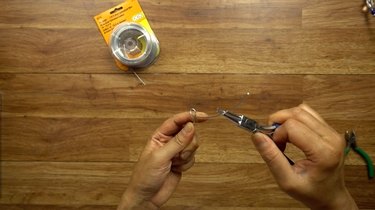
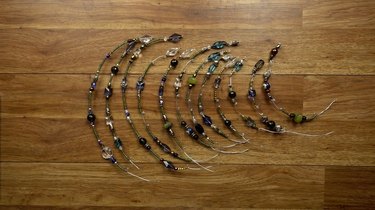
Your first step is to cut a piece of wire and prepare it for beading. Before cutting, decide on what length you'd like your longest "plumes" to be. You'll eventually cut 12 pieces of varying lengths with your shortest being around 9 inches.
I started by creating the longest pieces first, and then progressively worked towards the shortest pieces. Remember to leave a 3-inch unbeaded portion at the bottom of your plume. You'll use this bare wire to attach your plume to the pipe via the wine cork (covered in step 4).
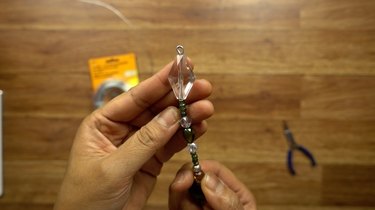
Once you've cut your wire, you'll have to either bend a small loop (using the round nose pliers, as shown below) or add a crimp bead 3 inches from the bottom to hold the beads above the stem. I've decided to bend loops in lieu of using crimp beads throughout this project. It's a more economical alternative, plus I think the loops add a decorative element to the plumes.

2. Add beads
Now comes the fun part -- beading! You can either cover the entire length with beads (note that this will make your plumes heavier and less bouncy), or create gaps in between bead clusters by using crimp beads or looping the wire (see third image below).
Putting gaps in some or all of your wires will make your plumes lighter as well as allow you to conserve beads if you don't have a whole lot of them. I chose to completely cover a few of the larger ones and leave gaps in the shorter ones.
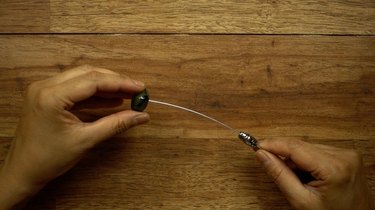

Once you're done, secure your beads on the wire with a small loop at the end.
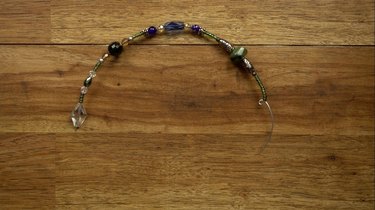
Repeat steps 1 and 2 until you've made 12 plumes of varying lengths.
3. Make cork plug
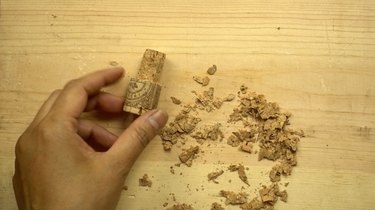
Now, you'll prepare your cork for inserting on the end of the pipe as shown in the series images below. (If you'd like to use a wine bottle as a stand rather than a pipe, see the tip at the end of this step.) If the bottom half of your cork cannot be inserted into the pipe as is, use a utility knife or paring knife to shave off piece of cork until it's the right diameter for a snug fit. Make sure to only shave the bottom half, as you'll need a portion of the cork to sit above pipe edge.
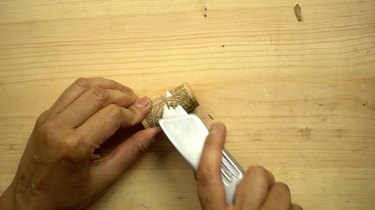
Once you've created a fitted cork "plug" for your pipe, apply industrial glue all around the shaved portion of the cork, then plug it into the pipe.


Let the glue set completely before proceeding to the next step.
Tip
A wine bottle would work in place of the pipe if you don't need your sparkler to be very tall. Simply plug the cork securely into the wine bottle opening and skip to the next step.
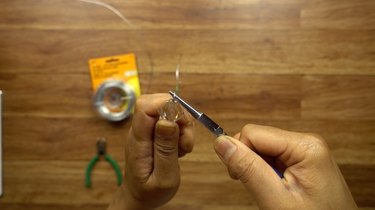
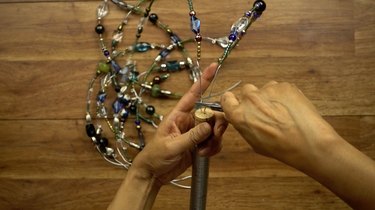
4. Insert wires into cork
Using the round nose pliers, insert the bottom portion of bare wire of each plume into the cork to a depth of (at least) 1 inch.
Tip
If you're having difficulty inserting the wire into the cork, use an awl or nail to create pilot holes first — but don't make them too large or the cork won't grip the wire. After inserting the wires into the holes, fill any gaps in the hole with glue.
Repeat for all 12 plumes.
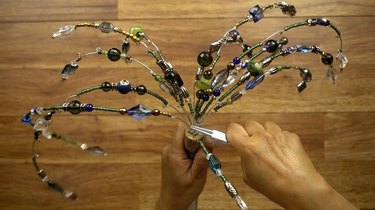
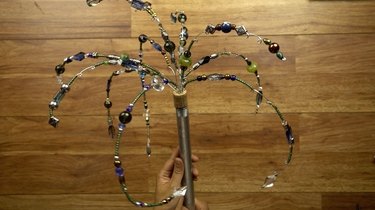
5. Arrange plumes
Arrange the plumes into your desired configuration, and your dazzling creation is ready to mount!
Mounting Your Garden Sparkler
The mounting materials you need for your sparkler depend on how you'd like to display it. If your pipe isn't too long nor heavy and you've got tightly compacted soil, you can stick it straight into the ground — perhaps with some rocks around the base to keep it propped upright.
If you'd like to mount it on your lawn, you can attach a pipe floor flange to the base and fasten it down using landscape staples. If you've used a PVC pipe, you can turn it into a stake by cutting the bottom off at a steep angle with a hack saw or miter saw. You can also mount it onto a fence post or onto a deck using a 1/2-inch floor flange and screws.
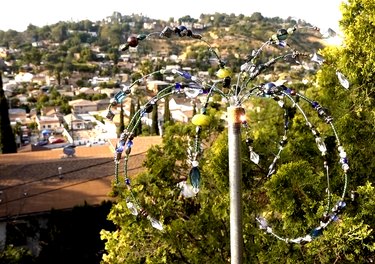
And there you have it! An eyecatching one-of-a-kind creation for your outdoor space. These would also make great, personalized gifts for those sparkle-loving folks in your life.