Things You'll Need
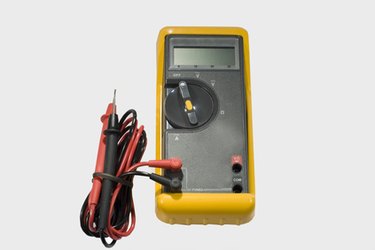
Multimeter
Screwdriver
Fuse
A battery charger rarely goes wrong, as it doesn't have any moving parts. It simply contains separate copper wire windings that reduce an outlet's voltage to the required voltage to charge your power tool battery. Battery charges are sealed units so there are only one, sometimes two, user-serviceable components on a battery charger: the fuse in the plug that connects to the external power supply and the fuse on the battery charger, if it has one.
Step 1
Plug your 18-volt power tool battery charger into the electricity supply. Turn on the charger.
Video of the Day
Step 2
Use a multimeter and set it to measure voltage. Set the voltage range to between 10 and 30 volts, if it has variable voltage settings.
Step 3
Connect the two wires extending from the multimeter onto the terminals on the 18-volt battery charger. One wire is red for positive and the other black for negative, both have small metal sensors or clamps on the end.
Step 4
Place the sensor on the end of the red wire onto the central metal terminal on the battery charger. Place the sensor on the end of the black wire onto the outer metal terminal on the battery charger. Note the terminals are labeled "+" and "-" meaning positive and negative respectively.
Step 5
Look at the voltage measurement on the multimeter display. It reads 18 volts, if the battery charger is operating correctly and producing a charge. If it is producing a charge, then it's likely the battery needs checking or replacing. If it's not producing a charge, check the fuse on the charger, if it has one.
Step 6
Remove the fuse cover by inserting a small screwdriver under the lip of the cover then lift it off. Place the sensors on the end of the two wires from the multimeter onto each end of the fuse. Check the multimeter. You receive a voltage reading, if the fuse is not blown.
It may be fewer than 18 volts because you are not completing a circuit; you are testing to check if electricity is flowing through the fuse. If you get a reading, then electricity isn't getting to the terminals and it's an internal fault so you need to get it checked by a professional. If there's not a reading, the fuse may be blown so replace the fuse.
Step 7
Replace the fuse cover. Repeat the check using the multimeter to touch the battery terminals as before. If you get a reading, your charger is working and it was the fuse in the charger. If there's no reading you need to check the fuse in the plug.
Step 8
Remove the plug from the electrical socket. Pry out the fuse from the fuse holder on the underside of the plug using a small screwdriver. Remove the fuse from the holder. Simply replace the fuse using a new one that has the same ampere rating.
Step 9
Insert the plug into the electrical socket. Repeat the test using the multimeter and touching the battery charger terminals as before. If you get a reading, it was the fuse in the plug and your charger works. If there's no reading, the charger is dead and needs to be replaced or repaired.
Video of the Day