Things You'll Need
Line wire cutters
Large regular screwdriver
3/8-inch Allen wrench
The electrical power feed into a home is generally routed through a main disconnect or breaker just before, or just after, the point of entry. Breaker sizes range from 80 to 300 amps, depending on the size of the home and electrical service required. The main disconnect also serves as a circuit breaker to interrupt power to the home in the event of a direct ground. The trip-unit mechanism built into the main circuit breaker is usually very reliable. There are times when this unit fails and disconnects power for no apparent reason. When this happens, it's time to replace the main circuit breaker.
Replacing Main Outside Circuit Breaker
Step 1
Schedule the electrical power company to disconnect the main power feed to the home meter. This is the only way to isolate electrical power to the main circuit breaker and allow safe removal and replacement.
Video of the Day
Step 2
Remove the main circuit breaker box cover, using a regular screwdriver and removing each of the four screws. Set the box cover aside.
Step 3
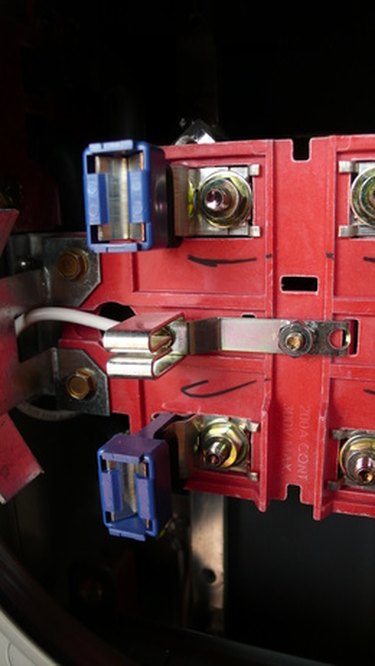
Remove the two 3/8-inch socket head lugs at the top of the breaker with the Allen wrench. With the lugs removed, two main cables coming into the breaker can be removed.
Step 4
Remove the two 3/8-inch socket head lugs at the bottom of the breaker with the Allen wrench. With the lugs removed, the two secondary cables going from the main breaker to the distribution panel can be removed.
Step 5
Take out the four large screws securing the main circuit breaker to the back of the box and set the screws aside. At this point, the main circuit breaker can be removed from the box.
Step 6
Install the new main circuit breaker in the same orientation at the old breaker was removed. The safety tag on the face of the breaker to be installed will have an arrow indicating the top of the breaker. Install the four large screws into the breaker to secure the breaker to the box.
Step 7
Install the two large secondary wires into the lugs at the bottom of the breaker. Tighten the socket head bolts with the 3/8-inch Allen wrench. Care should be taken not to overtighten or strip the bolts.
Step 8
Install the large primary wires into the lugs at the top of the breaker. Tighten the socket head bolts with the 3/8-inch Allen wrench.
Step 9
Replace the main breaker box cover and install the four screws. Tighten the screws with the regular screwdriver until tight.
Step 10
Turn off all 220-volt breakers in the lighting panel downstream from the main circuit breaker to prevent power surges when the electricity is re-established.
Step 11
Allow the electrical power company to re-connect power to the main circuit breaker and establish service.
Step 12
Turn on main circuit breaker to restore power to the home. Once power is confirmed on, turn on all 220-volt breakers in the lighting panel.
Tip
Apply electrically conductive anti-seize to wire lugs of the new breaker to aid in future removal.
Warning
Always take the time to have the electrical power properly disconnected and verified before working on electrical systems. Never work on or around live electrical lines.
Video of the Day