Things You'll Need
Two-probe voltage tester
Phillips or slotted screwdriver
Tape measure

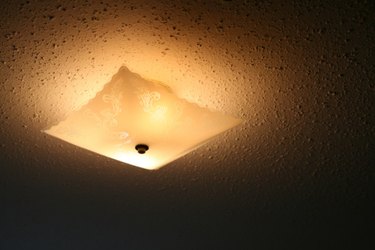
Flush mount fixtures installed in the middle of a ceiling are a common way to illuminate a room. Changing the decor in the room can include updating to a Hampton Bay flush mount fixture to accent or complement the new room design. No prior electrical knowledge is necessary to mount your Hampton Bay flush mount fixture. For smoother installation, some electrical knowledge is helpful. Hampton Bay is a proprietary brand name of the Home Depot.
Step 1
Turn off the circuit breaker inside the main electrical panel to disconnect the electrical circuits supplying power to the Hampton Bay flush mount installation location.
Video of the Day
Step 2
Confirm the disconnection of electricity on the circuit. Touch one probe from a two probe voltage tester to the black wire inside the existing ceiling junction box at the installation location. Touch the remaining probe from the voltage tester to the metal on the box. If the tester's light doesn't come on, the circuit is disconnected.
Step 3
Install the mounting strap provided with the Hampton Bay fixture's mounting hardware. The mounting strap is a 4-inch long piece of metal approximately 1-inch wide with a flat or raised center. It has a large center hole with slots and smaller holes located at each end of the strap. A green ground screw connects to the strap. Thread the two shorter screws from the mounting hardware through the slots in the strap. Attach the strap to the existing ceiling junction box.
Step 4
Connect the black wires from the existing ceiling junction box to the black wire from the Hampton Bay flush mount fixture using the wire connectors provided with the mounting hardware. If your fixture has more than one light socket, you may have more than one black wire to connect to the black wire from the junction box. Repeat the connection with the white wire from the junction box and the white wire or wires from the flush mount fixture.
Step 5
Measure 6 inches from the end of the flush mount fixture's bare copper ground wire. Create a small loop in the wire and slip it over the green ground screw located on the mounting strap. Pull the wire to tighten the loop around the screw, leaving 6-inches of ground wire hanging from the ground screw.
Step 6
Twist a wire connector onto the bare copper ground wire attached to the ground screw and the bare copper wire from the existing ceiling junction box to connect them together. If your fixture does not have the ground wire, attach the bare copper wire from the ceiling junction box to the green ground screw on the strap.
Step 7
Push all wiring into the existing ceiling junction box. Attach the flush mount fixture canopy to the mounting strap using the two longer screws from the mounting hardware. The canopy holds the light sockets and the shade.
Step 8
Install the light bulbs into the Hampton Bay flush mount fixture. Turn the bulbs clockwise until tight.
Step 9
Place the light shade over the light bulbs and hold it against the flush mount fixture canopy. If the shade is anchored by a single nut, or finial, on the bottom of the shade, carefully insert the threaded rod through the opening in the center of the shade.
Step 10
Anchor the glass to the flush mount fixture canopy by installing the washer and decorative bottom cover onto the threaded rod. Twist the finial to the rod until the glass is secure to the fixture. If the glass shade is held to the canopy with thumb screws threaded through the fixture canopy, alternate tightening the thumbscrews around the canopy until the shade is secure to the fixture.
Video of the Day