Things You'll Need
Phillips screwdriver
Wrench
Slip-lock pliers
Spray lubricant
Plumbing tape
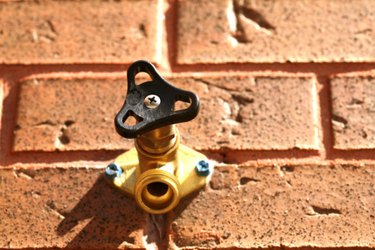
Freezing pipes are a problem in winter. When water turns to ice, it expands with enough force to rupture joints, and when it thaws, it can cause a flood. An outdoor spigot is especially vulnerable to freezing, unless you have a frost-free one. It has a long stem and is connected inside the house, where its warmer. Outdoor faucets are required to have an anti-siphon valve to prevent contaminated water from the garden hose being sucked into the drinking water. Repairing an anti-siphon, frost-free faucet is not much more difficult that repairing a conventional compression faucet.
Step 1
Turn off the water to the faucet. If you don't have a shut-off valve on the line that supplies it, turn off the main water supply for the house.
Video of the Day
Step 2
Unscrew the handle with a screwdriver and pull it off. Hold the body of the faucet steady with a pair of slip-lock pliers and turn the nut behind the handle counterclockwise with a wrench. If it won't turn, spray lubricant on it, wait five minutes and try again. When the nut turns, unscrew and remove it.
Step 3
Grip the valve stem with pliers and pull it straight out. Depending on the length of the faucet, it could be 6 to 10 inches long.
Step 4
Unscrew the nut on the end of the stem and remove the washer if it is worn. Take it to the hardware store to use as a reference for choosing a replacement.
Step 5
Screw the new washer onto the end of the faucet stem and slide the stem back into the valve body. Wrap plumbing tape around the threads of the valve body and screw on the retaining nut and tighten it with a wrench. Replace the handle and tighten the screw that holds it.
Step 6
Replace the spring in the anti-siphon valve mechanism if water squirts out through the hole on top of the faucet when the water is on. The anti-siphon valve is attached to the faucet outlet.
Step 7
Hold the faucet steady with slip-lock pliers and unscrew the threaded end of the outlet with a wrench. It is spring loaded, so remove it carefully. As you separate it from the faucet body, take out the spring. Then temporarily screw the outlet back to the faucet.
Step 8
Take the spring to the hardware store to use as a reference for buying a new one. Install it by unscrewing the faucet tip, inserting the spring and then screwing the tip back on and tightening it with a wrench.
Tip
When you solder a frost-free faucet to the supply line, remove the valve mechanism first or the heat will damage it. If your faucet isn't working correctly, it may have been improperly installed.
Warning
Be sure to turn the water off before you remove the nut that holds the faucet valve in place. If you don't, water will shoot out uncontrollably until you find the valve and shut it off.
Video of the Day