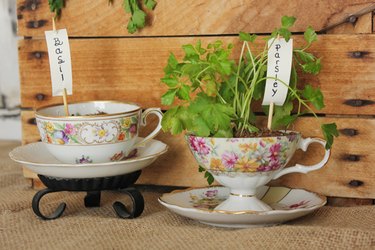
Rethink your boring flower pots and add some vintage style to your home by transforming your old teacups into mini planters. A teacup planter serves as an elegant display for an indoor herb garden, but smaller plants such as succulents or violets would be equally lovely. A teacup planter would also make a clever gift for any special occasion.
Things You'll Need:
Video of the Day
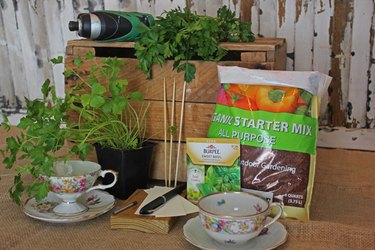
- Teacups and saucers
- Potted herbs, flowers or seeds
- Potting mix
- Power drill
- Diamond precision tip porcelain drill bit, 1/8 or 1/4 inch
- Scrap piece of wood (at least 1 inch thick)
- Card stock
- Scissors
- Calligraphy pen
- Wooden skewers
Video of the Day
Select Plants to Use in the Teacup
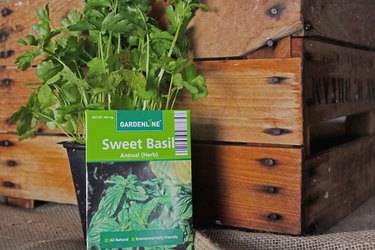
Herbs like parsley, rosemary, oregano, dill and mint will all grow well in teacups as long as they are trimmed regularly to avoid becoming too large. Small house plants, succulents and cacti will also flourish in a teacup planter. You can also get a jump start on your gardening during the winter months by planting seeds in a teacup that can be transplanted outdoors when the weather gets warm.
Drill a Hole for Drainage
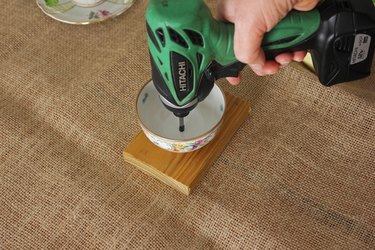
Place your teacup on a scrap piece of wood that is at least 1 inch thick. Using a diamond porcelain/ceramic drill bit and an electric hand drill, drill a small hole in the bottom of your teacup. Be sure to check out this article for detailed instructions on drilling through porcelain/ceramic. Use a drill bit between 1/8 and 1/4 of an inch diameter. This will allow any excess water to drain from the teacup and keep your plants healthy.
For Live Plants: Remove Plant from the Container
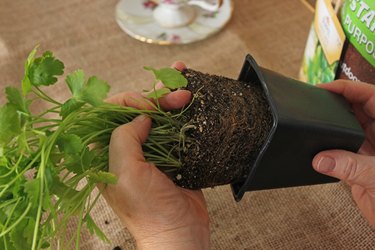
Carefully remove your potted plant/herb from its container by holding the plant near the roots and gently wiggling it loose, making sure all roots stay intact. Be careful not to apply too much pressure to the stems or they may snap.
For Live Plants: Plant the Herb/Flower in the Teacup
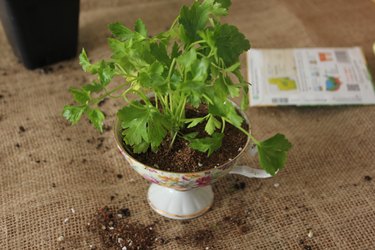
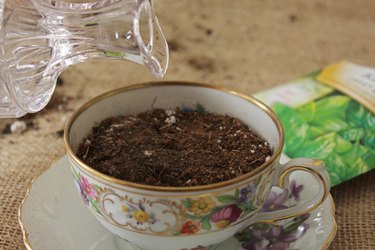
Place your plant in the center of the teacup and fill in the extra space with your potting mix. Fill the teacup 3/4 of the way full with potting mix.
For Live Plants: Water the Plant
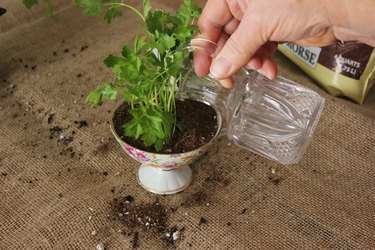
Transplanting a plant can be traumatic so make sure to water it immediately after it is planted. Use room temperature water and pour it in gentle dribbles. Potted herbs and plants need to be watered moderately and regularly. Water the plant every day using a small amount of water. You want the soil to be moist but not drenched.
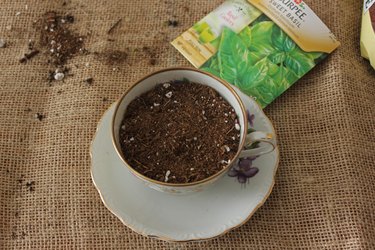
For Seeds: Plant Seeds in the Teacup Planter

Fill the teacup halfway with potting mix, and sprinkle the seeds on top of the mix.
For Seeds: Fill the Teacup with Soil
Cover the seeds with another 1/2 inch of potting mix. Most herb seeds need to be covered but some flowering plants need light to germinate. Make sure to check the instructions on your seed packet for any specific planting needs.
For Seeds: Water the Seeds
Seeds need to be watered immediately after being planted. Use room temperature water to gently pour on top of the potting mix. Do not use cold water as it will lower the potting mix temperature and dramatically slow the germination process.
Create Markers for your Plants
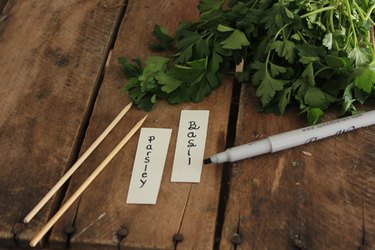
Cut your card stock into thin strips about 1/2 inch wide and 2 1/2 inches long. Using your calligraphy pen, write the names of your plants on your card stock.
Insert Skewers Into the Plant Markers
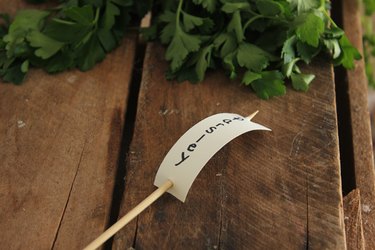
Using the sharpened end of the wooden skewer, poke a hole at the bottom and top of your marker. Slide the skewer in the hole at the bottom, behind the paper and out through the hole at the top. Place your markers in the appropriate planters.
Find the Perfect Spot to Display Your Planters
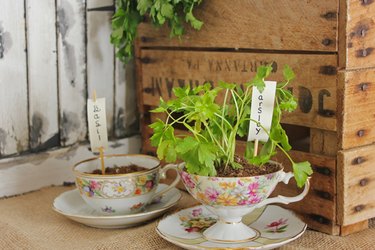
Place teacups on coordinating saucers and display them where they'll get ample light. Most herbs need eight hours of sunlight. If you are planting herbs, place your planter in a south-facing window to ensure it gets as much light as possible. Succulents and cacti also thrive in high-light areas. The light needs for flowering plants varies widely, so be sure to check the instructions on your plant or seed packet when choosing a home for your new teacup planter.
Tips & Warnings
- Use eye protection when drilling a drainage hole.
- Do not place planter too close to a window. If the leaves are too close to the glass during cold weather, the plant may frost.
- Use organic potting mix for herbs to avoid ingesting harmful chemicals.
- Keep plants away from pets and children, as some plant types can be toxic.