Things You'll Need
Dial test indicator
Magnetic base
Lathe
Machining parts requires accuracy. To determine accuracy, you need to use precision tools, including a dial test indicator. A dial test indicator consists of a gauge; on the gauge is a pin level mounted on a spring. When the pin contacts a surface, pressure forces the pin lever up, causing the dial gauge to move. Numbers marked on the perimeter of the dial test indicator display the amount of pressure applied to the pin lever. Comparing multiple points will show variances in a material.
Step 1
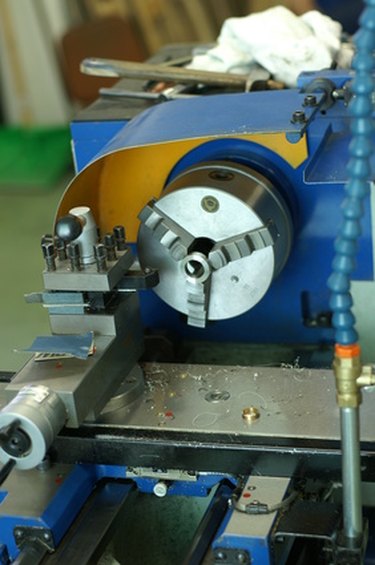
Attach the dial test indicator to the magnetic base. Refer to the magnetic stand usage manual to determine the correct procedure for horizontally mounting the dial test indicator.
Video of the Day
Step 2
Set the magnetic base onto the flat surface located directly above the jaws of the lathe.
Step 3
Adjust the articulating arms of the magnetic base to reach the jaws of the lathe. Make sure the pin lever aims toward the opening of the lathe jaws.
Step 4
Press the pin lever against the lowest point of the lathe jaw.
Step 5
Follow the indicator arrow located on the face of the dial test indicator. Note the number directly in front of the arrow's point.
Step 6
Gently lift the pin lever and manually rotate the lathe.
Step 7
Release the pin lever. If the arrow falls on the same number, the lathe is setting square.
Step 8
Repeat the steps with any object or material, ensuring that the magnetic base is not attached directly to the material you are testing.
Video of the Day