Things You'll Need
Paid subscription to NEC or the book "National Electrical Code" by National Fire Protection Association
Flexible conduit
Flexible conduit connectors
Flexible conduit cutter
Slip-joint pliers
Wire pulling (fishing) tape
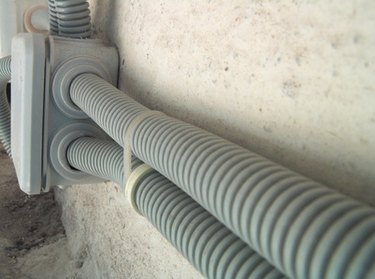
There are two basic types of flex (flexible) conduits—flexible metal conduit (Type FMC) and flexible metallic tubing (Type FMT). Both types are available as standard flex and as liquid tight flex. Liquid tight flex has an outer coating of rubber or plastic, making it suitable for use in wet locations. The National Electrical Code (NEC) defines where and how Types FMC and FMT may be used and how they must be installed; but they are all installed using the same basic techniques.
Note that you need a paid subscription to NEC or the book "National Electrical Code" by National Fire Protection Association to familiarize yourself with Article 348 (Flexible Metal Conduit) and Article 360 (Flexible Metallic Tubing) before undertaking any project using flex conduit.
Video of the Day
Using Flex Conduit to Connect Motors
Step 1
Install metal flex based on Table C-3 of the NEC (see Resources). The number and size of the wires (conductors) that you will be installing determine the size of the flex conduit used. Table 310-16 of the NEC (see Things You'll Need list) specifies the size conductors that you will be installing based on the motor's Full Load Current/Amperes (FLA) multiplied by 1.25.
Step 2
Cut the flex conduit to length using a flex conduit cutter. You could cut it using a hacksaw, but the flex conduit cutter produces a neater cut. When using the cutter, you are assured of a square (even) cut, which is necessary for the proper fit of the connectors. The NEC restricts the length of the flex connecting a motor to a controller to 6-feet; the length of motor leads between the motor and required junction box is also restricted to 6-feet.
Step 3
Assemble the flex by installing the wires in the flex before installing the flex between the motor and the junction box (J-Box). Stretch the flex out on the floor and shove the required wires through it, cutting the wires long enough so 9 to 10 inches projects from each end of the flex.
Using 3/8-Inch Flex to Connect Suspended Light Fixtures
Video of the Day
Step 1
Cut the flex to length. The NEC restricts the length of lighting tap wires to 6-feet.
Step 2
Insert fiber anti-short bushings ("Red Hats") in the cut ends of the flex to protect the insulation of the wires passing through it from any sharp edges left during the cutting process.
Step 3
Install the tap conductors in the flex as you did for the motor conductors in Step 3 of Section 1 before installing the flex whip between the lighting fixture and the J-Box.
Using Flex to Install Wiring in Finished Walls
Step 1
Estimate the length of flex that you will need to reach from point A to point B and then add 10 percent.
Step 2
Install fiber anti-short bushings in the ends of the flex. Push the wire pulling (fishing) tape through the flex. Attach the circuit wires to the fish tape by looping the stripped ends through the eye on the fish tape and taping them tightly together. Pull the wires through the flex. Cut them long enough so they extend 8 to 9 inches from each end of the flex.
Step 3
Route the flex assembly through the finished walls, floors and ceilings just as you would cable.
- J.H.Larson Electrical Company: Flexible Metallic Conduit Fill Table
- California Building Standards Commission: Article 350; Liquidtight Flexible Metal Conduit; Type LFMC
- "National Electrical Code"; National Fire Protection Association; 2008 Revision
- "Ugly's Electrical References 2008"; George V. Hart, Sammie Hart; 2008
- Table C-3 of the NEC