Things You'll Need
Crayons
Optional blade
Optional sorting containers
Heat source
Metal container
Spoon or stirring stick
String
Scissors
Optional pencil(s)
Optional metal weight(s)
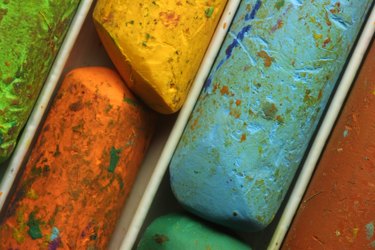
Crayons are a great source of wax for homemade candles and other crafts. They are available in an array of colors and can be used alone or together with uncolored paraffin as a tinting agent. Nearly everyone with a crayon collection has some old, broken pieces that are no longer suitable for children's use. Melting the crayons to make or color homemade candles is a great way to recycle.
Preparing the Crayons
Step 1
Collect a large number of crayon pieces and bits. Use the stubby ends that are no longer suitable for coloring projects.
Video of the Day
Step 2
Sort the crayon pieces into separate colors. These can be based on broad categories, such as red, blue and green, or finer distinctions, such as dark and light versions of each color.
Step 3
Remove the paper wrappers. If these do not peel off easily, then slit them with a knife or sharp blade.
Melt the Crayons
Step 1
Prepare in advance wicks or other candle-making supplies. Cut strings to the desired wick length.
Step 2
Set up a heat source, such as a stove, camp stove or campfire. According to the Crayola Company, a leading manufacturer of crayons, its product melts between 128 and 147 degrees F, so the temperature of your heat source should be around 150 degrees F.
Step 3
Put the crayons in a metal container. Be sure to sort the crayons into color groups, because melting the colors collectively will yield a brownish color.
Step 4
Heat the crayons in the metal container on a stove, camp stove or campfire. Stir carefully as the wax melts. Remove from the heat when all pieces are melted.
Make Candles
Step 1
Tie a weight to one end of the wick string. Tie the pencil to the other end of the wick string.
Step 2
Hold the pencil and dip the weighted string into the hot wax. Dip slowly and repeatedly. The wax will stick to the string, gradually forming a layer.
Step 3
Allow the wax to congeal slightly, then resume dipping to add a new layer. Use different colors as desired.
Step 4
Cut the weight from the bottom and press the finished candle onto a hard, smooth surface while the wax is soft to form a flat base. Do any other desired shaping at this time.
Step 5
Allow the candle to harden completely (preferably overnight or longer) before moving it. The wax should be cool and firm to the touch before moving the candle.
Tip
Coffee cans work well as containers for melting crayons. Cover your table or other work area surface to minimize cleanup.
Warning
Be sure to instruct children about safety rules when working with heat sources and hot wax. Do not use cookware with non-stick coatings to melt the crayons. Do not use "washable" crayons for this project.
Video of the Day