Things You'll Need
Tracing paper
Pencil
Scissors
Cardboard
Razor knife
Thinset mortar
Notched trowel
Floor tile
Tile spacers
Wax pencil
Wet saw
Tile nippers
Grout
Grout float
Sponge

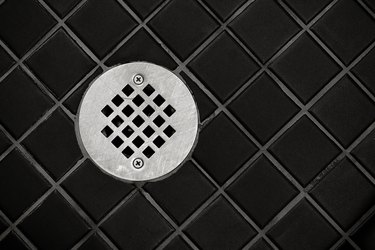
Tiling a shower floor is pretty much the same as tiling any other floor, except for the issue of the drain. You want the tile to come right around the drain (with 1/4 inch of space for a grout border). This is simple if you happen to have a drain with a square flange around it, so it can be incorporated right into the grid layout of tile. However, if you have a standard circular shower drain, you'll have to custom-cut the tiles around the curve of the circle using a wet saw.
Step 1
Set a piece of tracing paper over the shower drain. Trace around the outer edge of the drain on the paper with a pencil, but making the circle on the paper about 1/4 inch wider all around than the drain.
Video of the Day
Step 2
Cut out the circle from the tracing paper. Set the circle on a piece of cardboard and trace around it with your pencil. Cut out the circle from the cardboard, using a razor knife. Save the circle.
Step 3
Install your floor tiles on the shower floor by spreading down thinset mortar with a notched trowel and pressing the tiles into place. Put spacers between them. Lay all the full tiles, stopping around the shower drain wherever a full tile won't fit. Let the tiles set overnight.
Step 4
Lay full tiles loosely over the drain, spaced properly with the surrounding tiles, as if the drain wasn't there. Set your cardboard circle over the tiles in the same position as the drain underneath (you'll be able to see the outline of the drain through the spaces between the tiles). Use your wax pencil to trace around the outline of the cardboard circle, onto each of the tiles.
Step 5
Set the first marked tile on your wet saw. Make multiple straight, parallel cuts from the edge of the tile toward the curved line, stopping at the line each time. The cuts should be about 1/4 inch from each other. The result should look like a bunch of parallel claw marks or "fingers" between the curved line and the edge off the tile.
Step 6
Snip off each of the "fingers'' with your tile nippers at the curved line. You should end up with a jagged border around the curved line. Run the jagged edge sideways against the wet saw blade to smooth it out. Repeat for each curved cut on each piece of tile.
Step 7
"Butter" the back of each tile, which means using your notched trowel to spread thinset mortar on it. Press each cut tile into place around the perimeter of the drain. Let them set overnight.
Step 8
Grout the whole shower floor, using your grout float to spread the grout over the tiles and press it into the spaces between the tiles. Squeeze grout into the 1/4 inch space between the cut tiles and the drain. Use the edge of the float to scrape the excess grout off the tile face.
Step 9
Wipe off the surface of the tiles with a damp sponge to remove the remaining excess grout. Let the grout set for at least two days before using the shower.
Warning
Wear eye protection when using your wet saw
Video of the Day