Things You'll Need
Safety glasses
Clean rags
Tape measure
Permanent marker
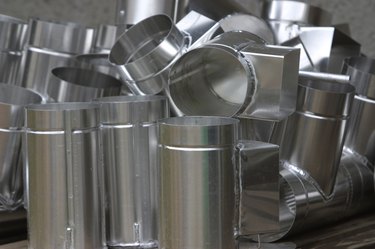
Piece of 26 gauge sheet metal
Combination square
Aviation snips
Silicone caulk
Utility knife
Eight-penny nail
Drop-in caulk gun
5/16-inch hex head screw adapter
Variable speed drill motor
#10 self-tapping sheet metal screws
Metal foil tape
Plastic tape squeegee
An HVAC system relies on the pressurization of the ductwork to move air throughout your home. A hole in the ductwork does not allow the HVAC system to pressurize, making the HVAC system lose its ability to adequately heat and cool your home. Repairing a hole in the ductwork will increase the efficiency of your HVAC, reducing your monthly energy bill. The method you use to repair the hole will depend on the type of material that comprises your ductwork and the size of the hole you are repairing.
Step 1
Turn off the HVAC unit.
Video of the Day
Step 2
Put on your safety glasses.
Step 3
Wipe the area around the hole in the ductwork with a clean rag to remove dust, dirt, and contaminants from the duct's surface.
Step 4
Measure the height and width of the hole in the ductwork with a tape measure.
Step 5
Add 1 inch to both the height and width measurements, and use a permanent marker to place a mark for each dimension on a piece of 26 gauge galvanized sheet metal.
Step 6
Extend the height and width measurements by aligning the blade on a combination square with each mark and drawing a line along the blade with the permanent marker. Make sure that the two lines intersect.
Step 7
Cut along the lines with aviation snips.
Step 8
Place a 5/16-inch hex head screw adapter into the chuck of the variable speed drill motor.
Step 9
Set the cut piece of 26 ga sheet metal against the side of the ductwork and run a #10 self-tapping sheet metal screw into one corner of the metal patch, if you are installing the patch on metal ductwork. If you are installing the metal patch on fiberboard ductwork, place a length of metal foil tape on each side of the metal patch to secure it to the ductwork.
Step 10
Continue placing #10 self-tapping sheet metal screws at each corner of the sheet metal patch to secure it to the side of the ductwork.
Step 11
Open the end of a tube of silicone caulk by cutting the nozzle of the caulk tube at a 45-degree angle with a utility knife. The opening of the nozzle should be 3/16-inch in diameter.
Step 12
Puncture the inside of the tube of silicone caulk by sliding an eight-penny nail into the nozzle until you feel it push through the membrane located at the bottom of the nozzle.
Step 13
Place the opened tube of silicone caulk in a drop-in caulk gun.
Step 14
Run a continuous bead of silicone caulk around the perimeter of the metal patch to seal the patch to the ductwork. If you have installed the patch on fiberglass duct board, smooth the tape with a plastic squeegee to seal the metal patch.
Step 15
After the silicone caulk has had time to set, turn on the HVAC unit. If you installed the patch on fiberglass duct board, you can immediately turn on the HVAC unit after you smooth the metal foil tape.
Video of the Day